How big does a succulent grow? How to plant succulents correctly
Succulents are plants that prefer bright sun; they grow in places where water is scarce and therefore store it in their succulent leaves or stems. They have special growing requirements. If you understand how to grow them, new horizons will open up for you. Because it's not just cacti, it's much more.
Cuttings of succulents today can also be purchased on the Internet (this allows you to get rare varieties, which you won't find at your garden centers). In the fall, cuttings are usually sent in fairly sluggish condition, this is how it should be: they are overwintering, and sluggish succulents are less susceptible to damage from low temperatures upon shipment.
1. Sun
This is the first condition for success. If you don't have a south-facing window sill at home, you may not like your succulents.

Succulents love bright light. and is unable to develop normally without it. IN Middle lane In Russia they need to be placed in direct sun. In summer, they can and should be placed on the balcony with cover from the rain (they don’t need excessive watering at all, these are desert plants). Provide them with desert, and they will reward you with growth and flowering.
2. Why do they die on you?
You cannot plant succulents in purchased peat-based soil and water them frequently.
The main enemies of succulents are dampness and darkness.. They cannot grow on shady windows or away from windows and the sun. More precisely, they can, but they will be elongated, weak, frail plants.
Succulents die when they are planted in purchased soil for cacti (unfortunately, the soil for cacti in the store is also based on peat, which succulents do not like), watered abundantly, placed in the shade, watered regularly in winter when kept on cold windows (forgetting wintering and root rotting in damp, cold soil). They cannot survive in such conditions.
3. Why you have to compose the soil yourself
Peat is an organic matter that is biodegradable by soil fungi, bacteria and blue-green algae. This is not suitable for succulents at all.
Succulents grow in the desert, and best soil for them it is dry dust, clay, stones and sand. These are subtrates with a low organic content and without dampness. In their composition no peat or other rich organic sources.
Under no circumstances should you plant succulents in purchased peat-based soil, even if it is called “Special soil for desert cacti.” That is why, if you want not to ruin another plant, you will have to work with the soil yourself. Actually, it's not difficult.
Constantly damp organic substrates (peat in a spacious pot and good watering) is a natural habitat for soil microflora, fungi and bacteria.
Succulents in their natural habitats do not encounter the presence of soil microflora in the substrate and therefore have absolutely no immunity to it. Their roots in your house die from ordinary soil microorganisms that are harmless to other plants.
To grow succulents you need soil that dries very quickly.
Peat and soils based on it take a very long time to dry out due to the high water-holding capacity of peat. If such soil is dry, it is extremely difficult to wet it back: the water simply flows down the walls of the pot without reaching the roots. This soil needs to be watered regularly, without drying it out. And for succulents, regular drying of the earthen coma is the main measure to prevent rotting.
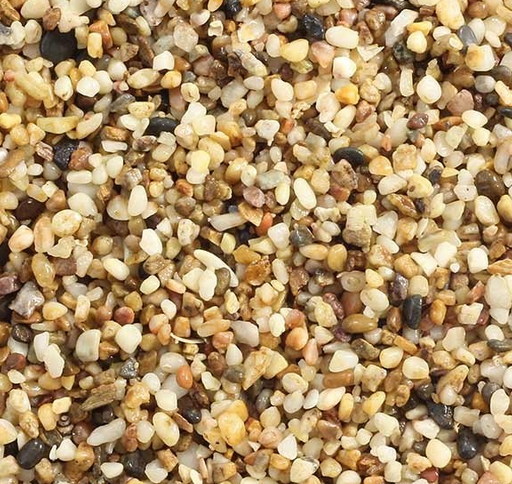
Ordinary outdoor forest or garden soil mixed with coarse sand is best suited for succulents.
Coarse sand is sold in the department products for pet shops/aquariums. There is no need to heat or steam the soil and sand. Spill the soil with potassium permanganate no need either because potassium permanganate is a strong oxidizing agent that worsens Chemical properties soil.
4. Small pots
Large pots are not suitable for succulents (and most other plants too) because the soil in them dries out too long between waterings, which is harmful for succulents, especially in winter. Suitable small plastic or clay pots(including Eco-people), small cups for seedlings and even just plastic cups of 50 and 100 ml (for small specimens).

5. No need to water
Compared to other houseplants, succulents require little to no watering. They have long adapted to moisture deficiency and know how to store it in their own leaves or stems, using it sparingly.
In summer, you need to water as the top layer of soil in the pot dries out (sometimes every other day in extreme heat, and sometimes after a week or more). The earth must really dry.
In winter, watering should be very rare, only as the leaves or stems of the plants become lethargic and soft. This is 1-2 times a month and even less often. Many people don't water succulents at all in December and January (but then you need to keep them cool).

6. Winter is all about storage.
That is why watering is practically reduced to nothing. It is also very advisable to lower the temperature. The metabolic rate will slow down 2-4 times for every 10 degrees change in temperature. For plants there is also zero active temperature, which is slightly above zero Celsius, at this moment the metabolism in the plant stops almost completely. This is storage.
From November to March, you need to give succulents a drought at low temperatures so that they slowed down growth as much as possible. Place on the coolest windows (you can remove them from the southern ones if your northern windows are colder), watering very rarely (once a month or less).
Wintering promotes better flowering. If you want to finally see your cactus bloom, winterize it.

Nolina, or bottle tree. This indoor plant Can plant seeds. This unusual plant belongs to the Agave family.
7. And under the lamps?
It is possible, but it must be placed almost closely, because the radiation intensity of household lamps (fluorescent, halogen and others, including special phyto-lamps for plants) is insufficient for the normal growth of succulents.
8. They are not afraid of temperature changes
Succulents easily tolerate temperature fluctuations over a much wider range than occurs in residential areas. There's only one thing to keep in mind here: most of the home-grown succulent species cannot withstand frost. They are not afraid of the summer heat, even the most severe, if you open the windows slightly. If you need to leave and the windows are closed, and according to forecasts there is great heat ahead, from direct sun better plants remove so that they do not “cook”.
Have you decided to transform your interior? Please note that today designers are concerned not only with how to renovate and furnish a room. No less important is the ability to decorate it with furniture and decorative elements so that it becomes elegant and stylish, filled with an atmosphere of comfort and individuality. Among various decorative finds modern designers They like to use special indoor plants - succulents. With their help, you can transform your interior yourself, without turning to a designer. Having learned about the propagation of succulents and the rules for caring for them, you will understand that these undemanding and original plants must be in your home.
Succulent garden
The name succulents, translated from Latin as “succulent”, was given to these plants due to their ability to store moisture for future use in their trunks and leaves. Therefore, they are undemanding special care, do not need frequent watering.
The variety of succulents is impressive. Tiny that can be grown in test tubes, and impressive in size, they look good in the home. winter garden or just on the windowsill. Succulents stand out for their bizarre shape, surprising with the unexpected color of their leaves and unusual flowering.
It is believed that an indoor succulent shares useful energy with a person. It is no coincidence that they are recommended to be placed near a computer monitor; they have a beneficial effect on humans, some types have a healing effect.
Let's find out in more detail how exotic indoor succulents are bred using leaves, plant cuttings or its seeds.
Using a propagation sheet
To start the type of plant you like, a leaf is enough. Propagation by leaves is a fairly simple and affordable method.
It is necessary to carefully consider the choice of leaf intended for propagation. It should be a strong, healthy leaf, without damage. You should not tear off or break off the leaf; to propagate it, you need to cut it off with a sharp knife, without leaving parts of it on the plant.
The cut leaf should not be placed in water; on the contrary, it must be kept in the air for a day or two so that the leaf dries out somewhat.
The leaf needs to be dried on the surface of the soil in which it will grow. You don’t need to do anything special for rooting, you just need to turn the cut of the leaf towards the soil. Everything else will happen without our actions, the leaf will take root on its own!
Video “Propagation of succulents by leaves”
Cuttings of succulents No less popular and simple is another way of propagating these exotic plants
- cuttings.
The cuttings are also cut with a sharp knife and left to dry for a couple of days.
You should definitely pay attention to the plant that gave the cutting. The resulting cut should be sprinkled with coal, which was previously crushed. In this case, before processing, you need to inspect the cut. If the plant is a species that secretes milky sap, the cut is first washed and then treated with charcoal.
Propagation by cuttings is a longer process. You can plant a cutting in the ground only after it has roots.
About rooting cuttings - more details To root a succulent cutting, you can place it in or sand mixture . This method is the most suitable for cuttings Euphorbias and Crassulas.
Rooting in water
Place the cutting in a container with clean, settled water (you can take boiled or distilled water), making sure that its lower part with the cut does not touch the bottom. At room temperature, the cuttings take root within 2-3 weeks. To create more favorable conditions, you can create a plant greenhouse conditions. To do this, simply cover it with a clean and transparent plastic bag.
Subtleties of rooting in water:
- Treating the cutting with a growth stimulant before immersing it in liquid will make the process more effective.
- The container with the cuttings should be kept in a well-lit place at room temperature, adding water as necessary.
- If the cut rots, the cutting should be cut off and placed again in a container with clean water, having previously dried and treated with a growth stimulator.
Rooting in the sand
Sand mixture is usually used for rooting sansevieria. A cutting treated with a strengthening compound (Epin, Kornevin) is placed in prepared sand (sifted and fried in the oven or in a frying pan), then watered with warm water.
There is no need to deepen the cutting too much. 1.5 - 2.5 cm in depth is optimal for the plant.
During the process of rooting in sand, the cuttings are also kept in a warm and bright place.
Video “Propagation of succulents by cuttings”
Propagation by seeds
Succulents can be grown from seeds. To do this, you will need soil consisting of fried sand and earth. In containers, the prepared mixture is covered with a thin sand layer (no more than 2 mm in thickness). The seeds are first dipped in a weak solution of potassium permanganate and left for 24 hours. The seeds treated in this way are placed in a thin layer of sand, which is spilled with the same solution before laying out. The container is covered with polyethylene, creating a “mini-greenhouse”. It is kept in a warm and bright place until sprouts appear. The germination period for different species ranges from 2 to 14 days. Diving can be done no earlier than a month after the sprouts appear. But the final transplant is possible only later; at least 6 months must pass before that.
Planting succulents
To ensure the successful development of the plant, you need to follow simple planting rules.
Choosing a pot
Planting fancy flowers starts with deciding what kind of pot for succulents. fits better Total.
When choosing a container for planting, it is necessary to determine how the flower is supposed to be grown, whether it will be a single planting or a composition of flowers will be created in a pot. In this regard, a more or less spacious pot is selected. Planting in a flat flower container is also popular. You should not choose a pot that is too large. In this case, the growth of the plant will be slowed down: the succulents first “master” the planting pot with their roots and only then use the energy to develop the upper, above-ground part of the plant.
When choosing a container for planting, the gardener independently gives preference to the material from which it is made (plastic or clay), as well as the shape of the pot. A mandatory requirement for any planting container is the presence of a drainage hole in the bottom of the pot.
Video “Choosing a pot for succulents”
Soil preparation
The next step is to prepare succulent-friendly soil. Flower and garden stores sell soil for indoor succulents. In addition to this, the soil must be prepared river sand and expanded clay for drainage.
Fill the pot in the following sequence: first layer - drainage, 2nd layer - wet soil mixture, 3-1 layer - sand.
Landing
The succulent is planted in soil mixture. The sprout is carefully placed in the pot without damaging the roots of the flower. The soil mixture should cover the roots up to the root collar, which should be in the sand layer. This will keep the plant from rotting.
Adaptation
An important moment in the life of a plant is the adaptation period and care after reproduction. For 1-1.5 weeks, the plant is protected from direct sun rays to avoid burns and do not water. There will be enough moisture in the soil mixture, but its excess can lead to rotting.
Video “Soil for succulents”
Caring for Succulents
Succulents are an undemanding houseplant. But you can’t do without following the basic rules of care.
- Watering
These indoor flowers do not need abundant watering. The frequency of watering depends on the time of year. In winter, plants are watered less often; succulents at room temperature are watered no more often, 1-2 times a month. Starting in spring, watering becomes more frequent: every 7-10 days.
- Fertilizer
Succulents respond well to weak solutions of phosphorus-potassium fertilizers without nitrogen or with a minimal amount of it.
Frequent application of fertilizers - 1-2 times a month.
The industry also offers special complex fertilizers for succulents. When using them, specific instructions for use must be followed.
By following these simple rules for propagating, planting and caring for flowers, you can do more than just start succulents at home. An original composition of beautiful and unusual plants will become a real interior decoration.
Why are plants called succulents attractive? Flower growers love them for their bizarre shape, huge palette of colors and great possibilities for creating artistic compositions. Beginning gardeners prefer this particular group of plants because of their colorful appearance and unpretentious nature, because caring for them is very simple.
What are succulents?
Most of them came to us from hot countries, where periods of drought last much longer than the rainy season. In this regard, they are accustomed to storing moisture in their fleshy, juicy leaves and thick stems. Succulent is translated from Latin as “juice”. This feature became fundamental in the classification similar plants, despite the fact that they belong to different families.
Kinds
Today there are many varieties: agave, cacti, aloe, bryophyllum, swallowwort, aisaceae, glotiphyllum, spurge, groundsel, Kalanchoe, wildflower and others. The most famous and widespread are cacti.
Conventionally, all types are divided into two - according to the characteristics of fluid accumulation:
- Leaf succulents have thickened leaves with a tight cuticle. They usually round shape, are often collected in a socket, which helps them save water. Among them, the most famous to us are aloe, agave, gasteria, and haworthia. They are used in folk medicine.
- Stem succulents store water in their trunks and stems. Instead of leaves they often have spines, and root system capable of accumulating liquid from the surface and from groundwater. Some have ribbed stems, which help avoid damage in the form of cracks due to excess moisture. Most species of stem plants form special shoots during the rainy season, on which leaves, flowers and fruits are formed.
Care
These plants do not require care, but you still need to know what rules to follow. All species have the same conditions of detention. All of them need good lighting , That's why the best place for them there is a window sill, and from the end of spring their place is on the balcony. They need moderate watering, once a week in warm weather, once a month in cold weather. Water for irrigation should be taken at room temperature.
To ensure a comfortable winter, the temperature should be between 13-15 degrees. They are grown in flat pots with good soil drainage. Succulents need a substrate with a moderate level of humidity. Ready mixes, sold in stores, often contain peat, which is not at all good for plants. They require a mixture consisting of leaf, turf soil and coarse sand in equal proportions.
Don't forget about soil fertilizers. In winter they do not need to be fed, which cannot be said about the growing season. Fertilizer is applied in the spring 1 time per month. Purchase fertilizers from flower shops.
It is not necessary to replant the plant annually. Everything depends on him appearance. So, if it is full of strength, grows, blooms and does not get sick, then you should not disturb it with transplants. If the plant has stopped growing, the skin has lost its elasticity or its usual color, and the plant itself is spring period stands wrinkled, then it is necessary to urgently take measures to transplant it into another soil. Replant in dry soil mixture and water after a few days.
Names with photos
The most exotic representatives of these plants are considered to be the inhabitants of the hot African deserts - succulents that resemble stones. This is a family is called Aizonaceae. Living stones include: lithops, fritia, dinteranthus, fenestraria, titanopsis, conophytum. However, once a year the incredible happens and these extraordinary stones give birth to a beautiful flower of magnificent tenderness and grace.
sedum
Sedum belongs to the Crassulaceae family (look at the photo below). It grows naturally in Central and South America, in Madagascar. This easy-to-grow plant has branching, fleshy stems and equally dense, boat- or cylinder-shaped leaves. The following species grow at home:

Haworthia
Haworthia is a member of the lily family South Africa, see photo. This is very popular and unpretentious plant has a beautiful basal rosette of fleshy, long, pointed leaves. Peduncles are formed, but it is better to cut them off so as not to take away the juices from the plant, since they are not at all decorative.
At home they grow:
- Haworthia pearly. Its leaves are up to 8 cm long and have white spots. The flowers appear inconspicuously on a long peduncle in a racemose inflorescence.
- Haworthia striped. Its leaves are longer and sharper than the previous type, the inclusions are smaller, and form dense rows.
- Haworthia chess. The leaves are short and wide, triangular in shape, with teeth along the edges. Round inclusions are located only at the bottom of the sheet, top part consists of a translucent mesh of light stripes.
- Haworthia Reinwardt is an exception to the rule, since it does not form a rosette of leaves; instead, there is a stem up to 20 cm, which is covered with thick triangular leaves.
Pachypodium
Pachypodium belongs to the Kurtaceae family. It grows naturally in Africa and on the island of Madagascar. The plant is tree-like, its thick the stem retains moisture well and covered with thorns. The plant sheds its narrow and long leaves in the winter. The juice of the leaves contains rubber. Pachypodium is unpretentious and is often found in gardeners' rooms. The following species are grown at home:

Crassula
 Lovers of floristry appreciate these plants; for them, this is one of their favorite materials for creating original compositions for the interior of the house. Dwarf species of Crassula, Rosalia, Gasteria, and sedum, which are ideal for miniature rocky gardens, are planted in low, spacious bowls made of ceramics or wood.
Look great in transparent containers, such as glasses, aquariums, flasks three or four types. Looks interesting from them wall panel. You can place up to 60-70 types of these babies on the windowsill. Some craftsmen create “desert corners” on it, in an original way complementing varieties with various colors with several stones with uneven edges.
The surface of the earth is sprinkled with sand or gravel. In this case, you need to know that the height of the bowl does not exceed 1/3 of the height of the bowl itself. large plant. For example, you can create a composition from haworthia, gasteria, equeria, lithops, cactus. You can plant pachyphytum with them, which has thick, bluish rounded leaves that resemble grapes. You can also supplement the company with small plants with creeping stems; their shoots will hang interestingly from the edges of the bowl. For this effect, sedums, monantes, and Crassula lycopsum are taken.
Succulents - spectacular and original plants, which even a novice amateur gardener can care for. Often they are planted in one bowl, creating a combination of complementary colors. Place them on a windowsill, balcony or other well-lit place to decorate your interior, adding a fashionable touch to it.


1. Success in sowing depends on many factors. These include lighting, temperature, humidity, soil composition, seed age, etc. A number of types of succulents have unique characteristics, and when sowing, it is important to group the seeds so that the conditions for their germination are similar.
2. Light requirement
Light is the most important factor for sprouted seeds. Light controls the direction of seedling growth: the roots move away from the light into the substrate, and the tender stems stretch towards the light.
For most cacti and other succulents, the light level of the seedlings should be fairly high. The seedlings themselves will tell you their light requirements. If they stretch out, then they need to increase the illumination. If they turn bright red and stop growing, it means they are getting too much light.
Many types of seedlings acquire the color given to them by nature, and in this case there is no need to worry.
3. Temperature is a very important factor for seed germination and many species will only germinate if the temperature is within certain limits. These limits depend to a large extent on the conditions under which the seeds of one or another type of cactus germinate in nature.
It has also been established that daily temperature changes are very useful for crops. This creates conditions that are close to natural, where daytime temperatures are much higher than nighttime ones. If you achieve this, you will create optimal conditions for successful seed germination. (Average t=20-28C)
4. Humidity is also an important factor because... moisture is absorbed by the seeds and begins the process of their growth. During germination, the water should be clean, preferably melted water; it is not recommended to use chemicals until the seedlings become stronger. Fertilizers only slow down the germination process.
Many hobbyists use fungicides both for the purpose of prevention and to protect seeds and seedlings from fungal diseases. This should be done with great care, strictly following the dosage indicated on the labels.
5. Substrate - no less important for several reasons. Soil supplies water, nitrates and gases necessary for seed germination and seedling growth. There cannot be a single recipe for an earth mixture that would suit all succulents, but the basic earth mixture (BEM) is: 50% coarse sand, 30% humus-clay soil and 20% crumbs (perlite, expanded clay, gravel, etc.)
Sowing bowls fill the OZS almost to the top and lightly compact the top layer with the help of flat objects. Gently distribute the seeds over the surface. By lightly tapping the edges of the bowl, allow the seeds to penetrate somewhat deeper into the seeding substrate. Large seeds can be lightly pressed with the same flat object. Large fragile seeds (for example Aloe) can even be sprinkled with additional OZS on top. Very small seeds (for example Dinteranthus) can be sown directly on the surface of the sand, and when sprayed they will go deeper into it. Seeds sown on the surface layer of OZS require germination high level humidity. Melt or distilled water is best suited for hydration during seed germination. After sowing is completed, the bowl is placed in a place where it can be illuminated by the sun.
It is best to install the seeding bowls in an “aquarium” glued together from plexiglass and covered on top with a white nylon cape. This coating provides partial moisture retention and Free access air to crops. Depending on the size of the bowl, it is necessary to spray so often that the surface of the sand does not dry out before the seeds begin to germinate. In the first days after sowing, you need to spray more often to stimulate the absorption of water by the seeds. After the first shoots appear, the frequency of spraying and its volume are gradually reduced, allowing the surface layer to dry from time to time. When the seedlings stand on their feet and begin to grow, the humidity of the substrate in the seeding dish must be sharply reduced so that the tender sucking roots do not rot.
When the expected number of seeds have sprouted in the seeding dish and further addition of seedlings has stopped, the dish should be removed from the moist environment, the substrate should be allowed to dry and it should be placed in conditions similar to those of adult plants. This is very important for the formation of seedlings.
6. Dive seedlings into early age It is not recommended until they begin to crowd each other. As long as the seedlings have enough space and they feel good, do not disturb them with transplants. It is useful not to plant the seedlings for 1-2 years, so avoid sowing large quantity seeds into small bowls.
If you do not have a greenhouse, then place a bowl with seedlings where they are illuminated by the sun at least part of the day, or under fluorescent lamps. It is very important that the level of illumination is sufficient for the seedlings to develop normally. If they stretch out or fall over aside, increase the amount of light. Applying nutrients during this period is also beneficial.
The seed bed should not be allowed to dry out, as the presence of even a small amount of moisture in the substrate promotes the continuous process of formation of the root system and makes the growth of seedlings more intense.
Gradually, the cover glass on the plate is moved more and more, the crops are ventilated more and more often, hardening the seedlings.
Usually, growing cacti from seeds is practiced in breeding work, since these plants reproduce well vegetative way. But it is quite possible to grow cacti from seeds at home; there is nothing complicated in this agricultural procedure. You can learn how to grow a cactus from seeds from the material provided. It talks about necessary tool and equipment, training planting material and organization of seedling care. A description of the entire process of propagation by seedlings will allow every gardener to repeat this work.
Before growing cacti from seeds at home, you need to prepare everything you need and be patient, since the initial growth and development of these crops will be very slow. Cacti grown from seeds at home can produce their first fruit only after 5-6 years. Otherwise, propagating cacti from seeds is not very difficult.
How to germinate and sow cactus seeds

Before planting a cactus from seeds, you should make sure that this variety or genus does not give rise to genetic mutations. If it retains all varietal characteristics, then the process will be exciting. The only thing is that before sowing cacti with seeds, you must follow a few basic rules. Thus, cactus seeds germinate, in accordance with the growth pattern of these plants in general, slowly; seedlings also develop slowly. In addition, although the seeds need moisture and warmth, on the other hand, cactus seedlings are very susceptible to fungal diseases. Therefore, when sowing seeds, you need to maintain the required humidity and at the same time strive to prevent the appearance of fungal diseases. How to germinate cactus seeds is described in detail in this article further down the page.
Sowing cactus seeds on a larger scale or propagating especially difficult, slow-growing cacti, which often have very small seeds, should only be carried out by experienced amateur cactus growers. The information necessary for this can be found in specialized literature. However, try to propagate by seeds suitable species cacti - for example, fast-growing columnar cacti - may, if available simple means even novice amateurs. The seed plant is an interesting spectacle to watch, and also when grown with my own hands From the seed, the plant always receives a special treatment. Therefore, below are some recommendations for sowing cactus seeds.
What cactus seeds look like (with photo)
Specialty stores offer a wide variety of cactus seeds. Usually, for their first attempt, beginners choose either a mixture of seeds different varieties, either seeds of fast-growing columnar cacti or seeds of species that bloom a few years after planting, such as rebutia. You need to know what the seeds of the type and variety of cacti you are interested in look like, otherwise you will be disappointed in the future.
Of course, you can also sow seeds received from another cactus lover. For sowing, you should use seeds that have been stored for no more than one or two years. To prevent possible damage to seedlings by fungal infections, seeds must be cleaned of possible residues of fruit pulp before sowing.
To do this, pour larger seeds into a tea strainer, and smaller ones into a linen bag and wash them thoroughly in warm water, then scatter them on paper and dry.
Look what cactus seeds look like - the photo shows planting material from different groups of these plants:


Before planting cactus seeds, prepare the soil and dishes
First we prepare the soil and dishes. Cactus seeds can be sown in low, wide or bowls, for example, made of styrofoam. Before planting cactus seeds, wash the dishes hot water. A convex clay shard is placed on the drainage hole, which, if necessary, can be made in the bottom of the bowl with a pencil. Then the container is filled 2/3, which should be especially loose and, if possible, contain more coarse sand or perlite.
Steamed, and therefore well disinfected, soil mixture provides the best protection against fungal diseases, but this is not necessary. A layer of broken brick, crushed basalt (lava) or coarse sand is poured on top of the soil with a layer of 0.5 cm. This material is first sifted to a grain size of 1-2 mm, then washed to remove all small dust particles, dried and then scattered over the surface of the soil in a bowl. As a result, this layer will not provide a breeding ground for randomly germinating pathogens.
Propagation of cacti by seeds in a mini-greenhouse
Propagating cacti by seeds in a mini-greenhouse has many advantages, since it creates favorable conditions for germination of planting material. The seeds of most cacti germinate especially well at temperatures between 20 and 25°C. Reducing the temperature to 15°C at night is often beneficial, but cooler conditions or temperatures above 35°C will slow down or stop seed germination altogether.


The easiest way to maintain the desired temperature is in mini-greenhouses for growing seedlings, which have a special low-power electric heating cable laid along the bottom.
The most convenient are mini-greenhouses with a thermostat that allows you to regulate the temperature, but the need for this arises only when there are strong temperature changes in the room.
Of course, additional heating is not necessary if the mini-greenhouse is located in a heated living room, for example, on a windowsill under a central heating radiator, where the required temperature is constantly maintained. Thanks to the closed lid inside the greenhouse, higher air humidity is also achieved and maintained. Since cactus seeds need light to germinate, the mini-greenhouse must be placed in a bright place, for example, on the windowsill of a window facing north or east.
However, it should not be in the sun, that is, on a sunny south or west window, since intense solar radiation very quickly heats the air inside a small enclosed space to critical values. Although cactus seeds require light for germination, it should be soft and not bright sunlight.
Sowing cacti with seeds
When sowing, cactus seeds must be evenly distributed over the surface of the substrate.
To do this, fold a piece of paper in half, pour the seeds into the resulting groove, after which, by lightly tapping the paper slightly inclined towards the bowl, sprinkle the seeds one at a time onto the soil surface.
Since cacti develop slowly and grow better in a community, the seeds are sown relatively densely. As a guide, you can indicate that approximately 20 cactus seeds are sown on the soil surface in a bowl measuring 2 x 2 cm.
After sowing cacti with seeds, they are lightly pressed into the soil using any object with a smooth surface, for example matchbox. Since cactus seeds need light to germinate, they are not sprinkled with soil on top.


After this, the seeds and substrate must be moistened. Of course, this cannot be done from a watering can, since in this case the seeds will be washed away from the surface of the soil by a stream of water. Therefore, the bowls with the sown seeds are placed in a container filled with settled water and kept there until the substrate is well saturated with moisture to the very top layer. To prevent fungal diseases, you can use a 0.05% solution of quinosol (1 tablet per 2 liters of water). Quinozol is a mild disinfectant. Finally, the seeding bowls or pots are placed in a mini-greenhouse, where, thanks to the transparent plastic cover will be supported required humidity substrate.
Germination of cactus seeds after planting
During germination after germination, the substrate should not dry out. Temperature is best monitored using a minimum-maximum thermometer.
The seeds of many cacti germinate within two weeks. It is interesting to observe how small green balls begin to appear on the surface of the soil and two well-defined cotyledons develop, between which a cactus stem later forms.
When most of the seeds have sprouted, the lid of the mini-greenhouse is slightly raised from time to time to reduce air humidity, and with it the risk of fungal infection. After three to four months, the bowls with seedlings can be removed from the greenhouse. Now they need to be placed in a bright and slightly sunny - however, not in the bright sun - place; since in natural conditions cactus seedlings grow in the light shade of adult cacti or under the protection of taller surrounding vegetation.
It is best to let the seedlings develop for several months in the bowl where they sprouted. Now, between next waterings, the soil in the bowl should dry out slightly, however, despite this, the seedlings need to be watered more often than adult cacti, since a relatively looser soil mixture is used for sowing seeds, and the roots of the seedlings are not yet very well developed. Watering should continue to be done from below. To ensure that the seedlings grow healthy and the substrate does not become alkalized, potassium phosphate can be added to the irrigation water (1 g per 2 liters of water).


Picking.
When the seedlings begin to form a dense cushion (curtain) in the bowl, they need to be planted into fresh soil.
In this case, the substrate in the planting plate or pot must be dry, then it easily disintegrates and allows the seedlings to be removed without damage. Young plants, which by this time have a diameter of about 0.5 cm, are not planted in separate small pots, but are planted in large numbers in larger pots or bowls.
Dishes for planting young plants are filled with relatively dry ordinary soil mixture for cacti. Then make a hole with a pencil or a pointed stick, place the seedling in it and carefully add soil from all sides.
Seedlings are planted from each other at a distance equal to approximately three times the diameter of the young plants.
Afterwards, the seedlings are kept in a warm, shaded place; They are carefully watered not immediately after transplantation, but only a few days later, when any root damage that may have occurred has healed. When the seedlings take root in fresh soil - after about a week - they are again transferred to a bright place, slightly shaded from direct sunlight. Now the plants grow and develop relatively quickly and without any problems.
How to plant cacti with seeds in a closed plastic bag (with video)
Some cactus growers strive good results using a simple method of sowing cactus seeds. Before planting cacti with seeds, pots or bowls are filled, as described above, with a well-steamed soil mixture and covered with a layer of sterile material such as sand, perlite, crushed basalt or pumice. Then cactus seeds are sown on the surface of the substrate and the crops are thoroughly watered from below, adding any fungicidal drug, such as quinozole, to the water.
After excess water has drained from the pot, place it inside a sealed (no holes) plastic bag, tie it and place or hang it in a bright, but not sunny, place.
Because moisture in closed plastic bag cannot evaporate, crops do not need constant monitoring and can be left to their own devices for a quarter of the year. The decisive point for successfully obtaining seedlings using this sowing method is the exclusion of fungal infections.


After three to four months, the bags are opened, the substrate is slightly dried in bowls and the seedlings are picked, as described above. This simple method of sowing cacti is definitely worth trying, first of all, in the case when you have received - for example, from a familiar amateur cactus grower - a lot of seeds of some particularly hardy species.
See how to properly propagate a cactus with seeds - the video demonstrates all the complex technical aspects of sowing, picking and organizing the care of seedlings: