Simple wood crafts. Wood crafts - interesting decorations, toys and possible types of crafts (75 photos)
From the old tree you can make a garden path, steps, country furniture, firewood. See how to use waste boards for gardening tools.
Many are familiar with such a picture, when you enter the country barn, the shovel strives to fall, and the rake, if you step on them, hit on the head. Sometimes it's so hard to find right tool, therefore, it is necessary to make an organizer for summer cottage inventory. Here is another problem regarding where to put the old tree, or rather, the boards, will be resolved.
Organizer for garden tools from scraps of PVC pipes
It is convenient when every garden tool is in its place. In addition, it’s good when the organizer looks beautiful for him, but is made from the remnants of old material.

If you made water supply for a summer residence, there were probably PVC pipe trimmings left. They will come in handy for the next idea. For such an organizer, take:
- narrow thick boards;
- self-tapping screws;
- pvc pipes or their trimmings;
- hacksaw;
- screwdriver;
- level;
- saw for wood.
To saw off PVC, use a hacksaw, miter saw, plastic pipe cutter, or special cutter.
Make a markup, helping yourself with a level, draw three horizontal lines on the wall on which the boards will be fixed. Measure the length of the boards, saw them off. Attach two to the wall using self-tapping screws. The lower one is needed for support so that garden tools do not touch the ground. We fix it with a small bar.

On other boards, make markings at the same distance. Attach PVC pipes cut side up.
If you have a straight wall in the barn, then look at what other crafts for giving are designed to store hand garden tools in them.

For this organizer you will need:
- PVC pipes;
- double-sided mounting tape;
- hacksaw;
- scissors;
- roulette;
- pencil;
- soft cloth.
Use a tape measure and a pencil to mark the wall. Cut pieces of mounting tape to the desired length. After removing the protective layer on one side, attach it to the PVC, then remove the second protective layer to attach to the wall.
In order for the tape to adhere more firmly, avoid getting dust, dirt on it during installation, do not touch the sticky surface with your hands.

Once you've fixed the PVC pieces to the wall, tuck away gardening tools in the section for easy storage.
Attach a board painted with wood varnish to the wall, pvc pipe trimmings. Thus, you solve the problem of storing extension cords. And brushes can be hung on nails nailed to another wooden board.

If you have pallets in the country, they can also be adapted for storage garden tools by attaching those to the wall.

Boards and small glass jars turn into a storage system for nails, screws and other small metal items that are needed in the country.

To implement this interesting idea, take:
- a small board;
- nail;
- a hammer;
- self-tapping screws;
- screwdriver
- small jars with screw caps.
- First you need to make holes in the lids. To do this, turn them over, putting them on the board. Make three holes at the same distance using a nail and a hammer.
- Attach the cover to the bottom wooden shelf, attach with self-tapping screws.
- Put in a jar every little thing for needlework in the country. All you have to do is screw it to the lid.

Old wood shoe organizer
Another problem faced in the country concerns shoes. There is not always enough space to accommodate rubber boots, slates, slippers of all households. Interesting ideas will help with this.

If you have an old hanger with hooks, don't throw it away. It is enough to paint it, nail it at the right height, after which the problem of storing shoes will be solved.
If you have a wooden pallet, this can be done like this: saw it into several parts so that a transverse bar remains in each. The bottom of such sections does not need to be done. It is enough to cover the shelves with wood varnish, place shoes in them. Teenagers and adults will hold up well.

If desired and wooden boxes, in which fruits and vegetables are stored, will turn into original crafts for giving, for example, an organizer for shoes.

To create this, take:
- wooden boxes;
- wood impregnation;
- self-tapping screws;
- boards.
On the small sidewalls, find the middle, attach here the bars that hold the shelf. Now connect the sections together as shown in the photo. That is, at first, they are fixed in pairs, then in rows, slightly shifting them one way or the other.
But what other interesting ideas can be realized using such boxes.

For the first, you first need to paint them, when dry, arrange them vertically and horizontally. For the second, you don’t even need to spend money on paint. Between themselves, these elements are connected using large paper clips.

On such a ladder, many pairs of shoes will be placed at once. It is only necessary to nail planks horizontally to the steps. If desired, you can fill the corner space by attaching rectangular shelves here with self-tapping screws.

Beautifully stacked firewood in the country
It is easy to clean up not only in the barn, in country house but also on the street. Such firewood sheds will not only become a place for firewood, but also add zest to the site. It is good to melt the stove with brushwood. Make bundles, put in a firewood rack. To make it, you need so little:
- boards;
- self-tapping screws;
- wood paint.

It is not difficult to create such a building. The basis is four vertical pillars, which can be made from narrow wide boards or bars. They are fastened with horizontal boards, which are also the bottom shelf. Make another one in the center. The roof is double pitched. Do not forget to cover all elements with antiseptic impregnation.
If you have an old shelving unit, stacked firewood can also be placed on it. But first you need to paint that one with an antiseptic to wooden elements lasted as long as possible. Put the firewood rack near the wall, then it will take up little space, and atmospheric precipitation will not get here.

The following firewood racks will decorate the old fence if placed in front of it.

For one such building you will need:
- four bars with a section of 50 or 40 cm;
- nails;
- self-tapping screws;
- boards of the same width;
- metal skate;
- impregnation for wood;
- saw;
- roulette.
- Knock down the bars in pairs in the form of the letter L, attaching to the transverse bar.
- Measure the distance between the two posts, cut the boards to that length. Nail them down starting from the bottom. In this case, each top should go a little on the bottom.
- From below, nail two bars horizontally across, attach boards to them, on which beautifully stacked firewood will lie. Attach the horse.

If you want to decorate the woodshed, then nail a board under the top “leg” of the pallet. Put a film in the resulting box, fill it with earth, plant flowers or greens.
A place for beautifully stacked firewood can also become a bench for relaxing, see how easy it is to make one. This idea will also tell you how to save space.

Place the firewood near the outdoor hearth, under the bench. When the weather is dry, put on it decorative pillows which are so comfortable to sit on.

Sawn birch firewood can be designed in an original way. Place thick and thin branches of this tree in the center, fragments of trunks around, fix everything with a rope rope. A pair of flower pots and a lantern complete the natural picture.
Where to put the old tree?
If you got a plot on which several trees grow or, perhaps, there are those that were broken by a storm. So that you do not spend money on the export of this natural material, see how many interesting things can be done from it.

For a device like this garden path you will need:
- old tree;
- electric or chainsaw;
- antiseptic;
- geotextile;
- brush;
- gravel;
- sand.
Take geotextiles high density so that it lasts as long as possible, and weeds cannot grow through it.
Saw the tree into round pieces 4-5 cm thick. Cover them with an antiseptic on all sides. If you want to give these elements shine, then after the last coat of impregnation has dried, paint with wood varnish intended for outdoor use.

First, put wide chocks on the marked and prepared site, place those that are smaller between them. You can help yourself with a wooden or rubber mallet, tapping on the workpieces to better fit them to the surface.
If you do not have enough of these elements, place them less often or pour a layer of gravel on the soil, and put wooden chocks on top in the form of a pattern.
Using the same technology, fix the second board at the top so that when sitting, you can lean on it with your back.
If you own the work of an electric or chainsaw, then you can make such an outdoor chair.

If you are looking for more simple ideas where you can put the old tree, then pay attention to these.

Churbachki need to be treated with varnish for wood, they will become planters or other items of room decor.
An old tree, its branches can turn into such a stylish mirror, for this you will need:
- plywood;
- dye;
- primer;
- wood;
- jigsaw;
- round mirror;
- liquid Nails;
- wood glue.

Attach a mirror to plywood, outline it. Step back from this mark on all sides by 10 cm, outline this outer circle already, cut it out according to this markup.
Apply a primer to the frame, when it dries, paint this place. Glue a mirror to the center, "planting" it on liquid nails. Apply glue to the wooden circles, fix them to the frame. You can pre-coat them with wood varnish, then glue them to plywood.

That's how many useful things you can make from wood, PVC pipe remnants. If you are interested in ideas on how to make a shoe organizer, watch the following video.
The second plot will teach you how to make a bench from a log without a single nail.
The faster industry develops, the more man tries to get closer to nature. He surrounds himself with nature not literally, but by creating the illusion of being in the air, even if he is relaxing in the living room. This desire is not just to live in a house that is built from natural raw materials, but also to come up with an appropriate interior design. Therefore, everyone strives to use hand-made wood decor in their home in order to feel like a real owner.
The fashion for wood appeared a long time ago, but now not everyone can furnish their own home in the style of the Twin Peaks series. The room should not be oversaturated with wooden furniture, furs and animal heads. This already speaks of the bad taste of the owners. These blanks are available for the forest area, but for the steppe - decorating a house in this style will cost a pretty penny. There is an option to dilute the familiar environment with rare interspersed with wooden saw cuts, which pour into absolutely any image. You can create such a design yourself, spending only on fasteners.
Advantages of decorating the interior with wood saw cuts
The saw cuts of a tree surprise at the same time with their external attractiveness and the complexity of creating from a technical point of view.
Now let's figure out what advantages wood trim has:
- Durability. If the wood lends itself proper processing, and will be protected from moisture and various mechanical damage it will last long enough. If it's whole wooden wall or floor, then you can save on annual repairs.
- Thermal insulation. Firewood is a source of heat not only in a fire. The raw material has the ability to keep the temperature, so for a cold concrete apartment it is best view insulation, albeit partial. In winter, such an insulated floor will warm any legs.
 decorative tree from branches
 - Uniqueness. Of course, you can glue wallpaper with the image of tree cuts, or lay a laminate, but in such pictures a pattern is used - a simple repetition of one module. Natural saw cut is a composition where each element is unique. The pattern on the saw cut and its shape are unique.
Create a design wall
For decoration, it is advisable to choose one side of the room. The design of all planes is a sign of bad taste, and the room will look overloaded. Any room needs to be given air, and it's not about the windows. It should breathe space, and this effect is given by light empty planes. Only one “woody” facet of the room will become a kind of accent that will become its mood. You can lay out the "tree puzzle" yourself, and now let's talk about how it's done.
Everyone in the yard has an already withered tree that needs to be removed. Now it's time to cut it down. We take a branch, saw it into bars of medium thickness. From the resulting "pancakes" you can remove the bark, and then polish it. Thanks to this, you will not drive the thorn by touching the wall. The resulting wood layers should be treated with a special insect repellent, and then planted on glue. It is advisable to varnish the resulting relief - varnished wood can last a long time.
On a note! Create a composition from branches of different sizes, starting from a massive trunk and ending with the thinnest branches. The composition breathes due to the formed voids between saw cuts of different sizes.
Wall panel - a piece of nature in the interior
You can meet a panel from any components, but you have not seen a canvas made of pieces of wood, right? Here, contrasts are welcome, so feel free to use even hemp. The picture should not look like a pattern, but a full-fledged composition with a dominant and secondary elements. Do tonal gradations, and place accents with the help of tone. Specifically for the proposed product, it is better to leave the bark - it will make it more attractive. The careless terrain will create the atmosphere of an endless forest, and move you into it.
It is advisable to sketch a rough sketch, but if you like to improvise directly in the course of work, then go ahead. For a bright contrast, assemble the frame of the canvas from simple planks, this will give the picture lightness. The saw cuts are polished from the side that is adjacent to the wall for better bonding. Leave the other side untouched - this will give naturalness to the overall picture. Framed tree cuts in the interior will look like a window overlooking the forest. The frame collects the composition into one whole, and groups it.
Difficulties in laying out a modular floor
This type is quite complicated, so it is better to be patient and get to work. Choose thick trunks to avoid creating large voids when laying out circles. For the manufacture of the floor, hardwood logs are selected, because the floor is exposed daily.
There are two reasons that will make you sweat:
- Solution. If you put all the parts on glue, then the floor will not last long, even if you cover it all with varnish. Modules will fall off due to constant pressure. You will have to use a solution, possibly based on cement.
- Surface leveling. If the thickness of each element does not play a big role in the design of the vertical plane, then this is the main condition for the floor. It is necessary to adjust all the modules to the total thickness, and start grinding after installation. The procedure will take a lot of time, because it is not easy to achieve a smooth surface.
Next, start varnishing the finished surface. It will protect it from pests and external influences. The floor is easier to clean, and it will last longer in a “protected” state. An unprotected surface can be attacked by pests or simply begin to rot due to excessive moisture.
Creating home comfort with homemade furniture
Furniture looks completely different, depending on the type of raw materials available. Tables and chairs are made, since the silhouette of the cut itself already resembles a small table or chair.
There are two main principles for creating furniture:
- Modular - assembly of an element from small parts (modules). Actually, we are already familiar with this method. It allows you to create a product of absolutely any shape. It is also necessary to achieve a perfectly flat surface. Dishes will be placed on the table, and so that it does not turn over, the surface of the table must be perfectly sanded.
- Solid - a solid element is taken as the basis. This option is much simpler than the previous one in technical terms, but it is more difficult to find a bar with a large diameter. Things are better with chairs, and if you want a table at which the whole family would have dinner, you will have to tinker with finding a large diameter saw cut. The price of the overall cut is quite large.
It doesn’t matter which principle you apply in creating a product, the main thing is to immediately evaluate your capabilities so as not to spoil the material. Any way is good, because wooden furniture renowned for its strength and durability.
Ideas for the kitchen based on semicircular cuts
Such a figure is an unusual piece of decor and reliable assistant in the kitchen. The material withstands high temperatures and does not heat up so much. From saw cuts, you can create simple solid coasters and modular ones, the material of which is easier to find. Everyone saw such coasters in the store, and thought “No, you can’t do this yourself” - an erroneous opinion. Why pay more if you do it yourself?
The kitchen will be complemented by fancy semi-circular shelves that can be put together from solid wood cuts, dividing them into two parts. An illusion is created that the "kruglyashek" is in the process of sinking into the wall. The reception is interesting if the shelf is round, thanks to this, visual movement is created. The effect is achieved due to the dynamic relief on the bark. The shelves will harmoniously accommodate cookbooks, or personal collections of recipes by the hostess. And the product will withstand a sufficiently large weight, even if its dimensions may not inspire confidence.
Remember! If this is a stand specifically for dishes, then it is better to make it whole. Connecting small parts involves gluing, and glue is incompatible with high temperatures. The stand will simply fall apart into several pieces.
Wooden detail as an accent in the interior
Small inclusions of "forest" in the familiar environment mentally bring you closer to nature. Saw cuts in the interior are used as a decor, and perform certain functions.
We create fancy accents with our own hands:
- Watch. Unusual application a wooden saw cut in any interior looks cute. Especially if it is an uneven circle with bark on the surface. The bark is fixed, because it is able to deteriorate over time. The more casually the wooden “pancake” looks, the more interesting the watch will turn out.
- Flower vases. Let your imagination run wild and use different kinds branches. An ornament made of small twigs created by oneself looks expensive, and no one will guess that the vase cost you a penny. It will be in harmony with the design, and will find a response in things with a similar decor.
Remember! There should be few things created from identical material in the room. They should overlap with each other, but not look like "brute force".
- Frames for mirrors. In creating a product, it is important to adhere to rhythm or metricity, but chaos will be inappropriate. Alternate large tree cuts with small ones, or make the entire frame from circles of approximate size. Either option will be correct.
It is quite possible to make a floor from saw cuts with your own hands. Not to mention small interior items that are made in a minute with wood, glue and your imagination. Surprise your friends with a tastefully decorated home and make your life more comfortable. It is an environmentally friendly product that will benefit your health. If the product is made of needles, then a slight coniferous aroma can even help you with the treatment of a cold.
If you can handle the floor, then decorating an entire wall with wood will seem like a matter of five minutes. You will need to use your own taste, and your knowledge of composition, although most people trust their instincts.
Everything will work out, it’s enough just to “assemble” these products and fix them with glue, or just cut out a solid object. Create an image in your head, and try to bring it to life. You do not need special knowledge or skills, follow the basic rules for choosing materials and processing tools. After all, why spend a lot of money on the work of a designer, if you are able to cope with this task on your own without spending a dime.


For many household plot today it is not only a garden, but also a place for family vacation. I want to arrange it so that everyone is comfortable, and the children also have fun.
Wood is often used as a material for landscape decoration. Moreover, it is not necessary to buy it.

You can use waste from the construction of outbuildings, sawn wood, wooden pole, snags from the nearby forest, etc.
Moreover, you can make crafts from wood with your own hands.

Structures
Arbor, pergola, sandbox, veranda, well - these and other structures made of wood look very impressive. For their manufacture, you can use timber, slats, logs.
But that's all enough traditional materials. And you can look for wind-blown tree trunks in the forest, cut logs of the same length, remove the bark (or not remove it) and dig them into the ground, having previously processed underground part a special composition that will protect the tree from decay.

The roof of the gazebo can be made of straw or willow. You get something like a bungalow. Very creative.

Track
In summer cottages, handicrafts from tree cuts are popular. It can be a gazebo wall, part of a fence, garden sculptures. And also this suitable material for a garden path.

You need to cut a log or several logs across. Circles may have different diameter, but the thickness should be the same for all. The same thickness you need to cut thin logs and branches.

If the wood is eaten inside by insects, it is better not to use it, since such a path will not last long.

For the future road, you need to dig a trench 10 cm deep. Its length and width are arbitrary, at the request of the owners. Fill the trench with sand and compact it. Lay the cuts first with the most large diameter. There are smaller ones between them.

Cuts from branches need to fill the remaining free space. Cover cracks with earth or sand. The path will be more interesting if you sow the seeds of lawn grass into the ground between the cuts.

fences
Can be used for fencing wooden picket fence- more or less straight sticks with a diameter of up to 5 cm. To do this, collect branches in the forest and remove the bark from them. If some of them have small knots or horns at the end, it will be even more interesting.

The fence can be not only external, but also inside the site for zoning space. It can be an openwork lath wall, along which, if desired, you can plant climbing plants or hang pots with petunias or ampelous plants.
bridges
Of course, the first to appreciate the semicircular bridges in the country are children. But the view of such decorative elements also touches and pacifies adults. It is good if there is an artificial reservoir on the site. The bridge will look more natural.

But there are some nuances.
- Firstly, for such crafts you need a lot of logs.
- Secondly, not every owner knows how to make the bridge a more complex modification, for example, a semicircular one.
- Thirdly, you can’t just go into the forest and cut down trees, for this you need permission from the relevant authorities, and this is quite expensive.
Flowerbed
Under the flower bed, you can adapt a stump from a sawn tree, a trunk, a log, a massive log. To do this, you need to hollow out a recess with a chisel and a hammer.

Note!

If it is a stump, then the recess is hollowed out on a saw cut, if it is a lying log, then in its side part. You can turn an old snag into an outlandish animal. Earth is poured into the recess and seedlings are planted.
Garden furniture
Wooden garden crafts can become quite functional if they serve as garden furniture. Of course, for the manufacture of furniture, you must have certain skills in working with wood and professional tools.

All the same logs, logs are suitable as a starting material, an excellent bench can be made from a stump. for countertop garden table you can use thick plywood.
Since all these items will be in the open air around the clock, you need to take care of moisture protection, protection from mold and drying out. And all surfaces must be carefully sanded and sanded so that splinters do not spoil the rest outside the city.

Playground
You can arrange it around a stump from a sawn tree. The stump itself can be easily turned into a house for gnomes, equipping it with a beautiful tiled roof, a door, windows and other accessories. Looking for photos of wood crafts on the Internet, it is easy to find examples of such houses.

Around the house you can arrange various garden wooden sculptures and toys: a rocking horse, a car, animals from round cuts. And of course a sandbox with a roof.

Note!

Older children can be involved in the arrangement of the playground by teaching them how to handle a hammer, planer and other tools. Children's crafts made of wood will appeal to themselves, their friends, and adults.

On the playground, with the help of logs and logs, you can arrange a real training base if you arrange and dig them in the form of a ladder, lay out a labyrinth, make a swing, hang the logs on chains 20 cm from the ground and build a swing path. It all depends on the amount of material and the imagination of the owners.

It is only important to observe safety precautions and use only strong wood for any element of the playground. The foundations of all sports facilities and buildings must be properly concreted. All knots and notches are sawn and sanded.

A wide variety of wood crafts for summer cottages and gardens can be viewed on the Internet. The main thing is to have quality material.

Photo of wood crafts


Note!


Alexander ForestLamp · 70,106 views
do-it-yourself wooden crafts
DIY spinner drawing
Do-it-yourself spinner, a drawing of a mechanism consisting of five components
Do-it-yourself wood craft drawings

Do-it-yourself drawings, wood crafts are an interesting activity that requires a creative approach to the implementation of the tasks set for yourself. AT

Drawings, do-it-yourself plywood crafts can be made with the appropriate equipment and a great desire, materialize
The drawing of a wooden chair for children

A drawing of a wooden children's chair, folded with their own hands, will surely bring joy to the baby by assembling and disassembling it
Plywood toys jigsaw blueprints

Toys made of plywood with a jigsaw, drawings of the designer of a children's truck, we bring to your attention
Drawing children's floor swing for home

A drawing of a do-it-yourself children's swing for the house, in the form of a horse, will bring additional fun to your baby's piggy bank
How to make a whistle from wood, drawing and

How to make a whistle from wood, drawing and detailed description products we bring to your attention
Do-it-yourself drawings of plywood crafts

We cut out drawings, crafts from plywood with a jigsaw. Table lamp from rings of various diameters
Drawing a bottle of plastic crafts with your own

Characteristics, technical description and its fields of application
Sawing with a jigsaw from plywood drawings

We bring to your attention drawings of napkin holders and stands for disks.
Stump crafts: stylish decorations made from natural material
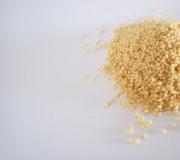
First of all, having sawn tree branches, we will get sets of golden “coins” that your kids will certainly appreciate: they are perfect as building material as an alternative to a regular cube.
And in order to combine business with pleasure, find a device for electric burning in the nearest children's or hardware store, and put the outlines of numbers on the cuts. Ready! Now you can unobtrusively teach children to count.

Another option is to burn letters on small sections of wood, and then glue small magnets to them. As a result, you will get a great kit for teaching kids the alphabet.

Crafts from a cut of wood can fit perfectly into the interior.
Wood crafts
If your cut has an oblong shape, we suggest using it as a clock face (you can look for a ready-made mechanism in needlework or home improvement stores). Such a country-style accessory can be made in two versions, using wood in its natural form or varnishing it.

Stump crafts can also be used to decorate your site, for example, by making such an attractive path from tree cuts out of them, which can complement your country path. Be sure to make sure that the wooden components are firmly planted on the ground to avoid any trouble, and then decorate them with pebbles and moss to give new look your gravel path.

Decorate the trees in your yard with stump crafts, what could be more natural! You can easily and simply make a rustic decoration out of cut felled wood by wrapping it with coarse sisal string and hanging it from a branch.

You can also connect individual parts into a garland, which can also be used for the New Year's decoration of your site, while it is better to secure the ropes with wooden rounds. transparent glue. If you want to make such a garland brighter, you can always decorate crafts made from cut wood with burnt patterns or paint bright patterns on them.

For a festive interior design in country style, you can also use such an elegant path made of wood saw cuts, painted with gold paint. Bottles will serve as a contrast to the shining tree, in which the festive decor will be reflected. Such an unusual and attractive decoration can be used to decorate a patio or a veranda.

Stump crafts can become the main detail of the interior in a rustic style. In this case, rough wood cuts serve as holders for candlesticks, pairing well with a table made of raw timber and a cheerful tartan tablecloth. Please note: the composition uses pieces of wood of different sizes, which looks especially impressive.

The same candles on stumps will become an organic addition to the Christmas tree. They are especially recommended for high bases under a tree, as in this case they bind the floor to the tree, filling the spaces and giving it weight.

An option for fans of stump crafts: the visual center of this interior is a wall completely finished with tree cuts.
Another important detail of this room are improvised individual coffee tables in a rustic style, made of "pyramids" of stumps.

More articles
Homemade wood crafts Technical literature

 Sometimes with the help of simple things you can transform the house beyond recognition. And if it is also crafts for the home with your own hands, then you will not only show your individuality, but also be able to save money. Moreover, for this it is not necessary to be an experienced designer or do needlework.
The main thing is to be careful, and then even with the help of items that have not been used for their intended purpose for a long time, or improvised means, you will create beautiful and practical things.
Below we will tell you what you can do with your own hands for the home, as well as give some examples of step-by-step work for creatively updating your home interior.
 Original DIY crafts for the home, photo
What to use for crafts
Any masterpiece starts with an idea, but you can get a boost of inspiration just by looking around: what can you use to create useful crafts for your home with your own hands?
Here are the most common options:

Advice: to create different crafts for the interior with your own hands, use old items: suitcases, plastic and metal buckets, mirrors, pieces of furniture. Many decor elements that have an aged look only decorate home rooms.
Of course, we cannot tell you about all the new DIY crafts for the home. But it’s not at all necessary to be limited only to these ideas: bring something of your own to the interior, involving the whole family in the process of creating crafts.
practical crafts
One of the interesting ideas for a do-it-yourself home is shelf made from old stairs as in the photo. To decorate it, we need boards, paint of any color (it is better to choose according to the style of the interior), brushes, a saw, sandpaper and glue. To begin with, start preparing the bases for the shelves themselves: calculate their dimensions - and cut the boards to the desired parameters.
Advice: sometimes the levels of the stairs on each side do not match. Glue additional leveling bars.
The boards that will serve as shelves are fixed in the stairs with glue. Next, the design is polished. When everything is ready, you can start painting and additional decor. Books can be stored on this type of shelves, houseplants, small accessories.
 DIY ideas for the interior, photo
Next useful thing for the home with their own hands - desktop organizer. It can be made from wood, plastic, cardboard, glass and other durable items. We will tell you about how to quickly and easily make such crafts for your home with your own hands based on wooden beams.
You will need several bars at least 2 cm thick: one of these components should be 1 cm longer. For decorating the organizer, it is better to choose several colors: you can paint each of the bars in your own color. You will also need a chisel, sandpaper, saw, hammer, drill, vise, glue, brushes, pencil and ruler.
Start by planning your design and assigning an organizer. Depending on what will be stored here, we will have to do different work. For example, a long slot will be intended for a smartphone, which can be made with a saw. And for pens or pencils, you can make holes using a drill. Some holes are made with a chisel and hammer.
Advice: to make the design of the organizer smooth, first make a markup with a pencil and a ruler.
After all the holes and slots are ready, sand the surface of the bar with sandpaper. The finished upper part of the organizer is glued to a solid bar. To prevent the structure from moving when it dries, use a vise.
After about an hour, you can start further work. All slots and holes must be lengthened, so do the same for the bottom glued bar, taking into account the design of the top one.
do-it-yourself wood crafts at home
The longest bar is glued to the bottom of this structure.
Advice: if you want to make an additional slot for paper, as in the photo, cut off the two upper bars, and paste the cut elements on the opposite side of the base.
 Do-it-yourself design ideas for the home, photo
After gluing is completed, you can begin to decorate the organizer. You can use not only paints, but also, for example, sparkles or decorative stickers. Beautiful DIY crafts made at home, like such an organizer, will become not only an assistant in work, but also a table decoration.
And below in the photo is an example of one of interesting crafts DIY home small sizes: coaster for glasses and cups. Collect a sufficient number of wine corks (about 20-30 pieces, depending on the desired size of the stand). Lay out these elements in the desired shape (circle, oval, square or even a heart: they can look like anything) - and wrap it tightly with wire.
You can fill the empty space in the stand with trimmings of the same plugs. If you are worried that the stand will fall apart over time, fix the corks together with glue, wrap them with electrical tape, or prepare a solid top made of cardboard or wood for them.
 DIY crafts, photo
With the help of improvised means, you can do everything for the house with your own hands. Quite often they make their own from wood, plastic or glass. coffee tables. In the photo you can see one of the examples of such crafts: the table is made very quickly, since it only involves connecting several wooden boxes.
Glue or nail together constituent elements table, decorate it however you like, and add a few inserts to create interior shelves - and a comfortable coffee table ready. By the way, the tree is in harmony with any materials and colors, so enter new table the interior is not difficult.
 DIY home ideas, photo
Your children can help you create unusual and beautiful things with your own hands. Instruct them simple work: glue or paint crafts, choose materials and colors. These can be papier-mâché plates and saucers, practical needle pads, painted buckets as flower pots, notepads and much more.
Do-it-yourself original children's crafts at home include handy hanger like the photo below. In addition to holders, it includes several pockets for storing toys, jewelry and other items.
This craft is made as easy as shelling pears: fabric elements sewn by hand are attached to a wooden base.
 DIY crafts for home, photo
Using the materials that you have at home, you can come up with many more interesting solutions and build cool and interesting things and products you need in everyday life.
Some do-it-yourself crafts for the home are useful things and decorative elements at the same time. So let's find out what will help us make our home even prettier.
 On the eve of the New Year, we suggest making a mini-Christmas tree - a New Year's topiary with your own hands: a master class on making and a video instruction will help you make a festive craft without mistakes.
See photos of bedroom design options for young spouses in this article.
Crafts for interior decor
Nothing catches the eye like unusual oversized wall decorations. Therefore, if you have a large mirror, make it spectacular frame from improvised materials.
You will find many photos of smart and cool ideas for a DIY home with decorated mirrors: framing can be made of glass mosaic, plastic, fabric, shells or pasta, all sorts of different buttons, clothespins, cutlery, decorative flowers and other items.
How about such an idea? The frame is made from many multi-colored newspaper tubes of the same thickness.

We continue to do crafts and decorate the house with our own hands: original ideas can also be implemented using plastic tableware. For example, spoons that only need to be glued to a base that can withstand such decor.
In the next photo - another idea for a do-it-yourself home: a lot of tops from disposable spoons were glued onto a plastic bottle to create a lamp shape.
You can make several of these decorations - and decorate with updated lamps self made the whole room, but do not forget that plastic is a fire hazard.
 Beautiful DIY crafts, photo
Another idea on how to make beautiful DIY crafts for home decor: this time it's about creating a spring atmosphere through artificial flowers from improvised means. Such ideas for a do-it-yourself apartment do not require special training.
The simplest flower arrangements are created using flat stencils used for starched fabric: the buds are strung on a wire - and fixed.
But some types of flowers, such as roses, are more difficult to make. For such a handmade decor, you need to cut out a paper or fabric circle with a diameter of about 15-20 cm with your own hands. Next, the figure is cut in a spiral - and twisted from top to bottom. The petals of such a flower must be carefully straightened, and the flower itself must be glued so that it does not fall apart.
Such original ideas for the home will allow you to decorate a vase, as well as frames, decorative panels and other surfaces.

Next craft: DIY beautiful and cute things for the house from large beads. For example, how about a do-it-yourself interior design idea in the form of a candlestick? Take a regular disk - and with the help of glue, begin to fix each of the beads in a circle. After the first layer has dried, proceed to the next.
Advice. For a better effect, use transparent beads that will allow light to pass through.
Beauty, right? Such creative ideas for the home will come in handy during the holidays.
 Ideas for an apartment with your own hands, photo
And now we make the most interesting thing for the house with our own hands: we decorate the window area. creative and useful crafts there will be curtains with your own hands. And it’s not at all necessary to sew them from fabric: show your imagination and create filament curtains from improvised objects of small sizes.
You can make a curtain in the form of many vertical garlands of paper, cardboard or felt.
 Original ideas for a do-it-yourself home, photo
Using ingenuity, design approach and improvised means, you can create other unusual and original things for the home.
So do something new with your own hands for the house: this will only make it better.
 Is there a little birthday in the family? It's time to learn how to decorate a child's room for a birthday - all the secrets and subtleties of technology are described in detail.
Place of application creativity maybe even dishes. Find out how to use a variety of decorative ceramic wall plates in your home decor here.
How to make your home cozy with your own hands? A lot of ideas for decor and comfort - in the article at: http://prostilno.ru/idei/uyut-v-dome.html
Video
Watch the video for five more DIY home decor ideas:

DIY wood crafts - step by step instructions

DIY wood crafts: photos and best ideas

Interesting DIY wood crafts for beginners

DIY: DIY crafts. Home Ideas

We make crafts with our own hands: photos, diagrams, instructions

Home crafts with photo instructions


Such a design element as a cut tree is currently not in every home, even with more confidence we can say that it can be seen quite rarely. Because Russian designers are just starting to use this practice. And decorations from tree cuts are mainly created by people in the hand mate sphere. If you have a front plot of land at your disposal, then one way or another, you are engaged in sawing trees. And you can turn the resulting wood into a great decoration. And in this article, we will tell our readers about how to use tree cuts for decoration.

We decorate the walls with tree cuts
Decorating your house with wooden saw cuts makes it, firstly, unique, and secondly, it brings a touch of naturalness into it, as if reuniting with nature. Basically, this element of decor is used as wall decoration. This is done quite easily. You just need to take either a branch or a tree trunk and saw it into thin bars, which later will be an element of decor. And any of the resulting saw cuts will be unlike the other, and make the bars whatever sizes you want.
It is better to remove the bark from a tree if it is large, but if it is thin, then you can save it. It is recommended that the saw cuts be sanded a little so that you or guests do not accidentally bring a splinter. As you know, what raw materials for decor, like wood, are very attractive to a variety of insects, and therefore, it is better to process the bars with special solutions. You can decorate them with paint or varnish. But how to finish the wall, you decide on your own. You can completely cover the wall with tree cuts, or you can take only part of it. No matter how you decide to decorate the wall, it will look just great.
Fastening saw cuts to the wall is carried out with special glue.
On a note! In order for the glue to securely fix the wood bars on the wall, it must first be cleaned and leveled.
Unusually panel of wood cuts
Wood cuts in the interior look quite beautiful. And a photo will help to verify this. modern interiors. In this part of the article, we will talk about how to create a panel using tree cuts?
So, the panel is a kind of composition, which just consists of wooden bars. And it looks just unusual and unique. That is, you will get a kind of picture that will make your interior unforgettable. Here also, at your discretion, you can remove the bark from the tree, or you can not. The saw cuts do not have to be the same in thickness, but the outline of the panel, to add beauty, is preferable to cut in the same size. Let's say right away that your picture will turn out to be a little abstract, since wood is not quite the material from which you can get a clear picture. So there is scope for your imagination. Basically, the cuts are polished from the side that will be mounted on the wall, but the other is left untouched in order to give the composition a natural look. To give originality and exclusivity, you need to use elements such as branches, hemp and others in the manufacture of panels.
How to make a floor with wooden saw cuts
Currently, wooden floors are widely used. Therefore, one should not be surprised that tree cuts will also be useful for this part of the house. Well, of course, some small branches simply will not fit here. Bars will have to be cut out of trunks, well, or from large tree branches. The size of the bars should not be small in thickness, because the floors are regularly loaded. And, of course, a tree of softer varieties will not work. Otherwise, the life of the floor will be greatly reduced. This type of decor is considered the most difficult. For several reasons.
- The first is that ordinary glue will definitely not work here, you will have to resort to using a special solution.
- The second is that after all the saw cuts are on the floor, you will have to grind very carefully and diligently until all the pieces get the same level and become smooth. After that, you can proceed to the procedure of varnishing the floor so that it begins to shine, and the varnish will also create a protective layer from moisture, dirt and wiping.
Varnish should be chosen one that is designed for wood, since in most cases they contain elements that repel various insects. And also the varnish will allow the floor to look like new for as long as possible.

We decorate the house with saw cuts from a tree
Wooden saw cuts can be used to decorate your home anywhere. The main thing here is your imagination. These decorative elements are not limited to floors and walls. Here is a basic list of what can be done or where to use wood blocks:
- Various vases and tubs for flowers. After spending a little time and effort, you will get a wonderful flower pot, which is inexpensive and will be a great decoration for your room. Real plants and flowers blend beautifully with wood, and when the vase or pot is placed on wooden floor it's just an amazing combination. Saw cuts will help not to lose the essence of the item that you are decorating, just use wooden circles of small diameter.
- Shelves for anything, coasters for hot. At the heart of such elements is a thick bar, from the trunk. As one of the ways you just grind it and apply varnish. But this method is most practical for making shelves.
But coasters for hot need a longer manufacturing process. To make such a thing, you will need the same cut of the trunk, and you will have to remove the middle from it. And cuts are placed in the recess, only smaller in diameter. This will make your product exclusive. If you have never done this, then practice on simple raw materials (take small saw cuts).
- Watch.
do-it-yourself wood crafts video
This element of your room will become not only beautiful decoration, but also perform, let's say, everyday functions. Of course, to make wooden clock, we need a real working clock. So, you take a wooden saw cut and make a hole in the middle and pass the arrow holder through it (the whole mechanism will be with inside slept). After that, we fasten the clock hands directly and that's it, the clock is ready! And it's up to you to draw the dial or not.
- Decor elements such as picture frames or mirrors can be pasted over with small branches. In this case, these decor items will become truly unique and very attractive.
- Stylized wreaths. You can also use artificial flowers in the decor, but putting them in a vase is boring and too easy. This wreath is very easy to make. How the base is needed round metal hoop, suitable, and an ordinary wire which needs to be given the required shape. Then it is necessary to paste over the form with small saw cuts, and then add branches, cones, artificial flowers, etc. on top. You will get a unique wreath that you will be proud to show to friends and family. Such a wreath can be hung in the hallway.
- Hanger. Design solution you can call a hanger made of saw cuts, of medium thickness, inserted into a rectangular frame. It is only necessary that the saw cuts have knots - they will serve as hooks for clothes. Such a hanger will look absolutely chic in the hallway.
- Tables and chairs. Everything is clear here! The tabletop is a large saw cut of a tree and legs made of small saw cuts in diameter are attached to it. Usually the made product is not painted, it fits perfectly into the interior of a summer house or a private house.
People with a highly developed imagination can bring to life even more ideas using saw cuts from wood, both decorative elements and things that are useful in everyday life. So, for example, cups for pencils and pens will look very nice. There is plenty of room for rampant fantasy and the embodiment of ideas. And what would you do with saw cuts? Now in this article we will show you how wood cuts look in the interior.


Old trees occupy an area that can be identified for more useful and functional elements. Dry giants only litter with dead branches and remnants of greenery, practically do not give shade, but take up a lot of space.
After sawing and uprooting, most often the wood eventually ends up in a fire.
Do-it-yourself decorative trees will allow you to decorate a summer house or an apartment. By remembering how to make a bonsai, you can easily create it.
DIY decorative tree - master class

Such a poplar tree can be placed on the street, it is not afraid of the bright rays of the sun and precipitation.
To make it, prepare:
- green plastic bottle;
- thick and thin wire;
- a candle;
- scissors;
- a needle;
- cement or plaster;
- glue;
- pot;
- matches;
- green and gray threads.

Dilute cement or gypsum, pour the solution into a pot, put a tree trunk with curved ends in a container. While the mass hardens, it is necessary that the poplar tree acquire branches. To make leaves for them, cut into squares different size, cut out leaves from them. Heating the needle over the flame, make holes in the upper part.

Insert a thin wire here, fold in half, twist. Connect three branches into one, complete several of these blanks.

To make a decorative tree with your own hands further, connect several blanks consisting of three branches.

Close the wire parts with a gray thread, secure the ends with glue. Leave the lower part of the branch free, it will need to be attached to the trunk.

In the same technique, complete the entire tree, wrap its trunk with a gray thread.

To make grass, cut green threads of the same size, fold them in half. Lubricate the folds with glue, attach the blanks to a plaster or cement base.

This is such a wonderful poplar tree. If you want to make a whole mini-garden, then check out the second master class.
How is a do-it-yourself apple tree made?

Such a decorative tree is suitable for indoor spaces, as its flowers are made of yarn.
To make it, take:
- wire;
- green and brown fabric;
- cardboard;
- pencil;
- scissors;
- wire cutters;
- scotch;
- glue;
- pot;
- gypsum or cement;
- hook;
- brown and red threads.

Armed with tape, use it to attach three small ones to one large branch. Form several of these blanks.

On the next step branches should be wrapped with cloth. Fleece or velvet looks especially beautiful, use these canvases.
From the selected brown matter, you need to cut strips, their width is 2 cm. Wrap the newly created blanks of branches with them, leave 3 cm free at the bottom. Fix the ends of the fabrics with glue.

In this technique, decorate several blanks. Now they need to be collected into a single tree. To do this, you need to cut a strip 3 cm wide from the fabric, wrap the canvas and connected branches with it. Also secure the ends of the fabric with glue.

To make the decorative tree go further, you need to install it in the container of your choice. If it does not have a narrow neck, to fix the plant, pour gypsum or cement mortar. Spread the branches and you can start decorating them.

Now you need to cut leaves from green fabric different sizes. To prevent their edges from spreading, pour these blanks over the flame without bringing them too close to it.

Glue the leaves on the branches, and you can start creating fruits. We will make them from pompoms. From the cardboard cut out two circles with a diameter of 3 cm. Draw a smaller circle inside, cut it out. You will get two of these cardboard rings.

Connect them into one piece, wind a red thread around it, helping yourself with a crochet. The yarn should completely cover the workpiece. Now you need to cut it along the outer edge, lay a brown thread, use it to tighten the resulting pompom.

Cut out leaves from green fabric, glue them on a brown thread.

Hang the fruit you made on the twigs. You can decorate the pot however you like.
If you still want to make a decorative tree for the street, then the next option will suit us.
Christmas tree do it yourself
To create it, you will need a small set of necessary things, these are:
- thin and thick wire;
- woolen green threads;
- gypsum;
- lighter;
- candle;
- glue;
- scissors;
- green plastic bottles;
- cotton wool;
- capacity;
- Christmas decorations;
- artificial snow.

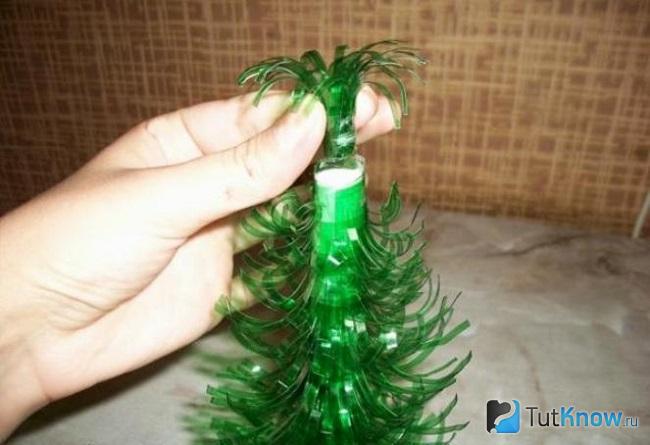
While the plaster hardens, make twigs to make an elegant Christmas tree. With your own hands, cut off the neck and bottom from a green plastic bottle. Using scissors, the rest of this container must be chopped into identical strips. Their long edges must be cut in the form of a fringe.

Using a heated needle on a flame, make a small hole in the corner of this plastic blank. Insert a thin wire here, fold it in half and twist. Do the same with the rest of the blanks.

Now, starting from this corner, fold the wire. In order for the turns of plastic to be fastened together, periodically bring the whole side of the workpiece to the flame of a candle.

It is necessary to close not the entire branch with such needles, but only its upper part. Do the same with the rest of the details.

You can melt the needles over a candle flame or leave it in original form. The blanks should turn out to be of different sizes.

The shortest will be the crown of the decorative tree. Attach it here with the free end of the wire.

Then there are branches of a slightly larger size.

So gradually collect the whole tree, then wrap its trunk with green thread, fixing the ends with glue.

If you are making a Christmas tree New Year or in the middle of summer you want to remember this holiday, then decorate the pot artificial snow, you can replace it with ordinary cotton wool. Leave the Christmas tree as it is or decorate it with toys.

Such an ornamental tree looks great at any time of the year. If you still have green plastic bottles, maybe you can make a second Christmas tree with your own hands according to a different principle.
This is how it will turn out.

Take:
- dense polyethylene or green oilcloth;
- satin ribbon;
- Styrofoam;
- a branch of a tree;
- suitable container;
- glue gun;
- alabaster;
- wire;
- beads.

In total, you will need about 20-25 such tapes. To make these parts turn into branches, wind each one onto a piece of wire.

Roll a cone out of cardboard and fix the sheet in this position with a stapler, align the edges with scissors. Spread glue on one side of the branch, attach to the back of the top of the cardboard cone.

If the fixation of the branch is weak, then first wrap its end with threads, grease them with glue and attach to the cone.
Here's how the Christmas tree is made. With your own hands, put it in a suitable container, pour alabaster or another quick-drying solution here. Hold in this position for a while so that the mass seizes. Can be leaned against a vertical support to free your hands.
When the Christmas tree is fixed, cover the surface of the solution with pieces of foam, which will become snowdrifts, gluing this material.
The container can be decorated, for example, with twine. It is also fixed with glue.
In order for a decorative tree to acquire needles, take blanks from film and wire. Wrapping them around the cone, we fix the turns with glue.

When the entire surface of the cardboard is decorated in this way, you need to decorate the Christmas tree. To do this, cut strips from a thin satin ribbon, tie them in the form of bows. So that the ends of these objects do not fray, singe them over the flame.

Wrap the Christmas tree with gold thread from top to bottom in a spiral, glue the bows. You can decorate the pot with beads and rejoice at what a beautiful Christmas tree made by yourself turned out.

If you want to get acquainted with another way that will tell you how to make a decorative coniferous tree with your own hands, then the third master class in this section is for you.

Very soon you will have such a tree. It is very easy to make it with your own hands. The main thing is to have a simple set of materials and equipment, which consists of:
- green plastic bottle of 2 liters;
- adhesive tape;
- album sheet;
- scissors.

From the rest of the container you need to cut 9 blanks:
- three pieces will be 4 by 6 cm in size;
- the next three pieces are 7 by 8 cm;
- three more blanks 5.5 by 8 cm.

Now cut each such detail on one side into strips in the form of a fringe. Their width is 4 mm, do not reach the top by about 1 cm.

Now you need to twist all these strips with the blunt side of the blade. Press it firmly against the plastic and swipe it up and down several times.

Now these "cilia" need to be attached to the trunk.

Attach the largest ones with adhesive tape down, the small ones should be at the top.

Twist one smaller blank in the form of a fountain and insert it into the upper part of the paper cone.
If you want to make a tree for the outdoors, then use plastic instead of cardboard. Here is such a wonderful Christmas tree, created by yourself, it turns out.

How to make bonsai?
Such a decorative tree can also be made from the most unexpected materials.

To create such a craft, you will need:
- tracing paper;
- pencil;
- wire;
- support for flowers;
- Styrofoam;
- aluminium foil;
- dye;
- brushes;
- green paper;
- scissors;
- hot glue or liquid nails;
- newspapers;
- gypsum;
- the cloth;
- PVA glue.

By folding these two ends of the wire at the top, you will form the trunk. And bend it several times in different directions. Make branches out of wire, screw them to the base of the tree.

You will make smaller branches from thin wire, also screwing it into place.

Now tightly wrap the foil around the tree and its thicker branches. Then cover this blank with brown paint. With a dry brush, go over it to make the bark as realistic as possible.

Cut leaves from green fabric, attach a piece of wire to each with liquid nails or hot glue. Now it will be easy to attach the leaves to the twigs. If desired, cover the sheets with green paint.

To fix a decorative tree in a container, pour alabaster or gypsum here. You can put this solution only on the bottom of the tray, and place crumpled newspapers on top. They are also covered with a small amount of plaster. You can decorate the surface of the pot painted in green color shavings or cover with paint of this shade.
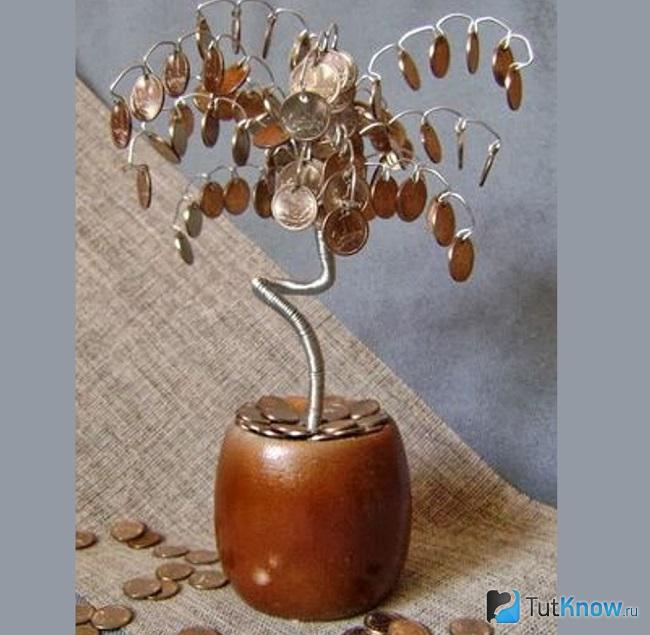
And here's how to make a bonsai using old buttons. Such original tree will be an interesting decoration of the room.

Twist the pieces of wire.
For creativity, you only need three items:
- wire;
- coil;
- buttons.
Instead of buttons, you can use coins of small denominations. With the help of a thin drill, drills make holes in them, and then string them onto branches.
Like these ones ornamental trees you can DIY. If you want to see the process of making such products, then we suggest you sit comfortably in an armchair or on a chair to watch the video.
If you are interested in the process of creating a bansai, then check it out again. But the idea of \u200b\u200bmaking is a little different, you will see this now.