New Year's toy from a glass jar. How to make a New Year's glass transparent ball with snow and a photo, figurines inside with your own hands: instructions, design ideas, photos
Hello! And we will create again! Today, before me and my little one is the task - craft snowball with your own hands. And you know, we are already rubbing our hands with pleasure in anticipation of a miracle! And we will make this Miracle ourselves! I invite you all to be witnesses and accomplices. Let's create everything together!
What will we talk about in the article? First, I will give some details regarding necessary tools and material. Then the subtleties of making a ball. And at the end, I prepared a master class for you. The program is extensive and designed with the help of little ones! It seems that everything is so serious that there is nothing to entrust to them. But, I think that you and I will find something that the kids can do! Here we go?!


When you hold this ball in your hands, it seems that the only thing needed to make it is magic. They shook it a little, and suddenly everything fell apart in a charming snowy day. A real mystery! And really, this riddle can be done at home? Yes! Can! And it is necessary!
For this we need:
- Jar
- Water - 5 parts
- Glycerin - 1 part
- "Snow"
- Story in story
Any bank will do? Will any material become snow? And which story to choose? Let's answer these questions!
Jar. We need everything to be clearly visible in the bank. Therefore, plastic or a jar with any pattern, pattern, sticker or edges will not work.
Water. Of course, without water, everything will be much easier. But our goal is for the snow to swirl and slowly fall. Therefore, water is needed. And without it in any way! That's just how to make sure that the snow does not float on the surface and settles slowly? It is for this that it is worth making a solution of glycerin.
Glycerol. There should be a lot of it, then the snowflakes will spin. Ideally, the proportions of glycerin and water should be 1 to 5. You can make a ball without glycerin, but snowflakes will quickly fall to the bottom. From quantity glycerine the speed of rotation of snowflakes will depend, the more it is, the slower they will spin. Many are interested in the question can whether do snowy ball without glycerine just on the water? We answer, no, without glycerine snowflakes will immediately fall to the bottom.
"Snow". What will do? Sequins, cut pieces of thin plastic or foil, artificial snow.
Story in story. Here's something to think about. First, what should the story be about? It is best if it is themed. After all, the ball can be made for any holiday as a gift. You can take plants as decorations, figurines as heroes, etc. The ball with a photo inside looks original. That's just the photo should be pre-laminated or covered with tape.
And you can even make a gift - a keychain with flying snow.


Tricks to help you make a cool snow globe
Now I will continue the topic. I’ll just show you how you can make a “ball” in different versions.
First of all, who said that pot-bellied banks are necessary? They can be of any shape and size. The main condition is that in order for the toy to look beautiful inside the jar, the container must be either slightly convex, and / or necessarily 2-3 cm higher than the figure.
Our New Year's plot assumes that there will be snow. I offered several options to choose from. But this is mostly finished products. And how to make artificial snow with your own hands at home? Yes, you can cut, as I said, plastic. But you can also grate a candle or solid soap on a fine grater. Only in one case or another, the water will become cloudy very soon. There are 2 more options for making snow yourself: eggshell, which was dried and then crushed; or, diaper filler. It should be taken out and slightly moistened. And it is indistinguishable from natural snow.
And then I will answer the question that you may have. Is it possible to make a ball without glycerin? Easily! It is replaced with very sweet syrup or vaseline oil. Some take refined vegetable oil instead of glycerin. Take note of this idea too.
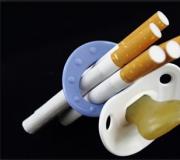
And one more nuance. For complete sealing, you need a silicone tape or thin rubber; you can use a medical glove cut into ribbons as it.
Without glue, the structure will fall apart! Look for glue that is not afraid of water. And it is desirable that it freezes quickly.
Last thing. The lid itself does not look presentable or elegant. It should be "disguised". How? Ribbon, bow, paper strip.
Let's make Christmas crafts together
Since the holidays are approaching, my baby and I decided to make a snow globe on New Year. At first they wanted to buy figurines of holiday heroes. But we went through everything we have and found everything we need. That is why they did not postpone the creative process, while there is time and the right mood.
A set of materials and tools for making crafts:
- Jar with screw cap;
- Figurine of a frog-Santa Claus with a red hat and on skis;
- Sprigs of Christmas trees and juniper;
- Rain;
- Glue "Moment";
- Silicone tape;
- Scissors;
- Water;
- Glycerol;
- Ribbon;
- Cork;
- Styrofoam;
- Foil balls.
First of all, we make neat holes in the cork from a 5-liter water bottle, and insert plant decor into the holes.

After, when we fill the entire lid with glue, the design will become completely stable. But even now it is worth trying to keep the holes small, and so that the plants go deep into them.

We fill the lid with glue and install the figure of "Santa Claus", lay out the "drifts" of foil balls. And in the gaps between them we glue pieces of foam.

The structure is ready. We fix it on the lid of the jar. We carry glue along the bottom of the lid. And when we put it in place, we additionally fix it with droplets of glue from all sides.

Tape the side of the lid.

We prepare water. Fill it first half, then add glycerin. If necessary, we still add water, but remember that our design will take some place.
It is not always possible to completely remove the air from the can. Yes, and there is no special need to do so.

We cut “snow” from the rain, and slightly crumble the foam. Here is the last one - my little one really liked it. I liked it so much that, unnoticed by him, I had to fish out and remove part of his “work” from the jar, otherwise everything would have been covered in snow to the very eyeballs.

Before connecting the lid and jar, we will take care of complete sealing. We glue the thread with silicone tape.

All! Final stage- screw on the lid and turn the jar over! And we really like him!
The snow is spinning

And settles.

Our glass New Year's snow globe is ready! We are happy with the baby! Still would! Your snow! We want, we will make a snowstorm, we want, we just admire how bright and beautiful everything is!
Snow globe with a snowman - step by step photo


That's all! Every fairy tale ends, even the most beautiful one. Today we learned how to make magic with our own hands, and gave our kids the belief that this magic is within their power, they can do it themselves!
And that's all for today! I'm sure it won't be our last. creative evening! And we will try to do something similar again as soon as the opportunity presents itself. Therefore, stay tuned for new articles. And to make it easier, subscribe. I invite you and your friends to share how you managed to make a fairy ball!
Goodbye! Waiting for your comments.
Hello dear readers! We all know factory glass balls with a liquid and a beautiful composition, which, when shaken, "activate" the snowfall inside the container, but not everyone knows that a similar item can be made independently. That is why today we will tell you how to make a snow globe with your own hands, practically from improvised materials. We recommend that children be involved in the process of creating such a wonderful object, it will be very interesting for them to observe and possibly even participate in its recreation.
Handmade glass ball with snow.
What you need:
- A small jar with a screw cap (you can buy glass jar with baby puree).
- Nail polish.
- Polymer glue or Moment.
- White tinsel or artificial snow.
- Scissors.
- White and silver glitter.
- A suitable figurine is clay, ceramic or plastic (sold in any souvenir department).
- Glycerin (can be bought for about 8 rubles at absolutely any pharmacy).
- Purified water (distilled or purified by a household water filter).
How to make a snow globe with your own hands.
We cut the white tinsel very finely with scissors, cut as small as possible, since even the smallest particles will visually appear large in water.
We paint the lid of the jar with matching nail polish. Pay attention also to the inner walls of the lid, since more often than not the product will be upside down, which means that possible unpainted places will be striking.
After the varnish on the lid has hardened, we glue the selected figure to its inner part. We used a figurine of the Moscow Kremlin, it’s a pity that the inscription on it is in English, but apparently in Moscow such products are purchased more often by foreign tourists than our compatriots, since literally all souvenirs are full of English engravings.
You can place figures from under the kinder surprise, small figurines or small children's toys inside your snow globe. We recommend going to the gift shop and picking up a tiny plastic Christmas tree or a snowman. If you don’t feel like looking for a souvenir shop around the city, visit any hypermarket, they usually have departments with similar trinkets.
Try to pick up small figures. Glass with water will act as a magnifying glass, so a large composition will appear bloated and dimensionless.
Now we proceed to the next more interesting step, pour glycerin into a jar, look at the photo below, how much we poured it into a small container. The amount of glycerin will determine the speed of rotation of snowflakes, the more it is, the slower they will spin. Many are interested in the question, is it possible to make a snow globe without glycerin just on the water? We answer, no, without glycerin, snowflakes will immediately fall to the bottom of the container, while with it they can circle around the composition inside the jar for quite some time.
We also pour purified water into a jar of glycerin to the top, it is important that the water is crystal clear, which is why we recommend using either distilled water or simply purified in a home filter.
Well, here we come to the very interesting moment. Pour half a teaspoon of previously chopped white tinsel or prepared artificial snow into the jar. We mix it with a teaspoon, and we see how our snowflakes “came to life”. Do not pour a lot of snow, otherwise the composition itself will not be visible behind the snowfall.
Snow globe with your own hands.
Pour 1/3 teaspoon of white and silver sparkles here. We mix everything thoroughly. Here I would like to say that the item with sparkles, in principle, can be skipped altogether, one snow will be quite enough.
We close the jar with a lid on which the figure is fixed. Turn the lid with special care so that the liquid does not start to leak out. Ideally, the lid should be treated with a layer of adhesive with inside, and only after that twist.
Snow globe with your own hands.
At the end, the neck of the jar can be decorated with rhinestones, tied with a ribbon with a bow or made from polymer clay effective stand. We decided to leave our snow globe with an open lid and neck, we didn’t want to burden the composition with unnecessary details.
Before you take the snow globe with your own hands, wipe it with a napkin to remove the prints left during its creation. Now we shake our snow globe and admire the snowfall, as well as the playful overflow of white and silver glitter.
DIY glass ball with snow, video:
Today you learned how to make a snow globe with your own hands, we hope this master class was exhaustive, but in any case, if you have any questions, or they arose in the process of creating a similar composition, feel free to ask them in the comments, with pleasure we will answer.
Last year, we bought a shower gel for our daughter, on the bottle of which a sweetheart posed. I don’t want to repeat myself, besides, the very idea of man-made winter attracts, so I collected information from the Web and today I share it with readers. I planned to name the article "New Year's ball with snow", but came to the conclusion that it is difficult to make it at home - for lack of transparent balls. But cylindrical glass jars are in every kitchen, and it is them that craftswomen use to create homemade jewelry winter theme.
Figures are glued to the lid, dried, then “snow” is poured into a clean jar and filled to the top with “winter air”. It remains to connect the two parts of the product and conduct a test: whether snow is falling, whether the contents are leaking.
What plot to choose for crafts?
In tall jars, slender fir trees look spectacular, next to which children and animals walk, in low jars you can put one object each: a snowman, Santa Claus, the animal symbol of the year, a resident of the North; tree, winter house, etc. Beautiful and touching Christmas compositions with angels, Christ's mangers. Sometimes it is appropriate to use a background cut out of a postcard. In order for the craft to acquire a finished design, it is worth decorating the base cover: paint, fabric, self-adhesive film, bright adhesive tape, bow, varnish.
What materials are needed for snow in a bank?
- A jar with a tight screw cap.
- Small toys that are not afraid of moisture. Ideal - penguins, bears and princesses from a chocolate kinder egg.
- Glue "Supermoment" for fixing toys on the lid.
- artificial snow or glitter, crushed rain, Styrofoam balls, rubbed white paraffin candle.
- Transparent liquid filler. Filtered water, a mixture of water and glycerin, pure glycerin from a pharmacy will do. The higher the density, the slower the snowflakes fall down - so interesting.

What I wouldn't do
Photos with children's heads in jars give away dismemberment, so I don't like this experiment. I don’t insert pictures so as not to offend the authors of crafts - but they are easy to find on the Internet. But the figure of a child in full growth against the background of a Christmas tree and under the snow looks very cute. They write that the photo must first be laminated or generously pasted over with adhesive tape, but I'm not sure of absolute tightness, so I won't risk it.

A transparent ball with snow can be a good competitive craft for kindergarten or New Years. Small children should study such a toy with their parents, because the jar is not only fragile and dangerous, but also quite heavy.
How to make beautiful christmas ball on a stand, you will learn from a very good video.
You can make crafts on the theme of the New Year and winter with the whole family. This activity is exciting and will bring the family together very much. Outside the window, frost and wind sway the trees, it’s cold and dark, and you all gathered at the same table to create a small family masterpiece: magic jar with snow. In warmth and comfort there is always something to talk about, both small and large. Also you are busy useful thing, the result of your efforts will be only your small miracle. You can even feel like a magician. A New Year's product will decorate the apartment and always remind you that you should get together more often. And, of course, all relatives will appreciate a family gift, because in things made by hand, there is a particle of the soul.

What you need to work:
A small jar with a screw cap.
A decorative plastic element such as a Christmas tree, a snowman, or any other product of a suitable theme.
Glycerol.
Sequins.
Tinsel.
Scissors.
Glue thermogun.

- First of all, we clean the jar of stickers and fill it with water exactly half.
- The remaining space of the jar is filled with glycerin. We pour, so to speak, with a slide.
- We glue the product of your choice to the lid of the jar, for example, let's focus on the Christmas tree. The surfaces to be glued are best degreased and notched for better adhesion. In the work, you can use other waterproof glue.

- In water with glycerin, add sparkles, small tinsel. Close the jar tightly. If there are air bubbles, add water or glycerin. The lid should fit tightly to the jar. For fidelity, it can be salted with glue.
Now it remains to be tested. Flip and shake your snow can and enjoy " winter magic", made by your hands.
Video: How to make a snow globe (a jar of snow) with your own hands
Young children will especially appreciate this. And you will spend many unforgettable and wonderful minutes in the company of your child. Good luck! Happy New Year!
It is not difficult to make it with your own hands, and at the same time, almost all of its components can be found at home.
DIY snow globe | Components

- Jar with screw cap. Ideally, the lid should seal tightly. If you take a jar and a lid from ready-made canned food, do not count on tightness. I took a jar of compote, so I had to reinforce and glue the threads to prevent leakage.
- Decorations. Well suited for this role Christmas decorations. Houses and Christmas trees look especially good with snow from above. I didn’t take this moment into account right away, so I had to take a lot of shots so that Grandfather Frost’s face would not hide in the snow.
- Glue. Glue is needed to stick the decoration to the lid. Many praise the glue gun, but I didn’t want to buy it specifically for the snow globe. I used a tube of super glue.
- Snow simulation. It can be artificial snow, glitter, or even shredded white plastic dishes. I bought ordinary silver sequins, but in the process I realized that they do not fit color scheme to our ball. artificial snow in small town not so easy to find, so I had to limit myself to homemade "snow" from plastic packaging from toys.

Homemade artificial snow
- Glycerol. It is needed so that the "snow" falls slowly. It does this by increasing the viscosity of the water. The amount of glycerin depends on the type of "snow" chosen. Large "snowflakes" will require more glycerin. I have a 400 ml jar. it took 4 bottles of glycerin 25 gr. With the proportions of water and glycerin 1: 1, snowflakes will float in the water almost without sinking to the bottom.
- Water. If you decide to make a ball for long-term storage or as a gift, then you will need distilled water and some kind of disinfectant for jewelry. There is no guarantee that the jewelry is sterile and their microbes will not cloud the water. For a ball that is not planned to be stored for a long time, any clean clear water. I used tap water. The first time I was unlucky, there was a whitish precipitate in the jar, which spoiled appearance. For the second time, I used pre-settled water.
- Rubber medical gloves. They are needed if you are not sure about the tightness of the lid. Gloves are convenient to use as a sealant for threads.
DIY snow globe | Assembly algorithm


At this stage, the ball is ready, and the next portion new year mood received.
If you liked the material, write about it on your favorite forum about babies and add a link to this page in your post or repost this post on social networks:
 Useful links.