Is it necessary to apply penetrating waterproofing before plastering. Cement plaster: technology for finishing basements and basements
The main purpose of plaster mixtures is to prepare the base for finishing, that is, in rough alignment and surface hardening. But there are also plasters that, in addition to the main functions, perform other tasks: they increase heat and sound insulation, protect against harmful radiation, give the base refractory properties, and so on. They are called special purpose formulations, and are used taking into account functional features these solutions.
Waterproofing plaster, which is used when finishing surfaces subject to increased moisture, also belongs to special ones. First of all, these are foundations, basements, basements, outer walls of houses located in damp areas.

How does this plaster differ from ordinary plaster, and how should it be applied correctly?
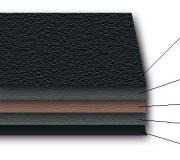
Waterproofing mixtures form a dense hard coating that prevents the penetration of moisture into the thickness of the walls or foundation. They are applied manually and by machine, used both outside and inside the premises. Depending on the composition of the components, waterproofing plasters are divided into 2 types:
- cement-sand;
- asphalt.
The first type is more common and is widely used in private construction. Cement-sand plasters can be made independently, and the process of applying them is almost the same as ordinary plastering.

To prepare the mortar, cement grade M400 and higher is used, and fine cement is used as a filler. quartz sand, stone flour, finely ground coal, bituminous additives. To increase water resistance, add to the solution liquid glass, ceresite, sodium aluminate and other water repellents.


The ratio of binder and filler is usually 1:2, less often 1:3. For maximum efficiency, the thickness of the coating should be 25 mm, provided that the plaster is applied from the water pressure side. The application is carried out in several layers, minimum thickness- 3 mm. Such waterproofing has many advantages:
- high reliability even with prolonged flooding of the foundation and walls of the house;
- resistance to repeated freezing;
- environmental safety - plaster composition can be finished internal surfaces drinking water tanks;
- plaster serves as an excellent basis for painting and cladding;
- has good adhesion;
- low cost of the solution;
- resistance to mechanical damage.

In order for the coating to be of high quality and durable, it can only be applied to a carefully prepared base. In addition, the surface must be strong and not prone to shrinkage, otherwise the plaster will crack. For work, it is preferable to choose factory mixtures with clearly adjusted proportions of the components. They are produced in dry form, and to prepare a solution, it is enough to mix the powder with water in the desired ratio.

Asphalt plaster mainly used in industrial facilities. Its cost is quite high, and special equipment is required for application, therefore, in private construction, the use of such waterproofing is not always justified. The composition of the plaster contains oil bitumen, asbestos dust, sand and mineral fillers in powder form.
There are two ways to apply asphalt plaster - cold and hot. Cold mortar is applied manually or by machine, and is much easier to work with. The second method involves heating the solution to 180 degrees and applying it using special equipment. In this case, the waterproofing is obtained as reliable and durable as possible.
Popular brands of cement-sand plaster for waterproofing
| Name | Brief characteristics |
|---|---|
| The mixture forms a hard waterproof coating with good vapor permeability. It has excellent frost resistance (up to 200 cycles), resistance to alkaline and salt effects. Designed for waterproofing of external and internal vertical surfaces that are not prone to deformation and shrinkage, not subject to vibrations. It is used when finishing buried structures, water tanks, swimming pools, to fill the voids of old brickwork. Produced in the form of a dry powder, packing 5 and 25 kg |
| Elastic mixture on a cement-polymer basis. Designed for deformable and subject to shrinkage substrates. Suitable for all mineral surfaces that do not contain gypsum. It is used to protect buried structures, walls and foundations of houses located on the banks of water bodies, to finish swimming pools and household tanks. The composition has increased resistance to chemically aggressive substances - alkali, acids, acetone, hydraulic oil and others. The standard package contains a canister of emulsion (10 l) and a bag of dry plaster mixture(25 kg) |
| Two-component elastic mixture deep penetration. Designed for waterproofing all types of surfaces, including those subject to vibrations and shrinkage. It has very high adhesion, after drying it forms an absolutely waterproof coating, but with vapor permeability. The solution has good plasticity, it is easy to apply with a brush or spatula. The standard kit includes a bag of dry mix (25 kg) and a canister of emulsion (5 l) |
| Cement mixture with active additives for waterproofing concrete surfaces. The solution penetrates into the thickness of concrete by 40-50 cm, completely closing the pores of the material, as a result of which the surface becomes absolutely waterproof. The composition is used when finishing foundations and plinths, basements, cellars, wells, pools. When applied to brick or masonry, wood, foam concrete and other materials, there is no waterproofing effect of the coating. The composition is environmentally friendly, frost-resistant, resistant to alkalis and acids. Packed in plastic buckets with a capacity of 5, 10, 25 kg |
| Dry cement mixture penetrating type for concrete bases. It is a more budgetary analogue of Penetron, due to which it is in good demand. Apply by brush or sprayer in two coats. It is resistant to chemically aggressive substances and temperature extremes. Packed in plastic buckets of 10 and 25 kg |


The consumption of conventional waterproofing plaster is on average 1.5 kg per m2 when applied in a single layer. The consumption of penetrating compounds is less - about 0.4-0.6 kg / m2. Of course, this indicator directly depends on the quality of the surface, the method of application and the thickness of the layers, therefore, before purchasing the material, everything should be carefully calculated and 10-15% of the calculated amount of the mixture should be added in reserve.

Prices for waterproofing plasters
Waterproofing plasters
Conditions for applying plaster
Waterproofing plaster mortars must not be applied to crumbling, loose substrates, coatings containing gypsum, as well as surfaces with efflorescence, traces of bitumen, paint, oil stains. All this reduces adhesion, which means that the plaster will not last long. It is also unacceptable to plaster bases with cracks, the width of which exceeds 0.5 mm.

Such a wall cannot be plastered without prior repair.
To properly prepare the surface, you need to completely remove the layers of paint, old plaster or putty. If the paint is difficult to remove, it is advisable to soften it by heating it with a hairdryer or special chemical washes. After that, it can be easily removed with a spatula. Plaster and putty are cleaned with a metal brush, you can also use a grinder with a nozzle. Excellent processing results sandblasting machine.


The seams of brick and masonry must be cleaned with a metal brush and dust removed. If the masonry is old and the joints are crumbling, they are cleaned to a solid base, and then filled with fresh cement mortar. Cracks before sealing must be embroidered to a depth of 1-2 cm and cleaned of dust.


When finishing surfaces with a heterogeneous structure (concrete and brick, brick and stone), the base is pre-plastered with ordinary cement-sand mixture.
Like ordinary plaster, the waterproofing layer needs to be reinforced if its thickness exceeds 10 mm. When plastering rough masonry or surfaces with numerous defects, when the solution is applied in a thick layer, a galvanized metal mesh with cells from 10x10 mm to 20x20 mm is used for reinforcement.

It is fixed to the base with plastic dowels and self-tapping screws with a fastening step of 40-50 cm.

On a flat surface, it should be applied, provided that the layer thickness does not exceed 30 mm.

Between the erection of masonry and its waterproofing, at least 3 months must pass. This also applies to concrete foundations. If preliminary leveling is carried out with ordinary cement mortar, waterproofing plaster can be applied no earlier than after 28 days. Plastering should be done in dry calm weather, at a temperature not lower than +5 and not higher than +30 degrees. The optimum air humidity is 60%. At the same time, such conditions must be observed not only during the application of the plaster, but also for several days after completion of the work.
Prices for plaster meshes
Plaster meshes
Plastering is done manually or by machine. The first option is much more practical, since it does not require equipment and the solution consumption is less. True, it takes more time to work, and the reliability of adhesion to the base is slightly lower. mechanical way allows you to do everything much faster and without much physical effort, moreover, with this application, the solution adheres very strongly to the surface, and the coating acquires high strength. The disadvantages include high flow working mixture and the need for a special installation.

Manual method of application
For work you will need:
- container for kneading;
- construction mixer;
- metal spatula;
- a paint brush with a semi-rigid bristle;
- pure water.

Step 1. The prepared surface is slightly moistened with water using a wide brush. The base must be damp, but not wet, especially the presence of puddles on horizontal planes is not allowed.

Step 2 Pour into container clean water room temperature, pour in the dry mixture and stir with a mixer at a speed of 400-800 rpm for 3 minutes. The proportions of water and dry mixture are indicated on the package. If this is a two-component composition, first the emulsion is poured into the container, water is added (if indicated in the instructions), stirred, and only then the dry components are poured. For the first layer, the solution is made more liquid: on average, 1 part of water is taken for 2.5 parts of the dry mixture. After mixing, leave the solution for 5 minutes to mature, then mix again with a mixer.
Construction mixer price
construction mixer


Step 3 The first layer is applied with a brush, moving in one direction. The solution is collected little by little, carefully rubbed over the surface, giving Special attention joints. Make sure that the layer remains uniform over the entire area, avoid the formation of sags and streaks. It is not recommended to return to already treated areas in order to correct something, this violates the integrity of the layer and reduces the adhesion of the material to the base.

Step 4 After completing the application of the plaster, you must wait until it begins to harden. After that, the next portion of the solution is prepared, but this time less water is added: about 1 part of water to 3 parts of the dry mixture.
Step 5 For applying the second layer, it is better to use a spatula. The solution is collected in small portions and evenly distributed over the base with a thin layer from the bottom up, holding the spatula at an angle to the surface. Spatula movements must be performed in a direction perpendicular to the direction of the brush. That is, if you applied the first layer with vertical movements, then the second should be applied horizontally. If a third layer is necessary, this rule must also be observed.

Step 6 The plastered surface must be protected from drying out, mechanical loads, direct sun rays. If the weather is too warm, the plaster should be periodically moistened with water using a spray bottle. After 7 days, when the coating is sufficiently strong, the plaster is grouted. To do this, make a liquid solution, throw it in a thin layer on the surface and smooth it in a circular motion with a polyurethane or metal grater.


Immediately after plastering, it is impossible to overwrite the coating, as this violates its density and adhesion to the base. Finishing work can be continued after 3-7 days, depending on the composition of the plaster. For example, a Barralastik coating can be tiled as early as 20 hours after applying the last layer, for Ceresit CR 65 it takes 3 days, for Penetron it takes from 7 to 14 days.
Mechanical method of application
Mechanical application, or gunning, is carried out using a special installation with a compressor and a nozzle. Smooth concrete base before shotcrete, they are sandblasted or manually make small notches over the entire area.

On bases with a rough uneven surface, a reinforcing mesh of galvanized metal is preliminarily fixed.

Step 1. The work surface is slightly moistened.

Water is poured into the installation tank and the dry mixture is poured in the proportions specified by the manufacturer. The pressure is set in the range of 0.25 ... 0.3, MPa, the supply of the solution is checked in a separate section of the wall. If the mixture begins to float, slide down, then there is excess water in the solution, and dry components should be added, but if dry spots form on the plaster layer, water should be added.
Step 2 For uniform application of the solution, the nozzle is held perpendicular to the wall at a distance of 80-100 cm from the surface, slowly moving it in a circular motion. The thickness of one layer should be within 7-10 mm. After completing the work, the plaster is covered with plastic wrap to protect it from drying out.


Advice. If the work requires a forced break, the edge of the plaster on the already treated area is cut off at an angle of 45 degrees and scratched with a metal brush over a fresh solution. After the resumption of the working process, the cut point must be abundantly moistened with water.
Step 3 The next layer is applied a day after the first, the same interval is maintained before applying the third layer. The total thickness of the coating should not exceed 50 mm.

Step 4 After the plaster has hardened, a grout is prepared, manually applied to the coating and grouted with a metal or polyurethane trowel. Next, cover the surface with polyethylene or periodically moisten with water to avoid cracking.
Within 7 days, the plaster must be protected from freezing, direct sunlight, mechanical stress. If everything is done correctly, the coating after drying has an even color, smooth hard surface, when tapping wooden mallet makes loud sounds.
Video - Robot plasterer PlasteRUS SPERO
Video - Waterproofing plaster
15.05.2008, 21:45
There is a concrete ground floor(with windows, semi-basement). Where the wall is in contact with the ground, white spots appear (like frost, apparently fungus or efflorescence), and dark spots(moisture). Metal was cleaned up. brush and smeared with anti-mold solution Pufas.
The walls are all uneven, the wave of the sea, then pushed forward by 3 cm, then inside by 3 cm they leave. This is how the smaller brothers did the plastering for us!
Now you need to make waterproofing and leveling the walls under the tiles.
Advise how to equalize such differences. Who advises with Rotbant (but gypsum, but it’s damp here), who with a cement-sand mixture, and who in general with drywall (which will reduce the area).
And which is better - first waterproofing or first final plastering, and then waterproofing.
Who has waterproofing experience? About three years ago, waterproofing was carried out with a mixture of HYDROTEX, there is no effect and its layer is gradually falling off.
21.05.2008, 16:32
It is best to do waterproofing outside the house. Dig, coat, dry, overlay with extruded polystyrene foam and bury. And it will be warm and dry in the basement. :D
21.05.2008, 19:33
Agree. The problem is that waterproofing was done from the outside with the HYDROTEX composition, but the result is zero. In addition, a blind area was made around the house, quite wide up to 3 m. In this case, it will have to be destroyed.
So far, they have begun to make waterproofing inside with a two-component HYDROLAST component. Then we put the beacons under the plaster, and after the plaster we will once again coat with waterproofing just in case.
I am concerned about the question: the layer of plaster will sometimes reach up to 5-7 cm. Will it fall off over time? It's on the walls.
There is a special song about the ceiling. There are also differences up to 5 cm. So that everything stays on and does not fall on your head, we decided to do this: beacons, cement plaster, mesh, Fugenfühler, Vetonit VH putty.
Can any of the plasterers advise: is this solution correct?
AnatolyK
22.05.2008, 16:08
the best waterproofing is rolled - you have already convinced yourself of the effectiveness of tacks, now it's the turn for a flipper. On thick plaster: it is advisable to apply on a reinforcing mesh screwed to the wall, even if it peels off in some place, it will stick to the mesh. Look in the stores for a hardening accelerator for concrete - it will turn out faster with it because you have to wait for the setting of the previous layer. A cut mesh will also go to the walls, and welded mesh is better for the ceiling - it will be more reliable
---- first mesh then the rest.
23.05.2008, 11:34
And what can be the thickness of the plaster layer (not total, but layer-by-layer)? I should probably have several layers at 5 cm and each one should set before applying the next one?
They also recommended a strengthening primer before plastering the ceiling.
AnatolyK
23.05.2008, 22:37
the thickness of the layer depends more on the skill of the plasterer; it will determine by eye that the solution will be thrown again and the entire layer will slide off. approximately looks like this: throw a solution of medium density with a ladle onto the entire wall - you get an uneven surface, along the beacons you remove the excess solution on thin places and wait for the grip. 5 cm - for 3-4 times, approximately a layer in the morning, the second in the evening, the third under the grout.
Strengthening primer before plastering the ceiling.
IN the latest technologies and I’m not very good at materials: D (Soviet hardening), therefore, on the forum I try to pick up something useful from modern materials (it’s better to learn from other people’s mistakes), if this is another impregnation, then write the name, maybe someone used it.
23.05.2008, 23:00
Clearly, now the only thing left is to find plasterers. Brigades living in St. Petersburg are looking for large volumes, and I have plasters of 60 meters, and screeds of 150 meters. No one can be lured to the object!
AnatolyK
24.05.2008, 12:45
volume only pulls on " repair work"You need to look for such people. For those to whom the construction of" the main bread ", of course, a small object is certainly not profitable. As a part-time job, give me only such and give, less volume, higher cost per square meter.
24.05.2008, 19:10
Yes, it is a pity that you are far from Peter.
28.05.2008, 22:13
I brought a plasterer to my object. At the base it was advised to take for ceilings during wet room plaster cement mixture KNAUF-UNTERPUTS, which is also used for building facades. Have taken. Today the plasterer is calling almost crying, they say he sprayed four bags and everything fell to the floor! It turns out that the base was not warned that before UNTERPUTS one more mixture of VP 332 of the same KNAUF had to be applied! We lost more than 2000 rubles on this experience.
It seems that it is necessary to stop at the gypsum ROTTAN, which at first they did not want to do because of the humidity of the room. It seems that everyone praises this mixture.
AnatolyK
28.05.2008, 22:41
and everything fell to the floor. Immediately collected it and again on the ceiling with a thinner layer. Gypsum can be made more or less moisture resistant, but in our country where all the mixtures are prepared in one concrete mixer:cry:, and super technology 2e is impossible until you buy 1e. :D
28.05.2008, 22:46
But in general, the ceiling on concrete can be plastered in the old fashioned way: cement, sand, carving, for example?
AnatolyK
29.05.2008, 12:34
So I wrote about "Soviet hardening", i.e. you yourself compose what you need for the given place, using additives - which you know, or which you can find. Buying ready-made dry mixes simply turns out to be more expensive and you have to overpay only for the promoted name. Therefore, I mentioned the hardening accelerator: cement-sand 1-3 (4) and the addition of% to cement (a bit of a plasticizer). Gartsovka is the simplest lime-sand mortar used since ancient times for internal plastering of walls and ceilings, for masonry. But before they kept lime in the pit for three years, therefore the quality was different. For the basement, it is better to add cement, or ask for a ready-made for wet rooms quick-setting.
If the hard worker did not find where to use the solution, then take off his last pants, shame on the jungle.
29.05.2008, 15:33
I called today the KNAUF company (manufacturer of UNTERPUTS cement plaster). I say, so they say, and so, your product falls from the ceiling and does not dry for a day. They thought for a long time, then they issued a verdict: that my room was poorly ventilated and therefore the solution did not dry, and secondly, that we used the soil not of their production, but of the PLITONIT company.
We decided to try ROTBANT on the ceilings (although KNAUFT technologists dissuade them, they say it will only last a year in a damp room), and cement-sand and a plasticizer on the walls. Let's see what happens.
02.06.2008, 22:20
Here comes from the village. In general, the walls turned out okay. The ceilings haven't been done yet.
We decided to use a gartsovka. We make the solution as follows: 1 hour cement + 2 hours. carving + 2 hours of sand. I refused the plasticizer, because. it is for faster drying of the mortar, and the mortar is stronger when it dries for a long time. It even needs to be wetted.
Here is the question: in next room to prepare previously plastered (smooth) walls for additional plastering (the walls themselves were plastered three years ago, but not leveled), what needs to be done?
1. Is it necessary to cover with a primer? And which one is better?
2. Put a thin metal. grid? Will there be air cushions under it?
3. Make notches?
AnatolyK
02.06.2008, 22:55
previously plastered (smooth) walls, depending on how much you need to level:?:, maybe just putty is enough. If you need a layer of plaster, then a notch with a grinder centimes through 5-10 diamonds.
For those who are familiar with this chemistry, we don’t use the primer - for me, the primer is the first layer of the solution: oops:
02.06.2008, 22:58
It is necessary to level in places up to 7 cm. Horror, of course, but it is necessary under the tile. And if you put the grid, maybe the notches are not needed then?
My plasterer does not want to work with a grinder.
AnatolyK
03.06.2008, 07:25
no chivo smooth wall - 7 cm brick thickness on the edge. it is necessary to make some kind of notch, in it the solution "as if with fingers" is held, the mesh, of course, is also stronger. Under the tile, the wall is simply leveled.
03.06.2008, 13:11
Yes, in some places you will have to put bricks on the corners.
Worse, there are still places where the old plaster is crumbling. They will recapture it, of course, but they may not notice something and cover it with a new one on a weak basis ...
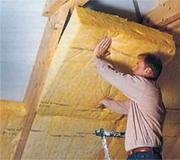
Special waterproofing plaster is used in the construction of buildings to protect risk areas from moisture. When building a private house protective compound used for processing basements, attics and foundations. In a damp climate, the outer walls of multi-storey buildings and basement floors are covered with hydroplaster. The mixture for waterproofing is used separately or in combination with a heater. For application, a manual or machine method is used. After hardening and hardening, the waterproofing mixture forms a coating of high hardness. Moisture does not penetrate into the structure of the foundation or wall with a dense waterproof coating.
The waterproofing mortar is prepared from M400 cement with fillers (bitumen, coal powder, fine quartz sand, stone flour). The plaster composition to enhance water resistance is supplemented with water repellents such as sodium aluminate, ceresite, liquid glass and other components.
The filler and binder in the dry composition are mixed in proportions of 2:1 or 3:1. Two types of plasters are used for waterproofing: asphalt and cement-sand. The second type is widespread in private housing construction; such mixtures are easily made independently.
Waterproofing plaster: brands and manufacturers
Available in construction stores a wide range of finished waterproofing materials. Mixes are sold in 25 kg multi-layer kraft paper bags, 25 kg polyethylene bags, 20 kg buckets, 15 kg bags complete with a 3 l canister with emulsion. In terms of price, properties and universal purpose, brands stand out favorably:
Console 540;
hydrofin;
Osmoflex;
Covercol;
Dichtugsschlemme.
Magma- cement mixture with mineral additives for underground passages, elevator shafts, showers, swimming pools, basements and foundations. It is applied on brick, concrete, cement-sand, reinforced concrete bases, provides rigid waterproofing. This plaster is not suitable for surfaces made of wood, asbestos cement and gypsum, with cracks and salt deposits, for painted walls.
The mixture cannot be used if the surface:
- deformed under the influence of changes in high and low temperatures or shrinkage;
- experiencing high mechanical stress;
- covered with fresh concrete (less than 3 months old).
Also, the composition is not suitable for coating cement screeds with a curing period of less than 28 days.
Console 540– hydro plaster for saunas, basements, laundries, swimming pools (walls and ceilings), foundations. The mixture has high strength, corrosion resistance, strengthening properties of building structures. The composition contains a protective modifier against microcracks. Plaster is effective in restoration work.
hydrofin – cement-polymer mixture for applying a thin layer coating, used on surfaces exposed to a water column of up to three meters. Properties: vapor permeability, elasticity, frost resistance, high adhesion. Upon contact with mineral base forms common crystalline structures.
Barralastic(pictured below) - a two-component dry mix for coating wood, metal, brick and concrete. Plaster waterproofing passes air well, is resistant to alkalis, oil products and acids, is environmentally friendly and non-toxic (this is confirmed by an environmental certificate). The composition is suitable for the treatment of food water systems. Advantages - elasticity, resistance to frost, vibration, movement and temperature extremes, tear pressure of 4 atm. and on the clamp 9 atm.
Bauta– mixture of elastic structure for outdoor and internal works. The material is used for arranging self-leveling floors, waterproofing cement plasters and concrete masonry. The composition is effective in conditions of water column pressure up to 5 m.
Osmoflex– plastic composition with butadiene-styrene resins for flexible connections of walls with pipes, ceilings and floors, for structures with dynamic loads and vibrations. It has high adhesion, resistance to frost, sulfides, chlorides, sulfur and carbon oxides.
Covercall- a universal waterproofing and adhesive mixture of two components: a binder ingredient and an acrylic elastomer. The material is used for waterproofing and gluing lining (mosaics, stone, tiles) in rooms with high humidity. The carpet is intended for waterproofing walls and floors in the bathroom, shower room, swimming pool, resistant to aggressive substances, low temperatures. Distinctive feature– high adhesion.
Dichtugsschlemme– mixture on a cement-mineral basis for application from the water pressure side with a layer up to 4.5 mm. Producer - TIGI Knauf.
How is wall waterproofing done?
The waterproofing layer on the water pressure side is applied with a thickness of 25 mm. This gives effective protection during a period of prolonged exposure to water on walls and foundations. The coating is stable during periods of spring flooding and withstands winter freezing of the soil. Tanks with drinking water covered with environmentally friendly compounds, special adhesives are used as a base for cladding and painting. Processing technology - applying the material in several layers with a thickness of 3 mm.
Important! Do not apply the mortar on loose and crumbling masonry, gypsum surfaces, walls with a tendency to shrink. If cracks with a width of more than 0.5 cm or salt deposits have formed on the base, it is impossible to plaster. Choose high-quality mixtures of proven brands, strictly follow the proportions, follow the manufacturer's instructions.
Waterproofing plasters are applied on carefully prepared substrates. Preparation includes three mandatory steps:
Remove old putty, plaster and paint. Use a grinder with a nozzle or a metal brush, hammer, chisel or chisel. Soften the coating if it is difficult to remove the paint chemical preparation or by heating with a special hair dryer. For a clean and even surface on large area use a sandblaster.
Clean the seams on the stone or brickwork to a hard surface. Treat deep recesses in old walls with spilling seams with a metal brush, remove dust, fill with cement mortar. Clean the cracks from dust, embroider one or two centimeters and putty.
Reinforce the surface if the thickness of the waterproofing layer exceeds 1 cm. Thick layers are superimposed on the base with damage and rough masonry. Use galvanized metal mesh with a cell size of ten by ten or twenty by twenty millimeters. Fasten the net with self-tapping screws with wide washers. If you are applying a waterproofing layer thinner than 30 mm on a level surface, use a fiberglass reinforcing net.
Important! On walls made of dissimilar materials (brick + concrete, brick + stone), a cement-sand plaster mixture is first applied, and then the plastered wall is waterproofed. Between these stages must pass 28 days. You can process fresh masonry no earlier than 3 months later. Temperature and humidity conditions: from +5 to +30 degrees, 60% humidity, dry calm weather.
After preparation, apply the plaster by hand or machine. Manual waterproofing is a lengthy process, but economical in terms of mixture consumption. Machine plaster – fast way with a guarantee of strong adhesion of the solution to the surface. But with mechanical application, more solution is consumed and the use of special equipment is required.
Manual waterproofing of plastered walls
Instructions for applying waterproofing plaster with your own hands:
Lightly dampen the cleaned surface with water. To do this, use a wide brush. Make sure the wall is damp, but not too wet, and that there are no puddles on the floor.
Pour water into a bucket, pour in the dry mixture, stir with a mixer for three minutes at 400-800 rpm. The volumes and ratio of water and dry matter are indicated in the manufacturer's instructions on the packaging. Two-component formulations are diluted in stages: first, water is added to the emulsion, then dry matter.
Apply the first layer of waterproofing (semi-fluid, 2:1 ratio). Apply the solution with a brush in one direction, thoroughly rub the mixture over the surface. For one application, collect a little solution, thoroughly coat the seams and joints, smooth out streaks and sagging. Do not return to the processed fragments for corrections: this will lead to a decrease in adhesion and the destruction of the integral structure of the insulating layer.
Wait for the beginning of hardening, prepare the second batch (thicker, in a ratio of 3:1). Apply the second coat with a spatula in upward strokes. Hold the tool at an angle, make the layer thin and even. The direction of movement is perpendicular to the movements of the brush when applying the first layer. In the same order, apply the third layer, again observe the condition of perpendicularity.
Within a week, expect complete hardening. In hot weather, periodically moisten the plaster with a spray bottle to protect it from sunlight and dry out.
After 7 days, grout with a liquid solution: sprinkle on the surface and smooth in a circular motion. Use a metal or polyurethane grater.
Important! If you had to take a break and postpone the waterproofing work for a while, trim the edge with a 45-degree cut corner. Scratch the oblique cut with a metal brush. When work resumes, moisten this area with water and wait a day before applying the next layer.
Video
The video in this article clearly shows how to apply Anserglob waterproofing compound.
In most modern domestic houses, the walls do not protect against moisture. It is believed that conventional surface cladding is sufficient ceramic tiles or a cheap analogue - coloring oil paint. How to make waterproofing of walls and whether it is really needed in the bathroom, whether funds are spent in vain - our article is about this.
That it is necessary to insulate the floor to prevent moisture from entering the building construction and as a result to the neighbors living below - everyone knows. As for the walls, building codes are silent. However, we advise you to do so. In areas where water flows will fall directly on the wall, we strongly recommend that you waterproof the walls with high quality. These are places behind the bath and shower, if it does not have airtight back walls.
Bathroom areas in need of waterproofing
In most cases, there is no need to specifically protect against water walls that remain dry or where only individual splashes will reach (for example, behind a washbasin). It is enough to tile, paint with waterproof paint and even stick waterproof wallpaper on the appropriate adhesive. But this is provided that the walls and partitions are built from materials that are resistant to moisture: concrete, brick, effective wall blocks. There is one more condition - good ventilation. If your bathroom is small enough and the ventilation is poor, then not only drops of water, but also steam will settle on the walls and ceiling. As a result, this will lead to the formation of fungus and, at a minimum, damage to everything in the bathroom.
The main purpose of plaster mixtures is to prepare the base for finishing, that is, to rough level and harden the surface. But there are also plasters that, in addition to the main functions, perform other tasks: they increase heat and sound insulation, protect against harmful radiation, give the base refractory properties, and so on. They are called special-purpose compounds, and are used taking into account the functional features of these solutions.
Waterproofing plaster
Waterproofing plaster, which is used when finishing surfaces subject to increased moisture, also belongs to special ones. First of all, these are foundations, basements, basements, outer walls of houses located in damp areas.

Waterproofing plaster on the basement of the house
How does this plaster differ from ordinary plaster, and how should it be applied correctly?
Waterproofing mixtures form a dense hard coating that prevents the penetration of moisture into the thickness of the walls or foundation. They are applied manually and by machine, used both outside and inside the premises. Depending on the composition of the components, waterproofing plasters are divided into 2 types:
- cement-sand;
- asphalt.
The first type is more common and is widely used in private construction. Cement-sand plasters can be made independently, and the process of applying them is almost the same as ordinary plastering.

Work with cement-sand plaster
To prepare the mortar, cement grade M400 and higher is used, and fine quartz sand, stone flour, finely ground coal, and bituminous additives are used as a filler. To increase water resistance, liquid glass, ceresite, sodium aluminate and other water repellents are added to the solution.


The ratio of binder and filler is usually 1:2, less often 1:3. For maximum efficiency, the thickness of the coating should be 25 mm, provided that the plaster is applied from the water pressure side. Application is carried out in several layers, the minimum thickness is 3 mm. Such waterproofing has many advantages:
- high reliability even with prolonged flooding of the foundation and walls of the house;
- resistance to repeated freezing;
- environmental safety - the plaster composition can be used to finish the internal surfaces of drinking water tanks;
- plaster serves as an excellent basis for painting and cladding;
- has good adhesion;
- low cost of the solution;
- resistance to mechanical damage.

Applied plaster
In order for the coating to be of high quality and durable, it can only be applied to a carefully prepared base. In addition, the surface must be strong and not prone to shrinkage, otherwise the plaster will crack. For work, it is preferable to choose factory mixtures with clearly adjusted proportions of the components. They are produced in dry form, and to prepare a solution, it is enough to mix the powder with water in the desired ratio.
Plaster waterproofing
Asphalt plaster mainly used in industrial facilities. Its cost is quite high, and special equipment is required for application, therefore, in private construction, the use of such waterproofing is not always justified. The composition of the plaster contains oil bitumen, asbestos dust, sand and mineral fillers in powder form.
There are two ways to apply asphalt plaster - cold and hot. Cold mortar is applied manually or by machine, and is much easier to work with. The second method involves heating the solution to 180 degrees and applying it using special equipment. In this case, the waterproofing is obtained as reliable and durable as possible.
Popular brands of cement-sand plaster for waterproofing
| The mixture forms a hard waterproof coating with good vapor permeability. It has excellent frost resistance (up to 200 cycles), resistance to alkaline and salt effects. Designed for waterproofing of external and internal vertical surfaces that are not prone to deformation and shrinkage, not subject to vibrations. It is used when finishing buried structures, water tanks, swimming pools, to fill the voids of old brickwork. Produced in the form of a dry powder, packing 5 and 25 kg | |
|
Ceresit CR 66 / CR 166 |
Elastic mixture on a cement-polymer basis. Designed for deformable and subject to shrinkage substrates. Suitable for all mineral surfaces that do not contain gypsum. It is used to protect buried structures, walls and foundations of houses located on the banks of water bodies, to finish swimming pools and household tanks. The composition has increased resistance to chemically aggressive substances - alkali, acids, acetone, hydraulic oil and others. Standard packaging contains a canister of emulsion (10 l) and a bag of dry mortar (25 kg) |
|
barralastic |
A two-component, deep-penetrating elastic blend. Designed for waterproofing all types of surfaces, including those subject to vibrations and shrinkage. It has very high adhesion, after drying it forms an absolutely waterproof coating, but with vapor permeability. The solution has good plasticity, it is easy to apply with a brush or spatula. The standard kit includes a bag of dry mix (25 kg) and a canister of emulsion (5 l) |
|
Penetron |
Cement mixture with active additives for waterproofing concrete surfaces. The solution penetrates into the thickness of concrete by 40-50 cm, completely closing the pores of the material, as a result of which the surface becomes absolutely waterproof. The composition is used when finishing foundations and plinths, basements, cellars, wells, pools. When applied to brick or masonry, wood, foam concrete and other materials, there is no waterproofing effect of the coating. The composition is environmentally friendly, frost-resistant, resistant to alkalis and acids. Packed in plastic buckets with a capacity of 5, 10, 25 kg |
| Dry cement mix of the penetrating type for the concrete bases. It is a more budgetary analogue of Penetron, due to which it is in good demand. Apply by brush or sprayer in two coats. It is resistant to chemically aggressive substances and temperature extremes. Packed in plastic buckets of 10 and 25 kg |
The consumption of conventional waterproofing plaster is on average 1.5 kg per m2 when applied in a single layer. The consumption of penetrating compounds is less - about 0.4-0.6 kg / m2. Of course, this indicator directly depends on the quality of the surface, the method of application and the thickness of the layers, therefore, before purchasing the material, everything should be carefully calculated and 10-15% of the calculated amount of the mixture should be added in reserve.
Ceresit CR 166. Elastic waterproofing compound
Conditions for applying plaster
Waterproofing plaster mortars must not be applied to crumbling, loose substrates, coatings containing gypsum, as well as surfaces with efflorescence, traces of bitumen, paint, oil stains. All this reduces adhesion, which means that the plaster will not last long. It is also unacceptable to plaster bases with cracks, the width of which exceeds 0.5 mm.
Such a wall cannot be plastered without prior repair.
To properly prepare the surface, you need to completely remove layers of paint, old plaster or putty. If the paint is difficult to remove, it is advisable to soften it by heating it with a hairdryer or special chemical washes. After that, it can be easily removed with a spatula. Plaster and putty are cleaned with a metal brush, you can also use a grinder with a nozzle. An excellent result is obtained by sandblasting.
Check the brick for its hardness
Use a chisel or chisel, as well as a hammer, to dismantle old plaster
After removing the old plaster, take a metal brush with which you will get rid of the remaining plaster particles
The seams of brick and masonry must be cleaned with a metal brush and dust removed. If the masonry is old and the joints are crumbling, they are cleaned to a solid base, and then filled with fresh cement mortar. Cracks before sealing must be embroidered to a depth of 1-2 cm and cleaned of dust.
Crack repair
Repaired crack
When finishing surfaces with a heterogeneous structure (concrete and brick, brick and stone), the base is pre-plastered with a conventional cement-sand mixture.
Like ordinary plaster, the waterproofing layer needs to be reinforced if its thickness exceeds 10 mm. When plastering rough masonry or a surface with numerous defects, when the mortar is applied in a thick layer, a galvanized metal mesh with cells from 10x10 mm to 20x20 mm is used for reinforcement.
Plaster mesh
It is fixed to the base with plastic dowels and self-tapping screws with a fastening step of 40-50 cm.
Fastening to masonry with a self-tapping screw with a wide washer
On a flat surface, fiberglass mesh should be used, provided that the layer thickness does not exceed 30 mm.
In the photo - installation of a reinforcing mesh on the facade of the house
Between the erection of masonry and its waterproofing, at least 3 months must pass. This also applies to concrete foundations. If preliminary leveling is carried out with ordinary cement mortar, waterproofing plaster can be applied no earlier than after 28 days. Plastering should be done in dry calm weather, at a temperature not lower than +5 and not higher than +30 degrees. The optimum air humidity is 60%. At the same time, such conditions must be observed not only during the application of the plaster, but also for several days after completion of the work.
Plastering technology
Plastering is done manually or by machine. The first option is much more practical, since it does not require equipment and the solution consumption is less. True, it takes more time to work, and the reliability of adhesion to the base is slightly lower. The mechanical method allows you to do everything much faster and without much physical effort, moreover, with this application, the solution adheres very strongly to the surface, and the coating acquires high strength. The disadvantages include a high consumption of the working mixture and the need for a special installation.
Benefits of machine plastering
Manual method of application
For work you will need:
- container for kneading;
- construction mixer;
- metal spatula;
- a paint brush with a semi-rigid bristle;
- pure water.
Plaster tools
Step 1. The prepared surface is slightly moistened with water using a wide brush. The base must be damp, but not wet, especially the presence of puddles on horizontal planes is not allowed.
You can wet the surface with a brush, dipping it into water and splashing onto the wall
Step 2 Pour clean water at room temperature into the container, pour in the dry mixture and stir with a mixer at a speed of 400-800 rpm for 3 minutes. The proportions of water and dry mixture are indicated on the package. If this is a two-component composition, first the emulsion is poured into the container, water is added (if indicated in the instructions), stirred, and only then the dry components are poured. For the first layer, the solution is made more liquid: on average, 1 part of water is taken for 2.5 parts of the dry mixture. After mixing, leave the solution for 5 minutes to mature, then mix again with a mixer.
Mixing solution
Mortar consistency
Step 3 The first layer is applied with a brush, moving in one direction. The solution is collected little by little, carefully rubbed over the surface, paying special attention to the joints. Make sure that the layer remains uniform over the entire area, avoid the formation of sags and streaks. It is not recommended to return to already treated areas in order to correct something, this violates the integrity of the layer and reduces the adhesion of the material to the base.
Application of waterproofing plaster
Step 4 After completing the application of the plaster, you must wait until it begins to harden. After that, the next portion of the solution is prepared, but this time less water is added: about 1 part of water to 3 parts of the dry mixture.
Step 5 For applying the second layer, it is better to use a spatula. The solution is collected in small portions and evenly distributed over the base with a thin layer from the bottom up, holding the spatula at an angle to the surface. Spatula movements must be performed in a direction perpendicular to the direction of the brush. That is, if you applied the first layer with vertical movements, then the second should be applied horizontally. If a third layer is necessary, this rule must also be observed.
Application plaster mortar on the wall
Step 6 The plastered surface must be protected from drying out, mechanical stress, direct sunlight. If the weather is too warm, the plaster should be periodically moistened with water using a spray bottle. After 7 days, when the coating is sufficiently strong, the plaster is grouted. To do this, make a liquid solution, throw it in a thin layer on the surface and smooth it in a circular motion with a polyurethane or metal grater.
Plastering technology
Wall grouting after plastering
Immediately after plastering, it is impossible to overwrite the coating, as this violates its density and adhesion to the base. Finishing work can be continued after 3-7 days, depending on the composition of the plaster. For example, a Barralastik coating can be tiled as early as 20 hours after applying the last layer, for Ceresit CR 65 it takes 3 days, for Penetron - from 7 to 14 days.
Mechanical method of application
Mechanical application, or gunning, is carried out using a special installation with a compressor and a nozzle. A smooth concrete base is sandblasted before shotcrete or small notches are manually made over the entire area.
Sandblasting
On bases with a rough uneven surface, a reinforcing mesh of galvanized metal is preliminarily fixed.
Methods for mounting reinforcing meshes
Step 1. The work surface is slightly moistened.
Moisten the wall
Water is poured into the installation tank and the dry mixture is poured in the proportions specified by the manufacturer. The pressure is set in the range of 0.25 ... 0.3, MPa, the supply of the solution is checked in a separate section of the wall. If the mixture begins to float, slide down, then there is excess water in the solution, and dry components should be added, but if dry spots form on the plaster layer, water should be added.
Step 2 For uniform application of the solution, the nozzle is held perpendicular to the wall at a distance of 80-100 cm from the surface, slowly moving it in a circular motion. The thickness of one layer should be within 7-10 mm. After completing the work, the plaster is covered with plastic wrap to protect it from drying out.
Application of plaster by machine
Leveling the first layer
Advice. If the work requires a forced break, the edge of the plaster on the already treated area is cut off at an angle of 45 degrees and scratched with a metal brush over a fresh solution. After the resumption of the working process, the cut point must be abundantly moistened with water.
Step 3 The next layer is applied a day after the first, the same interval is maintained before applying the third layer. The total thickness of the coating should not exceed 50 mm.
Application and leveling of the second layer
Step 4 After the plaster has hardened, a grout is prepared, manually applied to the coating and grouted with a metal or polyurethane trowel. Next, cover the surface with polyethylene or periodically moisten with water to avoid cracking.
Within 7 days, the plaster must be protected from freezing, direct sunlight, mechanical stress. If everything is done correctly, the coating after drying has an even color, a smooth hard surface, and when tapped with a wooden hammer, it makes sonorous sounds.
Video - Robot plasterer PlasteRUS SPERO
Video - Waterproofing plaster
There is a concrete basement (with windows, semi-basement). Where the wall is in contact with the ground, white spots appear (like frost, apparently fungus or efflorescence), and dark spots (moisture). Metal was cleaned up. brush and smeared with anti-mold solution Pufas.
The walls are all uneven, the wave of the sea, then pushed forward by 3 cm, then inside by 3 cm they leave. This is how the smaller brothers did the plastering for us!
Now you need to make waterproofing and leveling the walls under the tiles.
Advise how to equalize such differences. Who advises with Rotbant (but gypsum, but it’s damp here), who with a cement-sand mixture, and who in general with drywall (which will reduce the area).
And which is better - first waterproofing or first final plastering, and then waterproofing.
Who has waterproofing experience? About three years ago, waterproofing was carried out with a mixture of HYDROTEX, there is no effect and its layer is gradually falling off.
A bathroom without reliable waterproofing can be safely considered the most expensive area of an apartment: very often you have to do redecorating, any rush of the water supply system also leads to payment for the repair of an apartment from neighbors below. These costs can be minimized only if the walls and floor of the bathroom are waterproofed. For specialists, such an operation is not difficult. But it’s also easy to do it yourself, you just need to be patient and have the necessary materials.
Tools and materials
Before doing waterproofing, you need to acquire the following materials and tools:
- waterproofing material (bitumen, bitumen-polymer or cement-polymer composition);
- building hair dryer;
- reinforcing mesh;
- plaster;
- Decoration Materials;
- silicone;
- putty knife;
- building level.
The scheme of waterproofing the walls in the bathroom.
Waterproofing a bathroom should begin with good ventilation in order to avoid the influence of excess moisture on the surface in the future. A built-in hood or direct access to the ventilation well of the building will completely provide a good microclimate in the bathroom and protect the room from fungal aggression. Direct waterproofing in the bathroom should be carried out from top to bottom.