Bonsai (We make small trees with our own hands). Master Class
Growing a bonsai with your own hands is a complex and lengthy procedure that requires experience and attention. The key to project success is right choice plants. This is carried out taking into account climatic conditions and maintenance requirements. Experienced gardeners choose coniferous and deciduous varieties as a basis - pine and maple, which require minimal care. The main thing is to ensure the minimum required temperature regime.
Those who want to create a beautiful composition with their own hands can use the following green spaces as a basis:
- Sprouts of common lilac.
- Siberian larch.
- Pine.
- Siberian spruce.
- Juniper sprout.
- Kalina.
- A cob of azaleas.
- Bobovnik.
- Low almonds.
- Ussuri pear.
- Purple barberry.
- Varietal mock orange and others.
Garden ficus, low almond, and Jerusalem artichoke have also proven themselves well. You need to start by choosing a suitable container with humus. Ordinary will do flower pot. When choosing a soil, it is worth studying its formation. It is recommended that it provide minimal drainage and retention required quantity moisture.
According to these criteria, sand, clay and humus are taken in equal parts. To plant a tree, you will need pruning shears to form the crown line, a spatula, sticks, a sieve, and a watering can. Spraying is carried out with a spray bottle. If in locality There is a specialized store, then the seedling is bought there.
After this, the bonsai is grown to the required size. Further, depending on the plant variety, crowns are formed at a certain time. If time and experience allow, you can create a bonsai from purchased seeds, each type of which requires certain conditions. Another opportunity to do flower arrangement– use offsets, cuttings and indoor plants.
First you need to decide on the size of the composition, which ranges from 5 cm to 2 m. Large trees are easier to work with, but small ones are more impressive. In an average apartment, it would be reasonable to grow a bonsai tree within 35-45 cm. If you don’t have any ideas in your head yet, you can visit designer master class where they will tell and show possible options. Photos of completed projects will be useful.
The gardener allows the tree to grow on its own, but only to a predetermined limit. The growth process is completed by pinching the top.

- Work traumatic to green spaces is carried out strictly during the period of bud swelling.
- The branches - the frame of the crown - remain almost completely.
- If a plant in the garden forms appearance under influence environment, then in room conditions The gardener needs to shape the appearance of a miniature ficus or thuja himself.
- It will help to artificially deform individual plant elements step by step copper wire, which wraps ¼ of the diameter of the branch.
- If we're talking about about soft wood, for example, a maple trunk, then instead of the mentioned wire, thread can be used.
- The branches fit tightly to each other and to the bark, but this does not mean that the trunk should be pinched.
The formation of curved forms of birch branches takes about 3 months. Oak will take longer - 5 months. Regardless of the timing, this must be done step by step. At the same time, if the birch easily takes on a new form, then you will have to tinker with the oak. A tree can be formed step by step in 2.5-3 years, after which it is transplanted from a temporary pot made of plastic bottles, to permanent. The use of a pallet is allowed. In the future, you must strictly follow the watering rules.

Further production of a green composition from pine proceeds step by step according to the following scheme:
- It is recommended to buy a slightly twisted seedling.
- Before planting, you need to check the taproot.
- For planting, it is advisable to use the same soil in which the seedling grew
- Supplement it with a substrate that allows moisture to pass through.
- A thematic video will help you choose a style.
- Pruning and crown formation begins in the spring.
- The formation of curved shapes is best done using strong threads that do not damage the structure of the tree.
- The density of the frame is weakened as the trunk thickens.
- All branches are cut at a pre-selected angle.
- Lightly trim the roots every 3-4 months.
The shape of the crown is adjusted with sharp scissors, allowing you to quickly get rid of excess. The placement of the craft is carried out with orientation towards the sun. As the coniferous tree develops, it requires a large number of natural lighting.
How to make a money tree bonsai
There are many ways in which you can make a bonsai from the Crassula, also called the “money tree”. The key to success is hidden in growth control and crown formation money tree. Further growth can be stopped by pinching, carried out as the plant reaches the required size.

If you plan to go the whole way on your own, you can buy seeds at the store. In this case, strictly 1 seed is planted in 1 pot. Step by step it then needs to be watered, but not too much.
The seed takes root well, so no additional care is needed, however, you need to follow some recommendations:
- The depth of the pot exceeds 1/3 maximum length root system.
- You can grow it in an aquarium, but then the shape will be curved.
- The splendor of the composition is formed by creating at least 2 sprouts from 1 bud.
- Excess buds are removed with tweezers.
- Pruning is carried out according to a pre-planned plan.
- You can decorate the composition decorative elements made from foamiran.
- If the main holiday of the year is approaching, then white foamiran will create the New Year’s mood.
Growing a real Bonsai is very difficult. Here, as you understand, desire alone is not enough! This requires time, opportunity, skill and...years of painstaking work. It turns out, alas, not for everyone. But many people can decorate their interior with such a tree. The problem is solvable.
For fruitful work, you need to stock up on various natural materials. In this way, we will solve two problems at once: financial and environmental. It is advisable to select clumsy, knotty snags for trunks, but if this is a problem, then you can also use simple twigs. It’s important to decorate it all beautifully afterwards.

Depending on the color range interior, wood can also be both summer and autumn...

This tree is made from several branches of the bug grass. It grows under every garage. The grass looks like a tree - a thin stem strewn with many branches with small leaves. We take 5-6 of these stems and glue them together into a bundle. Branches with leaves form a luxurious crown. This grass dries quickly, but loses color. We paint the root with an aerosol acrylic paint. There is a lot of it in auto stores, in any color. We glue the trunk with a mixture of sawdust and PVA glue. If there is no sawdust, tea is very convenient for this. We drink tea, any kind, then dry it on newspaper. Great material to work with! If necessary, after drying, the trunk can be tinted. Gouache.

If there is little material, you can make a very tiny tree. True, it looks more like a toy.

What are we “planting” in... If you follow the Bonsai traditions, then the container for the tree should be small, almost flat. Here we select from what is at hand. In this case can from under the herring. We decorate it with a mass of papier-mâché and paint it. It is convenient to do this immediately with colored varnish; hardware stores have it. You can replace it with stain or gouache, but after drying, you will need to treat the surface with a colorless varnish.

For this work, a bowl was taken from disposable tableware. It is dense and holds its shape well. It can be painted, covered with pebbles or shells, pieces of glass, etc.

A curved gramophone record looks good in such cases. It bends easily over gas or electric stove. We put the plate on a nail with a large head and hold it at a distance of 20-30 cm above a well-heated stove. When heated, the edges of the plate sag and at this moment they can be given almost any shape. Be careful, the record gets very hot, use gloves!

Now let’s talk about how we secure the tree and with what... If the snag has shoots like roots, great! If there are none, it’s not a tragedy either. We just decorate it differently. To secure the barrel, you can use polyurethane foam. Plaster or alabaster are also very convenient in this case. The material is relatively cheap and economical. Cement is not suitable. It's very hard work. This is of no use.

Since I use gypsum for my work, I’ll tell you about it. For trees like those in my photos (height up to 30cm, no more: from the bottom of the bowl to the top of the crown), 1.5-2 cups of dry gypsum is enough. Divide the dry plaster into two parts. Make one larger, the other, respectively, smaller. The bowls and wood should already be ready. The wood is collected and painted. The bowl is decorated. Place a few pebbles at the bottom of the bowl for counterweight. This is just in case, for better stability of the tree. Place the tree trunk in the bowl as you plan. Dilute most of the gypsum in salted water. Salted water allows the plaster to quickly thicken and harden, so you need to work at a pace. Fill the bowl with wood to 2/3 of the depth of the bowl. Hold the barrel for several minutes. The plaster will set quickly. The bowl will become warm, don’t be alarmed. When gypsum hardens, it heats up. As soon as the trunk is fixed, we proceed to the main decor.

By basic decor I mean finalization"land" for bonsai. Nature is endlessly generous, so leaving the “earth” bare is ridiculous. We create the illusion of abundance and lush vegetation. It's easy. All sorts of small snags, stones, dry grass inflorescences... We take the remaining dry gypsum. Let's break it down, but it's already simple cold water, without salt. Now we won't benefit from its rapid thickening. Pour it over the already hardened plaster. As soon as this mass begins to thicken, fill it with everything you have stored as vegetation. Scatter pebbles, stick in driftwood, grass, moss. The plaster will harden and everything will be fixed. After the plaster has completely hardened, spray the surface with the remaining aerosol paints. Light and dark green, yellow, black. These are colors that are suitable for painting the surface of the “ground” and forbs.

Stones and grass.

This same snag is larger.


We fill the surface of the “earth” more abundantly, then the work really resembles a small corner of nature.

Doing it yourself is a complex and lengthy procedure that requires experience and attention. The key to a successful project is the correct choice of plant. This is carried out taking into account climatic conditions and maintenance requirements. Experienced gardeners choose coniferous and deciduous varieties as a basis - pine and maple, which require minimal care. The main thing is to ensure the minimum required temperature regime.
Those who want to create a beautiful composition with their own hands can use the following green spaces as a basis:
- Sprouts of common lilac.
- Siberian larch.
- Pine.
- Siberian spruce.
- Juniper sprout.
- Kalina.
- A cob of azaleas.
- Bobovnik.
- Low almonds.
- Ussuri pear.
- Purple barberry.
- Varietal mock orange and others.
Garden ficus, low almond, and Jerusalem artichoke have also proven themselves well. You need to start by choosing a suitable container with humus. An ordinary flower pot will do. When choosing a soil, it is worth studying its formation. It is recommended that it provides drainage and retains the minimum required amount of moisture.
According to these criteria, sand, clay and humus are taken in equal parts. To plant a tree, you will need pruning shears to form the crown line, a spatula, sticks, a sieve, and a watering can. Spraying is carried out with a spray bottle. If there is a specialized store in the locality, then the seedling is bought there.
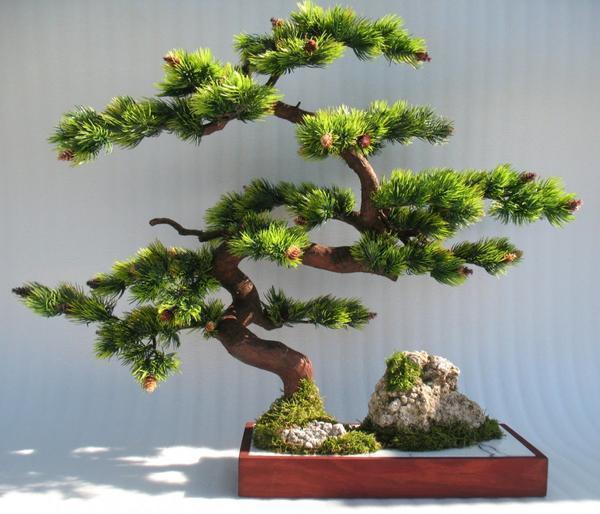
DIY pine bonsai
It is recommended to place the pine composition in a container irregular shape, the bottom of which is decorated with driftwood. If lightness of form is of paramount importance, then in this case a pot or tray of light shades and grass are used as a decorative element. After this, you need to carefully separate the smallest scales from the pine trunk. In order for the needles to look aesthetically pleasing, they need to be grouped into small bunches.

Further production of a green composition from pine proceeds step by step according to the following scheme:
- It is recommended to buy a slightly twisted seedling.
- Before planting, you need to check the taproot.
- For planting, it is advisable to use the same soil in which the seedling grew
- Supplement it with a substrate that allows moisture to pass through.
- A thematic video will help you choose a style.
- Pruning and crown formation begins in the spring.
- The formation of curved shapes is best done using strong threads that do not damage the structure of the tree.
- The density of the frame is weakened as the trunk thickens.
- All branches are cut at a pre-selected angle.
- Lightly trim the roots every 3-4 months.
The shape of the crown is adjusted with sharp scissors, allowing you to quickly get rid of excess. The placement of the craft is carried out with orientation towards the sun. As the coniferous tree develops, it requires a large amount of natural light.
How to make a money tree bonsai
There are many ways in which you can make a bonsai from the Crassula, also called the “money tree”. The key to success lies in controlling the growth and shaping the crown of the money tree. Further growth can be stopped by pinching, carried out as the plant reaches the required size.

If you plan to go the whole way on your own, you can buy seeds at the store. In this case, strictly 1 seed is planted in 1 pot. Step by step it then needs to be watered, but not too much.
The seed takes root well, so no additional care is needed, however, you need to follow some recommendations:
- The depth of the pot exceeds by 1/3 the maximum length of the root system.
- You can grow it in an aquarium, but then the shape will be curved.
- The splendor of the composition is formed by creating at least 2 sprouts from 1 bud.
- Excess buds are removed with tweezers.
- Pruning is carried out according to a pre-planned plan.
- You can decorate the composition with decorative elements made from foamiran.
- If the main holiday of the year is approaching, then white foamiran will create the New Year’s mood.
How to make a bonsai with your own hands (video)
I decorate offices and living spaces with miniature bonsai compositions. At proper care And timely pruning Bonsai is formed in 2-3 years. After this, the gardener must carefully monitor the composition, maintaining the splendor of the crown and the shape of the branches. For these purposes, wire or thread is used. Pruning is carried out no more than once every 4-5 months. The specific period depends on the type of tree.
Original options for beautiful bonsai (photo)


In winter, like no other time of the year, any green objects are pleasing to the eye. Especially if these items resemble warm summer. That’s why my daughter asked me to buy a bonsai tree. I, of course, did not agree. Besides the fact that a real mature bonsai tree is infinitely expensive, neither she nor I know how to care for it unusual plant. Of course, you can find articles on the Internet on growing and caring for these dwarf trees, but I think this will not help much.
Without practical skills, the plant will simply constantly get sick and lose its foxes. After all, caring for bonsai, in the homeland of these plants, is South-East Asia– this is a whole doctrine, and even a way of life. I’ve already seen this with friends – it seems like they did everything right. They maintained the required temperature, trimmed it, fed it with special fertilizers for this species, and even bought a small steam humidifier especially for it, but the tree was constantly sick, bald and stunted. Of course, there was no talk of any flowering. I think that, unfortunately, these beautiful plants are simply physically incapable of fully growing and pleasing to the eye in our northern latitudes, where I live. Therefore, I decided not to throw away a lot of money, but to try to make something similar, only inanimate. Artificial. Which is not so demanding and capricious. After watching several short videos about these trees on the Internet and studying them visually, I got down to business.
Will need
- Wire (1mm thick and 2 meters long).
- PVA glue.
- Tobacco dust.
- Foam sponge.
- Watercolors or gouache.
- A vessel with low sides.
- Sand or earth.
- Universal glue (you can use “Moment”).
- Pliers (2 pieces).
- Wire cutters or scissors (for cutting wire).
- Third hand from the soldering kit.
- Glue brush.
Making a bonsai tree
First, let's prepare the wire.
It is better, if possible, to straighten it to make it easier to fold in the future. And we will fold it based on the desired growth of the tree. For example, I chose 15 cm. We measure 15 cm from the beginning of the wire and bend it 180 degrees. We continue to bend this way until the wire runs out. It will turn out like this:

Now we clamp one end of the skein with pliers, and with the second pliers we take the other end of the skein, and twist the skein into a bundle.

Not too tight. So that you can branch two or three cores into separate branches. First, we branch the thickest branches to the middle - three or four wire strands each.

We twist them so that they do not fall apart.

We bite off the curved ends from their tops, and divide the resulting branches into several more separate branches along the entire length.


In general, we improvise and give this bundle of wire any shape of wood we like. You can shape it into a slender pine tree or a spreading maple tree.

We're done with the branches, now let's move on to the roots. There, in principle, everything is exactly the same, only we make the branches much shorter. It should look something like this:

We have received the “skeleton” of the tree, now we need to cover it with “bark” and “leaves”. To imitate the bark, I used tobacco dust, which I had left over from the summer, after fighting garden aphids. It is also sold at any hardware store. You will also need PVA glue.

Apply glue with a brush to the entire surface of the future tree, and immediately sprinkle it with tobacco dust.

Once, of course, is not enough. After the glue dries (20-30 minutes), repeat the procedure 3-4 times. Until all visible wire on the entire surface of the trunk and branches is hidden under the bark. We put it closer to the heating radiator (where it’s warmer), and leave it to dry until the next morning. In the meantime, while the tree is drying, you can work on the foliage. To do this, you need to finely (as finely as possible!) tear the foam sponge.

Do not cut with scissors, but rather tear into small pieces so that the shape of the pieces is involuntary and varied. The more magnificent you want the tree crown, the more sponges you need to pick. Pour the torn pieces into a bowl or small bowl, dilute a thick concentrate from watercolors or gouache Green colour(about a tablespoon), pour it into a bowl with a torn sponge and mix thoroughly with a stick, spoon, or hands.

When the sponge is evenly colored, pour it onto some clean surface and also leave it to dry until the morning.

Now it’s the turn of the dishes in which the tree will “grow”. It is advisable if it is a round or oval container with low sides. We pour soil into it, moisten it, and form a bulge in the middle, like a hill.

Pour 3-4 tbsp over the whole thing. spoons of PVA glue and spread it all over the ground so that in the future the mound does not settle and lose its shape. Sprinkle dry sand on top (you can mix it with crushed dry leaves), and also put it in a warm place until the morning.


In the morning we check the tree to make sure there are no bare wires left on it.

If everything is fine, we try it on the finished container with soil and mark with protruding roots the place where it will be in the future.

In my opinion, the work done is worth the effort and time spent - from the outside the tree looks very alive and natural. It can only be distinguished from the real thing upon closer inspection. In general, my daughter got what she wanted, and I avoided wasteful expenses and hassle with caring for a capricious living tree.

Watch the video
Bonsai art
Bonsai art is a very ancient art. This is the process of miniaturizing regular large trees by planting them in small flat containers. If you read the publication About, what is bonsai, you know that they are, in fact, dwarf prototypes of trees growing in nature, and have all the features inherent in their larger counterparts.
Not everyone can grow real bonsai at home, but make your own decorative bonsai Can be done by anyone who wants it. You can do it yourself beautiful craft from corrugated (crepe) paper, looking short video master class (below). To make such a cute dwarf tree you will need very few materials. And the result will be a magnificent work that can easily be confused with a living plant.
Materials for making paper bonsai:
2. Brown corrugated paper - 1 roll
3. Glue stick
4. Wire, wire cutters
5. Scissors
6. A piece of foam plastic or plaster
7. Bonsai container

1.Cut the roll of green crepe paper into equal pieces without unrolling it. Unwind each piece and cut to the middle into thin, uniform strips, like needles. Lubricate the uncut part of the tape with glue.
2. Wind the prepared tape onto the wire from top to bottom in a spiral. The first branch is ready.
3. Gather 3 branches together. Twigs bigger size are obtained from 3 small ones.
4. The roll of brown paper must be cut into pieces, similar to the roll of green crepe paper, but into thinner pieces. Unfold the prepared piece and completely coat it with glue.
5. Wrap the free ends of the collected branches with brown ribbon from top to bottom in a spiral. Carefully wrap the brown tape around the wire rod.
6. Formed branches should be lush. Be sure to form roots from the wire ends. Even though most of the roots will be hidden from view, they will give your tree more strength and beauty. The trunk is thick at the base due to the fact that all the branches are connected in one place. The same brown ribbon of crepe paper is wound on top.
7. The finished bonsai can be planted in a suitable container on polystyrene foam. Moreover, a bonsai can even be woven from a newspaper vine or a flowerpot can be made from napkins. If you don't have polystyrene foam or similar material, you can plant the tree in plaster, leaving some of the roots visible.
8. Cover some of the roots in the foam with shredded green crepe paper. This will create the illusion of moss. Dear readers, watch the entire manufacturing process in the video. Visualization will help you better understand this simple master class: