Construction of a bathhouse from timber: advantages of the material and stages of construction of a log house. Do-it-yourself sauna made of timber: how to build a good sauna without a single nail How to properly assemble a sauna made of timber
Bathhouse in the country or on the site country house– is no longer a dream, but a necessity. The owners of private housing construction develop a construction project in such a way that it includes all the necessary buildings - a garage, a barn, a bathhouse, a pavilion. Therefore, the construction of a bathhouse from timber in Lately is rapidly developing and popularizing. But since land are mostly small, then the owners choose smaller bathhouse designs, for example, a 100 x 100 bathhouse (beam cross-section) measuring 3 x 3 m with a ceiling height of 2 m. Even in such a small building a steam room, a shower room, and a relaxation room will fit. All operations must be regulated by SNiP 31-02-2001. In larger projects, a bathhouse is built from 150 x 150 timber with additional rooms that improve the comfort and functionality of using the building.
Small-sized timber bathhouse - selecting building materials
You will need
| Construction materials | Units and quantities | Drawing |
| Portland cement grade M 400 | 150-160 kg | |
| Beam with a section of 150 x 150 mm | 3.5-4.0 m 3 | |
| Edged board 50 x 100 mm | 0.3-0.4 m 3 | |
| Rail with a cross section of 20 x 50 mm | 25-26 linear meters | |
| Lining | 0.5-0.6 m 3 | |
| Edged board 25 mm | 0.3-0.4 m 3 | |
| Fireclay bricks | 500-550 units | |
| Andulin roofing | 10-11 m2 | |
| Concrete blocks | 30-35 units |
It is also necessary to prepare in advance insulation, nails, electrical wiring and its components, self-tapping screws of different lengths and diameters, corners for assembling the rafter structure, fittings, plastic or wooden windows and entrance as well as internal doors. In addition, if you plan to connect the water supply to the bathhouse, then you need to think about organizing a sewerage system. For ours, water supply and sewerage systems were not developed with our own hands.
Video instruction
How to lay timber and raise the walls of a bathhouse:
Procurement of building materials, cost and estimate:
We build a timber bathhouse ourselves - steps from the foundation to the roofing work:
Any construction of a bathhouse made of timber can be divided into specific stages:
- Pouring the foundation.
- Construction of a timber frame.
- Installation of rafters and roofing.
- Plank flooring.
- Installation of windows and doors.
- Laying electrical wiring, installing lamps and installing other electrical equipment.
- Decoration interior walls, finishing work on external walls.
Stage 1. Pouring the foundation
The best option to build a bathhouse from timber with your own hands is - concrete base. 
Tool you'll need
- Entrenching tool.
- Wooden stakes or fittings, cord, tape measure, level.
- Building material for formwork assembly.
- Reinforcing bars and binding wire for concrete reinforcement.
- Factory-mixed concrete or concrete mixer, shovel, container for preparing mortar, cement, crushed stone, water, sand.
- Waterproofing materials.
The area should be leveled and the perimeter of the foundation should be marked using pegs and a cord. If we are building a bathhouse from small timber, then the foundation will be shallow, and a trench for it can be dug with a shovel. Trench depth – up to 50 cm.
Stage 2. Trimming and walls of the timber bathhouse
| Construction Operations | How to do |
Foundation marking | We mark the contours of the base according to dimensions 3 x 3 m. For internal partition the foundation is not poured. Pegs are driven into the corners and the cord is pulled. |
Reinforcement | The reinforced frame is knitted from rods with a diameter of 12-14 mm; knitting wire with a diameter of 2-3 mm is used to connect the longitudinal and transverse rods. The distance from the frame to any surfaces of the trench is 5-7 cm. |
Pouring concrete | On clay soil There is no need to assemble the formwork - you can pour the solution into the trench right away. The solution is given 14 days to harden. |
Columnar base for furnace | Economy designs for baths made of profiled timber include a stove that will be built between the steam room and the relaxation room, so that the heat gets into two rooms at once. The base for the stove is buried to the level of soil freezing, the sand cushion under the foundation is 20-30 cm thick. In addition to sand insulation, you can use sheets of foam plastic 2-3 cm thick. The foam prevents the soil from swelling, and the foundation will be stationary. |
Base waterproofing | The upper part of the base must be protected from moisture. To do this, the concrete surface is covered with two layers of roofing felt or thick polyethylene. |
The beams will be connected like this: the ends - half a tree, the corners - a paw.
- It is recommended to saturate the first two rows of beams with antiseptics and fire retardants, and then lay them on roofing felt laid in two or three layers. The lower beam must have markings for the windows and doors of a bathhouse that has not yet been built. Corner connections The beams are additionally fastened, possibly with dowels or corners. When constructing a 3 x 3 m bathhouse, intermediate pins will not be needed.
- Next, floor beams are laid for the flooring. The distance between the beams is 1.3-1.5 m.
- The gaps between the timber are insulated with tow, flax, jute or more modern thermal insulation materials, for example, tape.
- If it becomes necessary to install intermediate dowels, they are attached every 1 m. The dowels can be wooden or metal. At the corners of windows and doors, pins are attached at a distance of 0.2 m from the edge of the opening.
- After the walls are set, they are mounted ceiling. The beams for it are mounted in two rows from the top edge of the wall, the approximate height of the ceiling that a do-it-yourself log bathhouse will have is 2 m. The beams need to be cut into half a tree; for a small bathhouse in our project, two beams for the ceiling will be enough.
- The remaining two rows of wall beams are laid on the ceiling beams. These two rows should be secured especially firmly, since the last beam will serve as the Mauerlat in the rafter system.
- Before arranging the roof, you need to make at least a temporary ceiling - it can be covered with any boards, since upon completion of the roofing work they will be removed and a permanent ceiling will be installed.
The main problem when building a bathhouse from timber with your own hands is to bring the frame of the bathhouse under the roof so that the rest of the work can be carried out not in the rain and wind, but in a protected room.
Stage 3. Roof
Arrangement schemes are available for single- or double-slope roofs. If we are building a bathhouse from small timber with our own hands (three by three meters), then a lean-to sloping roof option is better suited. 
Under pitched roof the ceiling is immediately made permanent and insulated with foam plastic. The characteristics of the heat insulator are shown in the table below:
| Brand of foam boards | Density, | Compressive strength at 10% deformation, ≥ MPa | Flexural strength, ≥ MPa | Thermal conductivity of dry foam at 25±5 0 С, ≤ W/(m K) | Foam humidity, ≤%, | Burning time, ≤ seconds | Moisture absorption per day, ≤% | Service life, years (minimum – maximum) |
| PSB – S 15 | 10-11 | 0 , 05 | 0: 07 | 0,037 | 1 | 3 | 1 | 20-50 |
| PSB – S 25 | 15-16 | 0,1 | 0,18 | 0,035 | 1 | 3 | 1 | 20-50 |
| PSB – S 25 F | 16-17 | 0,12 | 0 , 2 | 0,037 | 1 | 3 | 1 | 20-50 |
| PSB – S 35 | 25-27 | 0,16 | 0 , 25 | 0,033 | 1 | 3 | 1 | 20-50 |
| PSB – S 50 | 35-37 | 0,16 | 0 , 3 | 0,041 | 1 | 3 | 1 | 20-50 |
The ceiling is insulated step by step as follows:
- Boards up to 20 mm thick are attached to the beams from below.
- Foam is attached to the boards.
- Boards are also laid on top of the beams.
During construction gable roof you can install a temporary ceiling, and you can insulate the permanent structure later. It is necessary to build walls, build a rafter system and lay the roof before the onset of frost. Over the winter, the building will shrink and the moisture content of the materials will remain at a constant level.
Video instruction
Ceiling insulation with foam plastic:
Stage 4. Flooring
If you are using bathhouse projects made from profiled timber, floor joists do not need to be installed. The beams are laid in increments of 1 m, and edged boards 30-40 mm thick are laid on them. It is recommended to make a slope of 2-3 0 on the floor towards the water drainage. There is no need to install a sewage system because:
- A shallow foundation will allow runoff to quickly soak into the ground.
- A small log house made from timber with your own hands means minimal water consumption.

Video instruction
How to lay boards on the floor of a bathhouse:
Stage 5. Laying electrical wiring
- After calculation total power For all electrical appliances, you need to add a reserve of 2-3 kW.
- Electric cables are divided into categories according to the cross-section of the cores. For example, 0.5 mm 2 can withstand ≈ 2.5 kW load. It is better to buy proven licensed products, since a fake can have a wide variation in power and cross-section indicators. For complete peace of mind, it is better to buy a cable with a margin for these parameters, for example, with a cross-section not of 0.75 mm 2, but of 1 mm 2.
- It is imperative to arrange general grounding - high humidity and high temperature pose a danger to the operation of the bathhouse. Grounding is done simply and quickly: you need to drive a steel rod with a diameter of 16-20 mm into the ground, the immersion depth is 1 m. A bolt is welded onto the rod, and a grounding cable is connected to it.
- All electrical cables in the bathhouse must be protected by a metal casing - corrugated or solid. The casing will help prevent fire and will also serve as protection against rodents.
- Before laying the cable, prepare a small guide for yourself in the form of a diagram or layout of sockets, lighting fixtures, other electrical equipment.
- After this, markings are drawn on the walls, holes for fastenings are drilled, and wiring is installed.
Stage 6. More about windows and doors
It is not easy to make doors and windows for a bathhouse yourself - you will need a woodworking machine, experience working on it, and design drawings with exact dimensions. It’s easier to purchase factory-made products, and PVC windows will also be appropriate in a bathhouse. Doors can be wooden, MDF or PVC. Steps for installation of structures:
- Both door and window openings are leveled - sawed, planed, etc.
- Before installing the products, it is necessary to assemble special wooden boxes for them - you will need boards 5 x 15 cm. The frames are assembled on nails, inserting it into the opening, you need to leave a gap of 30-40 mm at the top - the log house may begin to shrink.
- In the openings of doors or windows, wooden frames are also attached to nails or self-tapping screws. The upper gap is insulated with polyurethane foam or traditional thermal insulation materials.
Video instruction
How to install windows in a wooden bathhouse:

Stage 7. Set of frame and fastening of lining strips
For wall decoration steam room and the shower room, lining is traditionally used. For the recreation room, it is allowed to work with any building materials - plywood, OSB, fiberboard, chipboard, plastic or MDF. It’s more difficult to work with lining, so let’s look at this step in more detail:
- For the supporting frame you will need slats with a cross section of 20 x 50 mm.
- First, the outer slats are attached to the wall, a cord is stretched between them, and frame slats are attached along it in increments of 400-500 mm.
- The difference in height between the ceiling and the floor surface in the corners of the bathhouse is eliminated. Discrepancies are leveled by adjusting the lining strips from below and above. It is necessary to leave gaps of 10-20 mm between the lining strips and the floor and ceiling. Subsequently, the gaps will be closed by the baseboards. Ceiling plinths should be attached to the lining, and not to the ceiling boards, otherwise, when the bath shrinks, the lining may bend.
- To install the strips, nails 150 mm long are suitable; they are driven into the grooves of the strips.

Any building materials are suitable for outdoor decoration. If you are building a cheap and small bathhouse, then it makes no sense to use expensive cladding. Window and door openings and openings internal doors need to be covered with platbands. Availability of cheap and beautiful materials allows you to choose any finish.
Video instruction
Internal thermal insulation of the bath, interior decoration and wall protection:


A timber bathhouse is an additional building on the site, the construction of which is not as easy as it might seem at first glance. If you have professional construction skills, special knowledge and experience, drawing up and implementing a project really won’t take much time. However, it is quite dangerous for a beginner to take on such a task: the structure may not last long. In any case, it is worth familiarizing yourself with the features of the projects and their implementation.

Preparation for construction
Before building a small bathhouse, it is necessary to carry out preparatory work.
Choosing a location
Any structure, regardless of area and purpose, should begin to be planned, following certain norms and rules. The location for the bathhouse must be selected taking into account a number of requirements.
The building must not:
- Being too close to a residential building.
- Harm the communication system.
- Pressure the area closest to it.

It is necessary to take into account the distance to other structures in order to avoid problems with government employees and neighbors. SNiP rules regulate at what distance a bathhouse must be built from other structures. According to the rules established by the state, from the bathhouse to other structures and buildings there must be:
- 3 meters – to a residential building;
- 4 meters to medium trees, and 5 meters to large ones;
- 1 meter to other bushes;
- 4 meters from buildings where animals are kept.
Selecting wall material
Yes, a bathhouse can be built from any materials. But it is advisable not to use the same brick, polystyrene concrete and foam block. They get too hot and then take a long time to cool down. Such structures create high humidity, and when ventilated, the room dries very quickly.
Bricks and blocks can be used if desired, but they must have a multi-layer cladding for such variable thermal conditions.

The best option is timber. It does not require any cladding. In addition, it is wood that produces useful and healthy steam when warmed up.
Drawing up project documentation
Creating a bathhouse project consists of:
- Outline sketches and drawings.
- Drawing up a work schedule.
- Calculation of estimates.
Using the drawing you can:
- make the correct orientation to the cardinal points;
- plan doors and windows;
- carry out the wiring correctly.

When drawing up a project, it is necessary to take into account the climatic conditions and location of the facility:
- It is advisable to install windows from the west and south.
- Place the doors on the side of the house.
- If possible, it is better to build a bathhouse on some hill. Thanks to this, storm water will bypass it.
On our website you can find contacts of construction companies that offer the service of building a bathhouse from profiled timber. You can communicate directly with representatives by visiting the “Low-Rise Country” exhibition of houses.
Obtaining permission from administrative authorities
If you build a bathhouse without approving it in the relevant structures, it can be demolished due to any complaints from neighbors.

Therefore, it is necessary that the project be approved. To do this it must include:
- Floor plan, even if the bathhouse consists of one floor. The plan must include detailed drawings, sections and explications.
- Approximate estimate for materials.
- Type of foundation with drawings.
- Written consent of all closest neighbors for the construction of a bathhouse.
Obtaining permission is a mandatory procedure.
Bathhouse layout
In order for the project to be complete and allow you to obtain permission from the administrative authorities the first time, you must have a good knowledge of the structure of the bathhouse. This will help you create the correct drawings.
The baths consist of 4 parts:
- Waiting room.
- Shower room.
- Steam room.
- Tambour.

Typical layout of a bathhouse with a vestibule
Tambour
After entering, a person finds himself in a vestibule. The vestibule is at the same time a hallway and protects the dressing room from cold air. It is sometimes used as a locker room. The size is chosen by the future owner.
Waiting room
Behind the vestibule is a dressing room. This is the room where people relax. Because of this, it should be made comfortable, convenient, and most importantly, spacious. This room is also used as a cooling area, so a window is necessary.

Important! Many make the floor slippery. This is a grave mistake. After leaving the steam room, your feet may be wet, which will directly lead to injury.
Shower room

Steam room
At the very end of the bathhouse there is a steam room. The main thing to consider is that the doors should not open onto the vestibule! This error will constantly reduce the temperature in the steam room, which will reduce its effectiveness.

Stages of bathhouse construction
Below is a step-by-step answer to the question of how to build a bathhouse from timber.
Foundation
The construction of a timber bathhouse begins with the construction of a foundation. The strength of the structure will depend on the quality and reliability of the foundation. Therefore, it is necessary to treat at this stage with full responsibility.
- In addition to the material, when choosing the type of foundation, you should take into account the type of soil and the topography of the earth.
- Considering that structures made from timber are not heavy, in order to equip the foundation with even terrain, a strip foundation would be an excellent choice.
- If the difference in relief is more than one meter, it is better to choose bored piles.
If it is decided that a bathhouse made of timber with strip foundation, you need to start working as follows. First of all they transfer ready plan to the area. A theodolite will help with this. In the absence of this construction device, it is proposed to use pegs and cords. Using them, you can also draw straight lines.
As soon as the markings are ready, construction of the foundation begins. The first step is to dig trenches. Their depth is determined by the type of soil and the depth of freezing in a given area. If the soil is heaving, the trench should be 17-20 cm greater than the maximum freezing depth. Depending on the climate zone, the latter indicator may vary.

A layer of sand is poured into the finished trenches, the minimum thickness of which is 13-15 cm. Next, you should install wooden formwork. Besides wooden shield, for this use any sheet materials:
- slates;
- boards;
- plywood, etc.
Then a layer of waterproofing for the foundation should be laid. To give rigidity to the structure, the foundation can be reinforced using a frame of 14 mm rods, which are connected with wires. After this they prepare concrete mixture to fill the trench. After 4 days, the formwork is removed.
Selection and purchase of timber
Further steps directly depend on the raw materials from which you need to build a bathhouse from timber. You just need to prepare in advance quality wood, necessary for the construction of walls in the bathhouse.
Timber is one of the most popular and best building materials for baths:
- It gives minimal shrinkage.
- Does not require adjustment.
- Mounted on a small foundation.
But at the same time, its quality directly depends on the selected raw materials. Therefore, at the stage of purchasing material you need to be extremely careful.

When the site is located in a temperate climate zone, it is not recommended to use logs whose thickness is less than 20 cm. Otherwise, the walls will be too small and thin. Consequently, heat will be retained inside very poorly.
Small logs are often used in an attempt to save money, but this is a fatal mistake. This will only increase costs, since everything will need to be covered with thermal insulation materials.
Important! You need to find and buy a good timber. You should not waste money on material with defects. If cracks, axial deformations or lesions are present, discard and look elsewhere.
When purchasing, you should pay attention to the thickness of the trunks. If possible, it is better to buy those logs whose thickness difference between the ends does not exceed 3 cm. Timber is cut along the length of the bathhouse. In most cases, the dimensions of bath complexes are 6x6 or 6x3.
Laying rows
- The first row is called the lining crown. It is advisable to use the thickest logs for it and place them on the foundation base. Before this, it is necessary to lay waterproofing. After this they collect bottom trim. Logs are made on it in order to assemble the floor in the future.
- Then comes the horseshoe crown. A window row is laid on it, and then a row above the window. How many rows there will be is calculated during the creation of the plan. The height of the building depends on this factor.
- On last stage When all the crowns have already been installed, the log house is left for a while. It must sag and take its final form. Best time for this procedure – up to 700 days.
The most important stage in the construction of a bathhouse is the laying of the mortgage crown:
- 20x20 bars are great for the first row.
- Mandatory - all beams should be cut so that their length is the same.
Important! Even slight precision cannot be tolerated. In most cases, “in the paw” is chosen as the type of connection.
When laying a bathhouse on pads, and not on a foundation, it is advisable to build a temporary roof over the building.

It takes a lot of effort to arrange the rows perfectly and maximize even laying. After finishing the first row, the remaining space between the base and the materials is filled with foam. There is no need to fix the first screw - the overall stability is guaranteed by the weight of the structure.
As soon as the process of assembling the log house is completed, window and door frames are installed.
Installation process: additional factors
It is imperative to lay waterproofing between the base and the first row of timber. The surface is covered with bitumen, then a layer of roofing material is applied. As soon as the first layer cools, apply the second and roofing material.
Mortgage rows should always be treated with antiseptics:
- Particular attention should be paid to the surface adjacent to the base.
- Machine oil is excellent as an impregnation.
Most professionals use this oil because it is inexpensive and is sold almost everywhere.

- Lack of contact with the foundation.
- Ventilation improvements.
- Protecting trees from mold and mildew.
All of the above will increase the shelf life of the tree.
Roofing, screeding and finishing - the final stage
- Lay the floor.
- Do a little finishing on the inside.
- Decorate the roof.
The roof is very easy to do. You should choose between single-slope and gable. Their main difference is the slope. A gable roof is made from 2 planes that together form a ridge.
A single-pitch roof is one piece of canvas. It is chosen for garages, sheds and other non-residential buildings.

It is with the installation of logs that flooring begins. Boards are laid on the joists. It is advisable to make them from pine or larch. You definitely need a floorboard!
Further work directly depends on what kind of floor is being built. Bathrooms have non-leaking or leaking floors. When choosing the second option, the boards are simply placed as close to each other as possible, increasing the angle slightly. The water flows at an angle into a gutter or siphon.
Further finishing is entirely a matter of the owner’s taste. Timber is an interesting and design-friendly material that does not require much effort in design after construction. Leaving it in its original form will create the atmosphere of a classic Russian bathhouse.
Video description
Interesting ideas for decorating the interior of a bathhouse - in this video:
From time immemorial, Russian people have had a love for the bathhouse. To this day he has not changed and remains faithful for dozens of centuries. For our people, the bathhouse has always served as a place for washing and cleansing. It’s not for nothing that they say that when you went to the bathhouse, you felt like you were born again. The most precious place in the bathhouse is, of course, the steam room, nothing special at first glance, a heater and shelves, but when you sit down, you splash on the heater, it gives you a raspberry heat, and then you feel the Russian love for the bathhouse. There were no saunas or other overseas curiosities even close to our favorite bathhouse. How many songs and poems have people dedicated to the bathhouse “Oh bathhouse, bathhouse, crimson heat!”
You can praise the bathhouse endlessly))).
Today there is a massive construction of bathhouses in summer cottages and country estates, because in Soviet time It was forbidden to build permanent buildings on 6 acres. But there was no talk about the bathhouse or anything at all; it was strictly prohibited. Later, in the 90s, people had no time for this. Now, thank God, the people have a pretty penny and a little freedom of action.
People are drawn to their historical roots, and the bathhouse has accompanied the people from the beginning of their existence. And it will not be surprising if people begin to explore other planets, then the first building on the new earth should be a bathhouse.
Today's construction boom is also fueled by the presence of a huge amount of building materials on the market. What bathhouses are not built from today, the main and unchangeable thing is wooden frame, it always comes first, but bricks, blocks, timber are also used, which greatly simplifies the construction process.
For example, from blocks, the box of a future bathhouse can, if desired, be folded by one person, quite easily. short term without having construction skills.
Of course, you can’t compare it with a log house, but it’s still an alternative.
The author conceived the construction of a bathhouse on personal plot, and the material for construction was timber, which is also much easier during the construction stages, because there is no need to cut crowns, grooves and everything else.
Previously, baths were built mainly without a foundation, as a result of which the lower crown quickly became unusable due to dampness. There was also basically no drainage system or sewerage system, and the water poured directly onto the floor and went into the ground through cracks in the floor.
But in our time, everything is far from being the case, because people have learned to put a bathhouse on a foundation, make a drainage system, and a sewer system, as a result of which the service life of the bathhouse increases many times over. Also, recently the bathhouse has been divided into two rooms, a steam room and a washing room, which also has a number of advantages in terms of temperature, because in order to swim and wash, you do not need temperature and steam, a separate room was allocated for these purposes.
Construction begins with pouring the foundation, then erecting walls, roofing, installation sauna stove, interior decoration.
And so now let's look in detail at all the stages of construction, how this work was carried out, and what he needed for this.
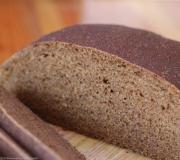
Materials: timber 100 by 100, cement, sand, roofing felt, tow, roofing material, sauna stove, brick, chimney pipes, sewage pipe, car tires.
Tools: chainsaw, hacksaw, axe, hammer, chisel, drill, screwdriver, trowel, mallet, level.
And so, first of all, he invites us to look and understand the diagram of the future bathhouse.

He started construction in the winter and first shovels away the snow to clear the site for construction.

And then he pours the foundation and waterproofs it.

Then he begins to build walls.


Pay attention to how the author makes a lock to secure the structure.

As the walls are built, window and door openings appear.


Then he makes the roof and ceiling, while installing a plumb line in order to accurately install the sauna stove later.


And now the main part of the construction is completed, the log house is ready and hidden under the roof.

Makes sewerage.


Moves on to installing a sauna stove and chimney.


Starts interior decoration baths.
The article examines in detail the technology according to which the construction of a bathhouse from timber is carried out with your own hands. The text describes the process correct selection materials, features of designing a future wooden bathhouse, creating a foundation for it, erecting walls, taking into account the formation of window and door openings in them, as well as other stages of construction and finishing work.
To build a bathhouse on a summer cottage, various building materials can be used. There is a wide range on the market that allows you to achieve any performance characteristics from the future building. If the owner of a summer cottage decided to build a turnkey bathhouse from timber, the price will be one of the most important criteria for choosing the material. In addition, personal preferences are also taken into account. If the construction will be carried out with one’s own hands, the choice may also be based on experience in working with a certain material.

Most often, owners of suburban areas give preference to wooden buildings, choosing projects from rounded or timber. These materials combine the beneficial advantages of natural raw materials and a relatively low price.
Advantages and photos of bathhouses made of timber in a summer cottage
The popularity of timber as building material for the bath it is due big amount benefits. First of all, consumers are captivated by the natural origin of this raw material. Wood is environmentally friendly, it does not contain toxic substances or impurities at all, therefore it is completely safe for humans. Having a little practical experience in handling it, a person can build a bathhouse with my own hands in a fairly short period of time. Moreover, the work is carried out with minimum set tools.
The timber has excellent technical characteristics. It is easily laid in rows, due to which the structure does not require much time to shrink. The price of log bath houses made of timber is more affordable than other buildings. The material retains heat well, creating optimal climatic conditions indoors and filling the air with the pleasant aroma of wood and natural resins.

The timber can be glued or profiled. The last of them has a special structural structure that allows the walls to be assembled using the tongue-and-groove method. The result is a very strong and reliable structure.
Helpful advice! If you don’t want to wait a long time for shrinkage to occur, you shouldn’t choose profiled material. For these purposes would be better suited glued timber, the price of a turnkey bathhouse made on its basis is much higher, but the construction is more reliable. In addition, this material is less susceptible to deformation changes.
The timber is easily amenable to all types of processing, it is pliable and does not impose restrictions on design. The material allows you to build baths with almost any design features and layouts:
- one- and two-story;
- with one or more entrances with a porch;
- with veranda;
- with terrace;
- swimming pool, etc.

To build a bathhouse, you do not need to build a solid foundation. The use of timber simplifies the technology as much as possible. In many ways, this material is even better than logs. It is convenient, cost-effective and does not require adjustment on the ground during the construction of walls. Laying the material can be done immediately on the foundation.
How to build a bathhouse from timber with a terrace: photos and recommendations
The bathhouse is used for taking water procedures However, this is not its only purpose. Here people can relax and unwind. Moreover, this can be done outdoors if the building includes a terrace. The smaller the dimensions of the structure, the higher the need to create this additional structural element. In self-made bathhouses made of 3x4 m or 4x4 m timber, the presence of a terrace will not only add usable space, but also give general appearance finished look of the building.
If the construction is carried out with your own hands, it is better to opt for a one-story building project. A bathhouse measuring 4x6 m will become excellent option. In this case, you need to make a support-column foundation. It is advisable to have 4 blocks in each cabinet. For walls will do profiled timber. The optimal height of the premises for such a bathhouse size is 2.15 m. For the construction of partitions, frame-panel technology can be used.

Structural features and overview best options for implementation. Recommendations for construction. Original ideas layouts.
Since the attic is characterized by a special temperature and humidity regime, the ceiling is additionally insulated from heat and moisture using film material or foil. Then the insulation is laid and the finished floor is installed. The ceiling is covered with clapboard.


Based on the calculated height, a stop for the rafters is formed. To do this, you need to take beams of the required length and install them as vertical supports. The timber is laid on top of them in a horizontal position. The supports are placed in increments of 1.5 m. During the assembly of the structure, you can do without cuts. Self-tapping screws or metal corners are used for fixation. To increase the reliability of the stop, you can secure it to the floor beams using corner boards.
On next stage The length of the rafters is measured. This takes into account the offset. In this case, 3.2 m is enough. Boards measuring 100x50 mm can be used as rafters. To build a 3x3 m bathhouse, 6 pieces will be enough. According to the technology, the outer rafters are installed first. Then you should pull a rope between them. This will allow the remaining roof elements to be laid evenly. The most reliable option for fixing structural parts is the notched method, but metal corners are also suitable.
Installation of a roof on a do-it-yourself bathhouse made of timber
Ondulin is the optimal material for roofing. It has a low cost and is of sufficient quality. If the installation of this material is done correctly, the roof will be solid. This eliminates the possibility of leaks, so there is no need to use hydraulic barriers.

For installation roofing material you will need a frame base in the form of lathing. Externally, ondulin resembles asbestos cement sheets. Unlike slate, its installation will require sheathing with more frequent placement of slats. As an alternative, non-stainless steel can be used to construct the frame. edged boards small width. They are more convenient when it comes to driving nails. When constructing sheathing, it is very important to ensure that all rows are placed level. If you have no experience, it is better to immediately lay out the first row, check its position, and only then start hammering nails.
Note! It is desirable that each sheet of ondulin be supported in four places. To do this, the slats are laid at a distance of 35-40 cm from each other.
Regular slate nails are suitable for fixing ondulin. The fastener is installed along the upper wave. The lower the roof slope, the more the sheets should overlap each other. In this case, it will be enough to overlap by about 10 cm. You need to hammer in the nails very carefully, otherwise you can damage the wave. If desired, a storm drainage system can be installed on the roof.

The space located between the wall of the bathhouse on the side where the slope rises and the rafters is filled with boards. At this point, all urgent work is completed. Now the log house can be left to shrink. During the winter, all deformation changes will occur, the relative humidity of the material will reach its natural value. If you don’t want to postpone the construction of a timber bathhouse for several months, you can continue work by starting to arrange the bathhouse from the inside.
Shrinkable bath flooring made from profiled timber
The floors in the bathhouse are formed according to the principle of a pie, where materials are laid in layers.
The optimal flooring layout looks like this:
- sand and crushed stone cushion;
- concrete screed 20-30 mm thick (no reinforcement required);
- extruded polystyrene foam boards;
- insulating film layer “Izospan D”;
- concrete screed 80-100 mm thick with reinforcement.

In addition, you will need to do expansion joints. To do this, 3 cm thick EPS sheets are cut. The seam is laid along the entire perimeter of the room, as well as around the base intended for installing the stove. At the same stage, the internal wiring water pipes and sewerage. Next, sand and crushed stone are poured onto the floor, after which the pillow is compacted. A concrete screed is poured on top of it. It is better to use a rule to level the surface.
When the screed is completely dry, you can lay Izospan. The canvases should be laid with a slight overlap on each other. The material should partially cover the expansion joint. All edge parts of the film and joints are fixed with adhesive tape. Next, the installation of polystyrene foam sheets is carried out.
Helpful advice! Experts recommend using extruded polystyrene foam boards 6-10 cm thick.
The slabs do not need to be fixed, but they should be laid as tightly as possible. After this, another layer of Izospan is laid, which is also fixed with tape. Next, a reinforced concrete screed is poured. When it dries, you can install heating equipment, and then finish the floors with tiles, porcelain stoneware or other materials.

How to build a podium for installing a stove in a bathhouse from timber
The base under the stove must be waterproofed. To make the equipment look aesthetically pleasing, it is advisable to build a podium of bricks 10 cm or more high on top of this layer. To do this, lay out two continuous rows. Before doing this, you need to provide protection from fire.
A rectangle is drawn on the floor according to the dimensions of the stove structure. The marking is done strictly at the place where the equipment will be installed. Next, you need to make allowances of 5-10 cm on each side and draw another larger rectangle.
Important! We should not forget that there must be a distance of at least 38 cm from the walls of the heating equipment to the lining of the room.

A protective sheet will be installed in front of the firebox door, the dimensions of which are 50x70 cm. The sheet should run along the stove. You need to mark the floor for its installation. If the fire door opens into an adjacent room, a protective sheet is installed there.
Taking into account the dimensions of the rectangle drawn on the floor, a part is cut out from a mineralite slab and screwed on according to the markings using self-tapping screws. A pair of continuous rows of bricks are laid on top. You can use red solid material, but fireclay would be preferable. First you need to soak the bricks in water.
It is better to fix the brickwork cement mortar with fire-resistant properties. The horizontal placement of each row must be checked. If there are deviations, the bricks can be knocked down using a mallet or their position can be adjusted by adding mortar. Next, the fireproof adhesive composition and with its help a protective steel sheet is fixed on the podium. Instead of metal, you can use porcelain stoneware, which perfectly withstands the effects of high temperatures. In two days it will be possible to begin installation of heating equipment.

Not only the floor, but also the walls of the bathhouse need protection from temperature and fire. Most often, protective screens in the form of brickwork, natural stone or porcelain stoneware are used for these purposes. The cost of building a bathhouse from timber increases due to this, but the result is aesthetically attractive. There are more budget ways, for example, applying a layer of plaster 2.5 cm thick over a metal mesh or installing a steel screen.
Note! A metal sheet made of stainless steel provides protection not only from heat, but also from infrared radiation.
Building a bathhouse correctly: technology for arranging a portal for a stove
To install the stove inside the bathhouse, a partition is formed between the relaxation room and the steam room. A pair of beams are taken (their length must correspond to the height of the premises), pre-impregnated with an antiseptic and installed vertically. Self-tapping screws and perforated corners are used as fasteners near the ceiling and floor. Similarly fixed horizontal jumper between the bars.

The result should be a frame base in the shape of the letter “H”. At the bottom there will be brickwork and the fuel channel of the furnace. The upper zone will be insulated and covered with clapboard. Plates basalt wool 10 cm thick are installed between the beams. Next, a horizontal sheathing is formed from wooden slats with a section size of 2 cm.
Using a construction stapler, you need to fix vapor barrier material with foil coating on each side frame partition. The lining is mounted on the sheathing using nails or clamps vertical position. Before making brickwork, it should be soaked in water. The material is laid level. A distance of 3-4 cm is maintained between the masonry and the timber. The fuel channel of the furnace should also be located at the same distance from the brick.
If there is a need to cut material, it is better to use a grinder for this. The use of steel corners will simplify the process of making the floor, because the brick will rest on them. When the masonry is completed, mineralite or basalt cardboard should be inserted into the gaps between the brick and the timber. The use of polystyrene foam or glass wool for these purposes is not allowed.
Helpful advice! By using wooden platbands You can cover and decorate unsightly areas with insulation between the timber and the brick.

If according to the project it is planned to build not only a portal in a bathhouse from timber, but also protective screen made of brick, the heating equipment is installed in its place immediately and covered with a film that will protect this area from dirt during interior work. In other cases, the stove can be installed after complete completion of construction and finishing.
Electrification of a bathhouse made of profiled timber: construction of wiring
When working with electricity, it is very important to adhere to all rules and requirements for installing electrical equipment. These provisions contain all the necessary information about the safe supply of electricity to the bathhouse, correct wiring wires and connecting devices.
First you need to decide how the power cable will be supplied:
- Airy.
- Underground.

The cable can be fixed directly on the external wall of the bathhouse, having previously hidden it in corrugated pipe or a protective plastic box. Since SIP is strictly prohibited from being inserted into the room directly, a box with a two- or four-pole circuit breaker is installed at the entry point. The hole through which the cable will be introduced into the room must be reinforced using a metal tube with grounding. A rubber tube cannot be used in this case.
A specialist who understands the design of networks for rooms where there is an increased level of moisture and temperature should work on drawing up the diagram. It is worth deciding what the connection will be: three-phase or single-phase. This affects the cable layout. Three-phase connection It is advisable if the bathhouse is installed a large number of powerful electrical equipment.
It is advisable to install electrical wiring according to the drawn up scheme using the open method. It is not only safe, but also convenient. You can hide the wiring under the casing only in the steam room.

To secure cables you can use:
- staples;
- porcelain insulators;
- cable trays.
Helpful advice! To add aesthetics to the wiring, it can be hidden under European baseboards or cable ducts .
- a step-down transformer;
- machine guns.

It should be installed as close as possible to the exit, since in this zone the temperature and humidity levels are the lowest in the room. The shield must be grounded, and also check that all wire fastenings are secure. Boxes, sockets and switches must be installed in the rest room. Installation of these elements in a steam room is unacceptable.
Electrical wiring installation standards:
Arrangement of door and window openings in a wooden bathhouse
For self-made door and window openings Experience working with wood and specialized equipment is required. It is much easier to purchase the necessary products ready-made. Moreover, the structures can be either wooden or metal-plastic. For installation, preparatory work will be required.

Existing openings need to be trimmed and leveled, since each beam is not adjusted during the laying of the log house. To do this, you need to apply markings on the wall with linear dimensions door and window openings. To cut, you will need an electric or gasoline saw. Using this tool you need to cut off the ends of the beams that protrude beyond the markings.
Next, based on 100x50 mm boards, boxes are made for installing door and window structures. If you don’t want to bother with making grooves and tenons, the parts can be assembled by driving nails into the end part. The frames prepared for the installation of windows and doors are placed in the openings and secured with self-tapping screws or nails.
Important! Between the box and top beam It is imperative to leave a free distance of 3-4 cm. More is not required, since the height of the bath is small. This is necessary in order to compensate for changes that will occur during the shrinkage of the building, otherwise the door may become blocked and window designs will lead.

The gap left in the upper part is insulated. Polyurethane foam or tow is ideal for these purposes. After this, you can install the doors and windows. If wooden windows are selected for the bathhouse, they should be secured to the casing with self-tapping screws. If you don’t want to drill the box, you can limit yourself to using anchor plates as window latches.
Installation metal-plastic structures requires professionalism and special skills. Therefore, the installation of such windows should be carried out by the company from which they were purchased. This approach will eliminate errors when installing structures and obtain a guarantee. The same applies to doors with double-glazed windows. The door in the steam room must open outward. This requirement is dictated by security considerations. External placement of crossbars and hinged hinges is done. Such an installation will exclude Negative influence temperature and moisture on these elements.
Interior decoration of a bathhouse: how to properly build and sheathe the frame
As a decoration for the washing room and steam room, you should use natural lining. Other material is not recommended for these purposes. The rest room is less demanding in this regard.

Wall decoration in it can be done:
- plywood;
- plastic lining;
- OPS, etc.
Of all the listed materials, the technology for installing lining is considered the most complex. To install it, it is necessary to build a supporting frame. This process requires effort and care. To make the frame, wooden slats with a section size of 50x20 mm are suitable. Before starting work, the surface of the walls should be leveled, eliminating strongly protruding parts. After this, the markings of the future frame are applied.
According to the marks, the outermost slats of the base are nailed in the corners. To install evenly wooden elements a level will be required. To do this, a rope is stretched between the outer slats. Based on it, you need to install the remaining frame slats. They are attached at a distance of 40-50 cm from each other. Next, you need to check the height parameters at the corners of the bathhouse. In this zone, the distance between the ceiling and the floor is measured.

Helpful advice! If there are differences in height between different angles, this defect can be eliminated on the last and first rows of the lining. To do this, the material is attached with a small gap near the floor and ceiling. 1-2 cm will be enough. The cracks that form during this process will be covered with baseboards. Baguettes must be nailed directly to the lining, and not to the ceiling base. Otherwise, during the shrinkage of the building, the cladding may become deformed.
To secure the lining to the frame, nails are needed. Optimal length fasteners 1.5-2 cm. These nails are driven into the groove of the lining, thus the material is fixed to wooden slats frame.
Methods for installing lining on a wooden frame made of slats
Lining elements can be mounted on walls vertically or horizontally. Methodology vertical installation panels is accompanied by one significant drawback. In this case, the heating of the lining along its length occurs unevenly. As a result, the service life of the coating is significantly reduced.

Vertical clapboard wall cladding is ideal for rooms with climatic conditions saunas. When operating in a steam room, high temperatures and low levels of air humidity are observed. To increase the circulation of air flow between the sheathing and the insulation, several small holes should be drilled in the lining.
When the panels are placed horizontally, the deformation changes that occur in the lining under the influence of temperature will be less noticeable. This method allows you to visually increase the size of the room, which is a definite advantage for a steam room small size. Horizontal fixation of the lining maintains air circulation, since the panels are attached to the vertical slats of the frame, due to which vertical gaps remain. Through such a coating it will be more difficult for rodents to penetrate the finish.
In general, anyone can handle the construction of a small bathhouse. To a large extent, the result depends on the diligence and quality of materials, as well as the correct adherence to technology. And such complex processes as designing an electrical wiring diagram and installing metal-plastic windows can be entrusted to professionals.
Building a sauna from 150x150 timber with your own hands: video instructions
Bathhouses can be seen on almost every suburban area. Buildings made of timber are popular and can be called both traditional and modern. Let's consider the step-by-step construction of a bathhouse made of timber with your own hands.
Stages of building a bathhouse from timber
. Laying the foundation
Any building requires a foundation, otherwise it will quickly collapse due to uneven ground vibrations. There are many options for arranging such a foundation, but in this case the most convenient would be columnar. A timber bathhouse is lightweight, so it does not require an expensive, powerful foundation.
do-it-yourself bathhouse made of timber. Schemes and drawings
For arrangement columnar foundation are used concrete blocks with dimensions of 90x60x30 cm. The construction site for a timber bathhouse is marked, the places where the main load will fall are identified, and it is there that the foundation blocks are installed. They are placed under corners and walls, as well as in the place where the stove will be installed. The blocks need to be immersed in the ground seventy centimeters. The optimal immersion depth is such that down side block reached the level of non-freezing soil.

With a bathhouse size of 3x5 meters, eight pieces of concrete blocks will be required. The specified size of the building is best suited for a log bathhouse in the country, because it matches the dimensions of the available material.
For foundation blocks, it is necessary to dig holes in a pre-marked area. Concrete blocks are lowered into them and leveled so that they are all on the same level. The surface of the foundation is covered with waterproofing material. Roofing felt is the most commonly used material.

. Walling
Let's consider further how to make a bathhouse from timber with your own hands. After laying the foundation, it’s time to build the walls. Before following the instructions for building a bathhouse, you need to make detailed blueprints future construction and construction scheme. All this is necessary to calculate the amount of materials and set a time frame.


To build a bathhouse of the specified size, it takes approximately five cubic meters timber with a section of 15x15 centimeters. The timber is laid alternately, connecting subsequent rows with the previous ones using dowels. To do this, holes are drilled in the material into which wooden or metal parts are installed. It is easier to work with metal ones, but they reduce the service life of the bath.


When building a bathhouse from timber with your own hands, you should pay attention to the fact that there are gaps between the crowns. Fill them out oakum or other sealing material. First, a layer of tow is laid, and timber is placed on it. When the walls are erected, all protruding edges of the sealant are driven into the seams.


how to make a sauna from timber with your own hands
. Roof construction
When building a bathhouse from timber with your own hands, they try to choose the structures that are easiest to construct. This is gable roof which is covered with slate.


First going rafter system made of timber with a section of 12x5 cm. For laying slate Cross boards are attached to the rafters. It is on them that the slate sheets are attached. This roof option is the most budget-friendly.


do-it-yourself bathhouse made of timber. Step by step photos
. Sewerage installation
It’s hard to imagine operating a bathhouse without sewer. To equip it, a pipe is laid. In the bathhouse, it should approach the place where the drain will be located, and its other end should be directed to the septic tank. A septic tank is being installed nearby. This can be a fairly deep hole, the walls of which are lined with moisture-resistant materials. The pipe should be deepened into the ground to provide a slope for natural outflow and to protect it from freezing in winter.


. Interior decoration
In the process of building a bathhouse from timber, it is necessary to pay attention to the interior decoration. For heating you can choose oven Compact 12B. It has a water tank. Since such a stove has significant weight, it must be placed on a foundation. It can be block or cast. A brick wall is laid around the door.


how to build a sauna from timber with your own hands. Step-by-step instruction
The walls and ceilings of the premises are sheathed with heat-insulating and waterproofing materials, for example, Penotherm. They are then covered with wood cladding made from hardwood planks.


A wall made of concrete blocks is installed between the dressing room and the washing room. The floor in the washing room is multi-layered. First, a layer of expanded clay is poured, which additionally insulates. A screed is placed on it. Then another layer of expanded clay and another screed are laid, but with a slope towards the drain. A pipe is installed there in advance, which is then covered with a grill. The floor is covered with boards. Larch would be preferable.


Further instructions for building a bathhouse include laying the floor in the dressing room. The soil is covered with roofing felt, on which sleepers or timber impregnated with antiseptics are placed. Another layer of roofing felt and floor boards are placed on top.
The pipe is discharged through a special opening. It is covered with two galvanized sheets, between which a sheet of asbestos is laid. In the attic, a sleeve is put on the pipe, into which expanded clay is poured.


Expanded clay is also poured onto the ceiling from the attic side. It protects against heat loss from above.
This completes the description of how to make a bathhouse from timber with your own hands.

Timber bath projects
Before building a bathhouse from timber at your dacha, you need to choose the most optimal project. Let's consider several options for such buildings.
Bathhouse with dimensions of three by four meters. Inside there are locker rooms, a steam room and a washing room. The optimal arrangement of components allows for maximum use of such a small space. The bathhouse has two windows giving daylight.

project of a bathhouse made of 3 by 4 timber. Photo
Project of a bathhouse made of timber with dimensions of four by four meters. Inside there is a fairly spacious dressing room with an area of 6.6 square meters. The area of the steam room is a little over four square meters, and the washing room is very small - its area is 2.4 square meters. meters.

project of a bathhouse made of 4 by 4 timber
One-story timber bath with dimensions 5x4 meters. The steam room is given about five square meters of area, the shower area is about three square meters. The main space is given over to the locker room, where you can create a relaxation area.

project of a bathhouse made of 5 by 4 timber
A bathhouse made of timber with dimensions of 5x5 meters is quite spacious. It has a space allocated for the vestibule so that cold air does not penetrate into the seating area. About half of the space is allocated for a shower and steam room. The rest of the room is equipped with a rest room.

project of a bathhouse made of 5 by 5 timber
A 5x6 m timber bathhouse with a spacious relaxation room with an area of almost twelve square meters. The vestibule is large enough to store fuel or other related items. Windows provide natural light and are absent only in the steam room.