Scheme of a lamp with a motion and light sensor. Motion sensor connection diagram: principle of operation and technical characteristics
A fairly common practice is sound and motion sensors in the house. We suggest considering how to make motion sensors with your own hands, instructions, diagrams and photos in our article.
The principle of operation of the device
The operation of the device is based on the reception and transmission of impulses emanating from fluctuations in air (or water, for example, in swimming pools) while moving (and it doesn’t matter what it is: a car, a person or an animal). The functionality of the device may vary, depending on the requirements for it. There are several types of motion sensors:
- thermal (react to temperature changes in the reachable field). The most striking example is an infrared or laser sensor, mainly used in security systems;
- sound (transmit and receive an impulse when air vibrates from sounds). A very simple device, used to fix movement in open space;
- oscillatory (responding to vibrations environment and change magnetic field when moving within reach). They are most often used in an apartment or house, to turn on or off lights, sound and other things.
How to make a sensor
Consider how the most common motion sensor for signaling is created. It is done on the basis of such a scheme
 Motion sensor circuit
 You need to prepare the following tools and parts:
- bulky body (can be taken from an old camera);
- Soviet-style control element base (buy at any electrical goods store or at a flea market);
- soldering machine;
- wires;
- screws;
- screwdriver;
Step by step execution guide
Based on the transistor, an autodyne is assembled, which has now become a local oscillator and a mixing device for signaling. As soon as air vibrations (movement) are detected in the field, which is guarded by the device, the signal level will change. It is fully consistent Doppler shift, and will be equal to several hertz.
Video: how to make a motion sensor with your own hands
Further, with the help of a capacitor (in diagram C2) and a low-pass filter (shown as C1, L3, the pulse will go to the alarm contact, which, in combination, will also be a filter part. Due to this, the pulse will reach its maximum and retain these parameters for a certain time. Resistor (on R11) will adjust the sensitivity of the circuit.
Comparators in this case are VD3 - a zener diode and a small relay (K1). Be sure to take into account that the nominal value of the mains voltage is 11 volts. Because of this, we recommend that you also connect a signal-boosting stabilizer to the circuit.
Step two: adjust the board to the desired parameters
At the top of our board is the antenna, it must be carefully polished and treated with degreasing solutions, it is very desirable to cover it with rosin or at least acetone, because there is a high probability of oxidation of the antenna material during its use.
Next, you need to wind the L1 coil and the L2 coil with twelve turns of small-section wire (we took PEL-0.23).
Using a screw with a diameter of 3, we screw the sleeve to the central hole of the future sensor, fix it, and check the strength of the connection.
Now let's start fitting our body. We measure it, it is necessary that the board enters the box freely, i.e. the body is either sawn, or another one is selected. In it we mark the place of the center of the board and there we also drill a similar hole, as in the diagram, process it with acetone, try on the board.
Three millimeters need to be drilled into the corners in the housing where the installation is carried out electrical circuit. Some deviation is allowed depending on your mounting screws.
Screws, bushing and plates can be taken of any material, but be sure to check the equality of the holes and legs. In some cases, you will still need to drill holes for future LEDs, but basically they shine through the case.
The simplest sensor is ready, in the assembled state it will look something like this. The installation is carried out according to a clear scheme: we attach a room lamp or a fluorescent lamp to the detector.
 Motion Sensor
 How to make a laser motion sensor
In the movies, everyone has seen lasers that signal the penetration of robbers into the bank. Making an electronic motion sensor with your own hands with a laser is also not as difficult as it seems. You need to prepare the following components:
- infrared diode or photodiode, depending on capabilities and requirements;
- capacitive relay type RES55A,
- wire circuit;
- transistor and resistor blocks;
- 5 volt charger;
- multimeter;
- other tools and parts (gasket, screws, soldering iron).
First, let's disassemble the charger. We expose the wires and find positive and negative contacts there. Further, according to the rules, you need to set our resistor to minus. Now we attach a diode to it using the cathode, and the anode must be soldered to the tuning resistor. Next, solder the transistor emitter to the negative wire, connect the resistor to the base circuit.
In total, we get: a resistor - a minus, a contactor - to a relay, a relay - a signaling device. The circuit diagram of the infrared sensor looks something like this:
 Schematic diagram of the motion sensor
 Using a screw, you need to attach this entire structure to the gasket, and bring the power wire to the screw head. Important: install the connecting screw so that it rests against the spacer spring, it is a sensitive part in this scheme.
This light alarm can be installed anywhere if there is a power outlet nearby. It is most logical to place it at the level of the legs.
Any of the above options can be customized to suit individual needs.
- The webcam itself can act as a motion indicator. If you connect it to the signaling device, then it will even make sounds, but in most cases it is enough just to download a special program to your computer;
- When attaching the sensor to the lighting system, make sure that there are no fans and large household appliances in its reach;
- To create with your own hands smart home» We recommend using the touch switch. The fact is that in most cases there is already a built-in motion sensor;
- Choose the diodes for your laser carefully. IR radiation can be harmful to the eyes, so it is not recommended for domestic use;
- Car alarms are made in a similar way. Only to circuit diagram an audible alarm is also attached. When the sensor detects movement, the light turns on and a tone sounds, just like a metal detector. Such a device is also called a radar sensor;
- If desired, include a capacitive display in the circuit, it will display the indicators "Work" and "Stop". Or connect the monitor to the circuit according to the principle of a webcam, and get a full-fledged home video surveillance network;
- It is quite possible to make a gsm alarm on a regular phone, for this you just need to download the program, just like on a PC.
If you need to carry out repairs, then all the indicators are disassembled very quickly and the main problem lies in the contacts, just clean them.
When there is simply no time to make motion sensors with your own hands, you can buy them at any electrical engineering store, good feedback about Grandway and Siemens models. The average price of the device is 500 rubles.
5 / 5 ( 1 vote)
To ensure the safety and increase the comfort of people, motion sensors have recently been added to ordinary lamps. They are designed to respond in the zone of their control - when moving, they transmit a signal through a wire to a lighting device that turns on the light. If earlier such devices were used exclusively for security purposes, today they have gained wide popularity in private houses and apartments. They perform the following functions:
- prevent the search for the switch in a dark room;
- save energy by turning off in the absence of movement fixation;
- can activate the alarm and scare off intruders.
Externally, such lamps are represented by a plastic rectangular or round box, which is covered by a Fresnel lens. Through it, the device monitors movements in the control zone. The Fresnel lens is made of a rather fragile and thin material, which requires special care when mounting the lighting fixture. Also, when installing, you need to consider what size people or animals will pass through the control zone of the sensor.
Motion sensor with built-in lamp
When choosing a luminaire with a controller, you need to pay attention to its appearance:
- motionless - does not move as the person moves;
- movable - turns in the direction where the movement was recorded, and is more often used for security purposes.
Depending on the type of sensors can be:
- active - work on the principle of an echo sounder;
- passive - triggered by heat detection human body.
As a rule, the range of the sensor is limited to 12 m. And when installing in a room or in a non-rectangular area, you will need to buy additional lighting devices with sensors.

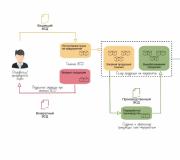
Motion sensor connection diagrams
Expert opinion
When choosing a motion sensor, you should give preference to infrared models. They react to the heat of the human body and are resistant to sound vibrations and vibration (as opposed to ultrasonic sensors that respond to temperature changes). They are the most accurate, but they require fine tuning, preferably professional.
Konstantin Kotovsky
Connecting the Motion Controller to a Lighting Fixture
Connecting the motion sensor according to the scheme is a simple operation that resembles connecting an ordinary switch. This is logical, because this device, like a switch, opens and closes the contact through the electrical circuit where the lighting device is located.
Usually, the connection diagram of the motion controller according to the diagram is attached along with the instructions or is shown on the packaging, the device case.
According to the diagram, there are 2 types of sensor power wire: phase (brown wire) and zero (blue wire). When a phase comes out of it, it is transmitted to one of the two ends of the lamp in the lamp and vice versa. When the controller is activated, the relay contact is closed, which leads to the transfer of the phase.
To connect the motion controller to the luminaire according to the scheme, you need:
- remove the back cover and find the terminal block. 3 wires coming out of the device body are connected to it;
- after looking at the diagram indicated in the instructions or on the case, connect the wire from the sensor to the corresponding wire in the device case;
- after connecting the controller, put on the back cover;
- to connect the wiring in the junction box, where there are 7 wires (3 from the motion sensor, 2 from the lamp, as well as zero and phase), the phase wire of the power cable is connected together with the phase wire from the motion controller. After that, the “0” wire from the power cable is connected to a similar wire from the lamp and sensor. Final stage- connection of the 2 remaining conductors.
Connecting a switch to a sensor
Some users of lamps equipped with motion sensors decide to connect through a common circuit and a switch. This is necessary so that the light in some cases burns regardless of the operation of the sensor, for example, if you need to stand still or turn on the light in a room or yard before entering it.

Wiring diagram for a motion sensor for lighting, for operation in two modes, as well as a switch + motion sensor
To connect the switch, you will need to follow a simple diagram that can be found on the Internet. According to it, the switch will duplicate the functions of the sensor, in some cases controlling the light in forced mode. This scheme involves the parallel connection of the switch and the motion controller.
When the switch in the circuit is active, the light will not go out for the required period, and when it is turned off, the lighting will be controlled through the controller.
Motion sensor settings
In addition to connecting according to the scheme, you also need to adjust the following parameters:
- illumination (LUX);
- turn-off delay (TIME);
- sensitivity to infrared rays (SENS).
By adjusting the time settings, you can set the length of time that the lighting will turn on from the moment motion is detected in the monitored area. Typically, this value for fixtures ranges from 1 to 600 seconds. Important role in setting the time interval, the speed of a person will also play. It also depends on it whether the controller will work or not. If a person passes quickly in the control area, it is better to reduce the light burning time. And vice versa - when installing such a device in a garage or utility room, it would be logical to set a large shutdown delay.

Setting motion sensors
As for the illumination parameter LUX, it corrects the operation of the lamp in the daytime and at night. If on the street or in the room the level of illumination has dropped to a certain level, the light turns on. You can also change the illumination threshold yourself.
Setting the LUX parameter to the highest scale division is recommended if there is little daylight in the room and vice versa.
In many motion sensors in fixtures, you can also adjust the sensitivity to light activation - SENS. The reaction of the controller depends on what level of sensitivity to objects is set there. If the motion sensor is triggered quite often, or “sees” the slightest fluctuations, the sensitivity needs to be reduced. A simple turn of the lamp to the desired point can also help in changing it. In addition, you can set:
- range (no more than the maximum, which usually reaches 10-12 m);
- volume (if you do not want the lamp to turn on due to a flying bird).
By the way, in many models that work on the street, reconfiguration should be carried out in winter and summer - some indicators in them may go astray.

Received higher education majoring in Fundamental Informatics and Information Technology at the Moscow state university named after M.V. Lomonosov. After that, he became an expert in a well-known online publication. After a while, I decided to try writing articles on my own. He maintains a popular blog on YouTube and shares interesting information from the world of technology.
The functions of the "smart home" include automatically turning on the lamp in the room as soon as a person enters it and turning it off when leaving. For this, a motion sensor is used, which closes the lamp power circuit, detecting movement in the room. After a specified time interval, if there are no repeated signals, the lighting is switched off.
Motion sensor in the room to turn on the lighting
The figure does not show the lead wires, since the wiring to it is made hidden.
Before you connect the motion sensor to the light bulb, you need to choose the right place for it. It is usually installed at the top of the corner of the room so that it controls most of the space.
Advantages and disadvantages
When deciding to install a device, you need to be aware of its positive and negative characteristics. The advantages include:
- economical energy consumption, since the lamp will always be turned off on time;
- constant scanning of the site and reliable operation when a signal appears;
- no need to look for a switch in the dark;
- the scheme provides for protective functions when the lamp lights up when strangers appear in the yard.
The disadvantages of sensors include high cost, false positives due to different reasons, work in limited temperature limits.
Types of motion sensors
- Infrared - triggering a change in thermal radiation from moving people. If the device scans the surrounding thermal background, it is called passive. Such sensors are more common because they are cheaper. When the device circuit contains a radiation generator and a device for measuring reflected rays, it is an active sensor.
- – reaction to a sound of a certain level, depending on the setting.
- Microwave - generation of radiation of short waves and response to a change in the reflected signal.
- Ultrasonic - generation of high-frequency sound and reaction to a change in the signal after it is reflected from objects.
The operation scheme of a device of any type provides for a reaction to a change in the parameters of the scanned space.
The principle of operation of the infrared sensor
The sensor captures thermal radiation from surrounding objects that enters the photosensitive sensor through a system of concentric segmented lenses (Fresnel lens). Their number is 20-60 pieces. The more of them, the higher the sensitivity of the optical system. The controllable coverage area is directly related to the surface area of the lenses. Installing a Fresnel lens (Fig. a) instead of the usual lens makes it possible to reduce the weight and dimensions of the sensor.

Fresnel lens (a) and ordinary lens (b)
The picture below in general view shows a diagram of the motion sensor. It does not react to background radiation, but to a sharp change in the heat flux from a person entering the room. The radiation receiver is a pyrodetector, which generates an electromagnetic field, which is directed to it by the optical system. Electronic circuit amplifies the signal and closes the electrical circuit of the lighting system. For this, a controlled semiconductor is used - a thyristor.
The conductance of the thyristor depends on the level of the input signal. If it is sufficient to operate the device, the control unit turns on the lamp. To change the sensitivity of the sensor there is a control device.

Scheme for switching on lighting from a motion sensor
The electronic unit provides for switching off the lighting after a predetermined time delay. In addition, it has a twilight switch to take the device out of operation during the daytime.
Selecting an installation site
The device should cover as much as possible more space in room. When installing, you should take into account the features of the room and the path of people passing through them. Due to the fact that the review is 120 0, the sensors are placed in the corner so that the rays pass through the entire room. Removing to the middle of the room will create uncontrolled spaces, although with right choice and installation on the ceiling, the view can be increased up to 360 0 . If the room contains turns, instead of one, several devices are installed, connecting them in parallel to each other, as shown in fig. below (c).

Motion sensor connection diagrams
The following must be avoided when installing the sensor:
- Do not install near radiators, appliances with electromagnetic radiation, in a drafty area, and in other places where the operation may be affected by extraneous signals.
- Obstacles in the line of sight can cause false positives. These can be bushes, trees, cobwebs, device contamination, etc.
- Do not expose the device to direct sunlight and artificial light from the lamp.
- The switched load should not be brought to the limit.
- Parallel connection of several sensors should be only through one phase.
Connection methods
The sensor connection scheme instead of a conventional switch is not much different from it, only the work is done automatically. The device is used to open or close electrical circuit.
The sensor should only be connected as shown in the diagram (Fig. a). The phase and neutral wires are connected to the sensor terminals (brown and blue, respectively), and the lamp is connected to the neutral wire and the output of the device, which is supplied with power when triggered.
All connections must be made with the mains voltage removed.
In order to turn on the manual control mode instead of automatic, switch contacts are connected in parallel with the motion sensor (Fig. b). If you need to go back, they open again and the motion sensor will again control the lighting.
The old light switch in the circuit is usually left. With it, you can turn off the motion sensor if it is not in demand or during repairs.
If one device cannot control the entire room, another sensor is connected in parallel to it (Fig. c).
If it is required to turn on a lamp, a spotlight or a group of lamps with a power exceeding the specified one, the signal from the device is fed to the winding of the magnetic starter, which, with its power contacts, will provide the required connections.
3 wires are pulled to the device from junction box: phases, neutrals and lamps. On its terminal block, you can see the designations of phase (L), zero (N) and lamp (A).
Do not confuse the connection terminals of the motion sensor. Incorrect connection can lead to its failure. The phase is easily found using a voltage indicator that does not respond to the neutral wire.
The connection is made through the terminal blocks, and the wires for the screw must be tinned, since the copper wire oxidizes over time.
Choice
The choice of sensor design depends on the installation location: outdoor, indoor, corner, wall, ceiling.
Sound switches
Often used devices that respond to sound, as they are cheap. Sound switch 00090 (manufacturer Argos-Trade, Russia) is connected in the same way as usual, it does not require a separate connection of the neutral wire. The device is installed in mounting box and has good sound sensitivity. It is used to automatically turn on lighting sources with a power of up to 100 W in corridors and stairwells.
In addition to the built-in sound sensor, the device has a light sensor that allows you to set the threshold for daytime operation.
Sound switch 00091 has similar characteristics, but a neutral wire is used for connection.
Motion sensor LX-01
The figure below shows a common motion sensor LX-01 (Feron, China).

Motion sensor LX-01
LX-01 has 3 settings:
- Turn-on time interval - the duration of operation from the moment of detection (up to 2 minutes). If a person continues to be in the coverage area, the device turns on again.
- Illumination level - below the adjustable threshold value, the sensor does not work. It is not necessary to operate the sensor during the day.
- Sensitivity - to eliminate random triggers, such as from the movement of pets. The radius of the coverage area is adjustable.
Specifications:
- scanning angle - 120 0 ;
- maximum detection distance - 12 m;
- supply voltage - 220 V;
- turn-on time - 5-600 sec;
- light sensitivity range - 10-2000 lx.
At low temperatures, the device operates up to -10 0 С.
DetectorLX1 consists of two boxes:
- hardware, consisting of a control board, a pyroelectric motion detection sensor and a light-sensitive photoresistor for controlling the level of illumination;
- mounting, with fastening of the device case and holes for input of wires.
The motion sensor can be mounted on a wall or bracket.
The figure below shows other motion sensors well-known firms in demand. They are reliable and fit well into any interior. Viewing angles can reach 360 0 .

Types of infrared motion sensors
The motion sensor can be built into the luminaire in the form finished product. It no longer requires a separate connection of lighting, and then a control system, as well as installation costs. The device is installed in place and immediately starts working, for example, the Steinel-L265S wall lamp. It covers a zone at a distance of up to 8 m, the viewing angle is 360 0 - 100 W, and the maximum duration of operation is 15 minutes. The lamp costs about 10 thousand rubles, but it will be more economical in terms of costs and time than when the circuit is assembled from separate parts.
Ultrasonic motion sensor
The device emits ultrasonic waves, and then the optical system captures them after reflection and sends them to the receiver, which, at a certain level, sends a signal to the electronic light switch. Manufacturers: Feron (China), Turck (Germany), Master Kit (Russia).
IN living rooms they try not to use devices, since ultrasound is negatively perceived by pets. They are used mostly in long corridors and on the stairs.
The advantage of the sensor is its low price, unpretentiousness to environmental influences and fixation of objects made of any materials.
The disadvantages include a short range and low sensitivity when objects move slowly.
Microwave motion sensors
The principle of operation and the scheme of the device are similar to ultrasonic ones, only the operation takes place in the microwave range. Recommended manufacturers: TDM Electric (China), Evroavtomatika (Russia, Belarus). The advantages include compactness, high range, the ability to pick up signals from slowly moving bodies, resistance to the external environment.
Their cost is higher compared to sensors operating on other principles. Signals can be picked up even behind partitions made of non-conductive materials, which often leads to false alarms. In places where people are permanently located, microwave sensors are not used, since microwave radiation is harmful to health.
Combined sensors
By combining the advantages of several methods of parallel motion control, the sensors compensate for the inherent disadvantages and work more reliably.
The universal device is the “Control-Lux 1100” sensor shown in the figure below (TD Pan Electric, Russia). The scheme of the device provides a response to sound and movement, operates at a distance of up to 12 m, is not afraid of moisture, is used for a lamp indoors or outside the house. The load is up to 1 kW.

Motion sensor "Control-Lux 1100"
DIY sensor. Video
You can learn how to make a full-fledged motion sensor with your own hands by watching this video.
Lighting control using motion sensors saves energy and creates comfort at home. It can be used with a soft start device for a lamp or a dimmer for. Infrared sensors are predominantly used. To install them, you need to know the rules of installation and connections.
Comfort, ease of use and energy savings are the three main advantages of one device. That's why we will tell you how to connect a motion sensor to a light bulb. It is important that this procedure is simple, and even a person who does not have special qualifications can handle it.
Choose a place for installation, the desired connection scheme, depending on the desired result, assemble the electrical circuit and check its operation.
The purpose of the motion sensor is to turn on the lighting
Motion sensor - a special electrical device that registers the presence of a person in the area of action and sends an electrical signal to the controller. The latter controls various appliances, including lamps and chandeliers. The use of the element simplifies the operation of lighting devices, increases the level of safety.
The first detectors were used at large production and storage facilities for security purposes. Behind last years the cost of detectors has decreased significantly, so the products are more often used at home. Motion sensors work automatically and send a signal to the controller of lighting fixtures and other devices, including alarms.
And yet, in everyday life, detectors are more often used to automatically turn lights on and off. In some cases, a parallel connection is made to the home security system (a separate switch is installed that activates part of the circuit) - during the absence of the owners of the house, the electrician protects their property from unauthorized access. The same is organized in the offices of directors and other important premises in enterprises.
Externally, the device is a plastic box of a rectangular or round shape. The hole is covered with a matte film with the function of a Fresnel lens. A source of infrared radiation is installed inside - the waves are fed through the window on the sensor. With their help, control over the presence / absence of a person in the controlled territory is carried out.
Important! The Fresnel lens is made of soft and delicate material, so during the installation process, act as carefully as possible so as not to damage the structure.
Selecting a Detector Model
Before installation, select the model and functionality of the device, depending on the goals pursued, the dimensions of the room and the operating / triggering conditions.
Devices are divided according to the method of determining a person in the detection zone, they are passive and active.
- The principle of operation of active ones resembles a standard radar - the emitted infrared waves are reflected from an object and recorded by a Fresnel lens. There is a default location of objects - if it has changed, then the sensor is triggered.
- Passive devices register the heat radiated by the human body.
- Combined sensors combine the functions of active and passive.
Active devices operate in the ultrasonic range or at high radio frequencies. In the first case, there are restrictions up to 20,000 Hz. A person does not hear this sound, but domestic animals perceive it, which is why they behave restlessly. The conclusion is simple - if there are animals in the house, it is pointless to use ultrasonic motion sensors.
Elements operating in the high radio frequency range bypass obstacles - walls and furniture, therefore, they determine only the movement of certain objects. With a technically incorrect choice of the connection point, there is a possibility of a false alarm from the swaying of trees, foliage, and the movement of people in the neighboring room. Add to that the high cost.
Based on the foregoing, it becomes clear: to automate the lighting control system in an apartment and a residential building, it is recommended to take passive motion sensors.
Round devices, which are mounted to the ceiling, have a detection zone in all directions - 360 degrees. Wall-mounted elements operate under different horizontal and vertical corners- usually 180 and 20 degrees. respectively.
In most cases, the motion sensor is not able to cover the entire volume of the room, and the detection area becomes smaller. Therefore, it is very important to choose right place installation, tilt angle, to control the most passable places.
Sensors differ in detection range. For medium devices, this figure is 12 m. For domestic use more than sufficient. In the case of a non-standard shape of the room, the presence of several corners or floors, several sensors are installed.
When considering the design of devices, they are divided into mobile and fixed. In the first case, the user can make changes to the registration area by moving the device along the vertical or horizontal axis, and in the second case, this cannot be done.
Selecting an installation site
Timely and correct operation of the motion sensor to turn on the light is associated with the choice of installation location. Follow these tips:
- Regardless of ceiling or wall mount installation is carried out closer to the door - as soon as a person enters the room, a signal is sent to the controller and the light turns on instantly.
- Avoid installing the element on the central part of the wall, which can make the door disappear from view.
- If possible, use sensors in rooms without windows. If this is not possible, then try to move them away maximum distance from any source of daylight. Otherwise, flexible adjustment of the degree of illumination is required.
- If there is more than one door in the room, then it is necessary to install several devices for automatically turning on / off the light. You can install one sensor located in the corner of the room if the detection zone covers both doors.
- When using devices on the landing, they should be mounted above the stairs or to the ceiling, which will allow the device to register movements from above and below.
Wiring diagrams
Three contacts are displayed on the motion sensor - “zero”, power and output current supplied to the lighting device. Depending on the number of elements of the electrical circuit, different schemes connections.
Connection of a luminaire with a motion sensor is carried out according to the scheme indicated in the attached instructions or on the detector body.
One sensor
Very simple circuit. One pin is connected directly to the phase, the other is used for ground, and the third connects the sensor and the lighting fixture controller.
With switch
A conventional switch is connected to the same circuit, which is necessary so that the light does not turn off or turn on, regardless of the presence or absence of a person in the room, as well as the degree of its illumination. The switch is connected exclusively in parallel.
It is important to note that the switch performs only one function - constantly on or off light. One position of the switch disables the control of the detector (and keeps the light on or off), the other activates it.
Multiple sensors
Due to the non-standard shape of the room, it may be necessary to use several motion sensors. If you install one device in a curved corridor, then it cannot be guaranteed that it will work correctly. In such situations, you need to connect two or more devices in parallel, depending on the length of the room.
The zero phase is continuously supplied to each device, after which the outputs from them are connected into one wire and connected to the lamp. If at least one sensor is triggered, then voltage is applied to the lamp and it turns on.
Important! All motion sensors in a circuit must be connected to the same phase to avoid short circuit.
Various interior objects can interfere with the high-quality installation of an electrical element. Choose a location that provides the maximum viewing angle, foreign objects did not shield the operation of the device.
The power level of the products is in the range from 500 to 1000 W, which limits their use in high load. If the motion sensor must supply power to several lighting fixtures, the total power of which exceeds the recommended one, then add a magnetic starter to the circuit. LED devices consume a minimum electrical energy and less demanding on power.
If the luminaires contain multi-core cables, then use special lugs (sleeves) NShVI.
Installation procedure - step by step
Choose where the lamp and motion sensor will be installed. Install the element by removing the stand and fixing it to the wall or ceiling. The mounting height is not less than 2.2 m. Strip the ends of the wires connected to the sensor by 10 mm.
Open the cover of the detector and you will see a distribution unit with three contacts and multi-colored wires. Blue N - "zero", red-brown (purple) L - phase, yellow or green - grounding.
Connect voltage to the sensor by connecting terminals L and N with current-carrying cables in accordance with the color. Insulate each connection point using couplings, electrical tape. When connected via a double/triple type switch, one of the pins is used to supply power to the motion sensor.
If the phase supply from the detector to the light bulb is reversed, then the circuit simply will not work. On the other hand, a short circuit will not occur - swap the wires. The same connection method is used for the direct plug circuit - the detector functions from the socket like a conventional electrical appliance.
At the next stage, the sensor is connected to the lighting device. Connect the phase leaving the housing to the end of the wire coming from the lamp. Perform isolation. Connect the other end of the light bulb cable to the "zero" on the sensor.
Important! Total power used in the chain of lamps should not exceed the specified value of the detector, otherwise the latter will fail.
Setting up and adjusting the device
The first step is to set the time during which, from the moment of registration of the last movement (presence) of a person, voltage is applied to the lighting device. It ranges from one second to ten minutes.
To choose the right time, follow these tips:
- when illuminating the stairs, it will take 3-4 minutes, since no one lingers here for a long time;
- the supply of light in any room should take 10-15 minutes, because pastime can be both short-term and long-term.
To avoid false alarms, it is necessary to set a response delay after the initial motion detection. The parameter also ranges from one second to ten minutes, and the choice of a specific value is determined depending on the speed of movement of a person. Since people move faster through the corridor, the minimum delay is set.
The detector is equipped with a LUX toggle switch, which is responsible for the level of illumination. Here you need to focus on the fact that the sensor is triggered at times when the room is less lit. The toggle switch is set to the minimum or average value in those cases when the device is operated in a room with big amount windows and other sources of natural light.
To set the sensitivity of the element, use the SENS toggle switch. The choice of value is related to the distance from the moving object and its dimensions. If the sensor worked falsely and turned on the light in the room for no reason, then you need to reduce the sensitivity. Reverse actions are needed if the sensor did not turn on the light when entering the room.
Troubleshooting
One of the most common installation errors is poor contact of the neutral wire. This can happen when construction debris gets into the motion sensor terminal or a weak clamp, which causes carbon deposits or oxidation. If the detector does not work, then inspect all the wires, strip them and tighten the clamps well.
Another cause of failure is deformation or breakage of the aluminum core. Connect a voltmeter to the device. Be careful as the device may not operate even if voltage is present. If this happens, then replace the bulb with a new one, as the problem may be due to a burnt filament.
Another malfunction in the motion sensor is due to the fact that the lighting device does not turn off, despite correct work detector. Check what time was set in the settings. Perhaps it is too large and the output contact opens for a long time. Decrease the parameter using the appropriate toggle switch.
Only when correct connection and technically correct setting of the motion sensor can be achieved maximum savings energy, comfort and ease of use automatic system lighting. At home, it is recommended to use passive detectors, which are characterized by lower cost.
The use of a motion sensor to activate the lighting at the moment of approaching the lamp significantly increases the level of comfort in the house/office/apartment. A miniature device manages the system for you, allowing you not to worry about such trifles. The power consumption is reduced, and you can easily install it yourself.
An economical device from all sides is worth acquiring. Do you agree? We will tell you how to connect a motion sensor to a light bulb. The article presented by us provides technological rules and schemes available to a novice electrician. Placement options are listed, the specifics of the setting are described.
The main purpose of the motion sensor is switching electrical network. It can work both with an active load in the circuit, and with an active-inductive one. Any movement in the controlled area first of all starts the process of determining the level of illumination (if such a function is provided in the device).
If the indicator is below the set threshold, the device closes the contacts and turns on the lamp. Thus, the detector can work both at night and during the daytime. The threshold is set with the help of regulators, it can be from 3 to 2,000 Lx.
In everyday life, devices are most often installed, the operation of which is based on capturing electromagnetic oscillations of waves in the infrared spectrum. The time after which the detector is triggered in case of detecting a moving object is also configurable.
Turning the knob sets the exposure mode. At different models the delay time can be adjusted from 10 s to 7-15 min (small error is allowed).
The operation of detector devices is based on motion detection or on the detection of a person in the field of view
Landmarks of a competent choice
Different models may have different purpose. Some are only for managing internal lighting fixtures, others are more versatile and can be used for circuits with electrical appliances, with alarm devices, with.
Sensors can be with limited and circular view, have different angles of horizontal and vertical observation. Wall mount devices monitor the area at an angle of 110-120° or 180° horizontally and 15-20° vertically.
Models with a movable viewing organ make it much easier to set up, but stationary models do not have such an opportunity, so you need to choose a placement more carefully for them.

For models with limited visibility, the viewing angle can vary and range from a few units to hundreds of degrees. When choosing a device, it is necessary to consider what area the device can control
All-round detectors can cover the monitored area at an angle of 360° horizontally. Their viewing area has the shape of a cone, expanding downwards. Despite the large control zone, areas that are not visible (outside the radius, in the corners) still remain in the room.
To install the sensor outdoors or in rooms with high humidity, it is necessary to choose a device with high resistance to external factors (dust, moisture).
For example, devices with a protection degree of IP20 can only be used in indoor areas with normal humidity, with IP33 installation on the street is possible - on a terrace, a porch, an arbor. With IP44, it can be mounted outdoors, but protected by a visor from water drops during precipitation.
You can buy a ready-made complex from. The article recommended by us will acquaint you with the features of its selection and installation.
Placement and orientation
The general rules for installing sensors are as follows:
- installation height above the observed surface can be from 2.5 to 4 m (the parameter depends on the device model);
- when choosing a mounting location, take into account the fact that the detector is more sensitive to movement that occurs across the observation area;
- The total load power of the lamps is limited and can be, for example, from 60 to 1200 W for incandescent bulbs and from 0 to 600 W for fluorescent illuminators.
Temperature also affects the sensitivity of the detector. The range of temperature values at which the device normally performs its functions is from -20 to 40 ° C.

Methods for installing motion sensors on the example of TDM ELEKTRIK devices: DDPt-01 is mounted in a cartridge; E27, DDT-03, DDT-02, DDT-01 are installed in the mounting hole for spotlights(diameter at different devices differs and can be 40-65 mm); DDSK-01 can be mounted in the wall, ceiling, luminaire housing
It is forbidden to install lamps:
- on vibrating surfaces;
- near fans, air conditioners;
- on glossy white wall surfaces;
- near heat sources -, lamps;
- on surfaces exposed to direct sunlight.
To avoid false triggering, avoid exposing the infrared detector to sources electromagnetic waves, wind and heat flows.
It is also impossible for it to fall into the action zone - a gradually cooling thread will trigger the detector, since it will react by switching on to a change in its temperature.
This can continue indefinitely - the light will turn on and off. False alarms can also occur in windy weather due to swaying branches.

When choosing the installation location and location of the sensor itself, it is necessary to take into account: installation height, ambient temperature, make sure that there are no interference
How to install the device and connect it to the lamp?
To begin with, consider the installation of a motion sensor using the example of models that are installed in holes designed for spotlights.
The installation sequence is as follows:
- Turn off the mains voltage.
- Remove the protective plastic cover (Fig. 1).
- Connect the conductors (Fig. 2). The manufacturer indicates the connection diagram on the device itself and in the device passport.
- The fixing springs are bent, directing them upwards (Fig. 3).
- Install the sensor in the prepared hole (Fig. 4) - the springs will fix its position.

The wiring diagram for mounting motion sensors that are installed in the holes for spotlights is indicated on the back side. It may vary slightly for different series of devices.
It is easier to install a sensor that is screwed into the cartridge. Then a light bulb is screwed into it. In this case, it is necessary to use only those lamps that are not more powerful than indicated in the device passport. It is advisable to purchase those designed to work in tandem with detectors.
To install a remote sensor in the ceiling, wall or luminaire housing, insert the device into the prepared hole, screw the housing to the mounting surface using self-tapping screws. Next, you need to turn off the mains power and connect the phase and neutral conductors of the supply cable to the terminals according to the diagram.
Testing and configuring the motion sensor
Each device has at least two controls. Testing and tuning is performed according to two main parameters - the duration of the glow (TIME) and the response sensitivity (LUX). The first indicator means the period of time for which the sensor leaves the lamp on.
With each recognizable movement, the countdown of the duration of the glow starts from the beginning. It can be adjusted by the user from 10 s to 4 min.
The response sensitivity of the device is also a configurable value. With it, you can adjust at what level natural light the light will turn on. Thus, you can set the lamp to turn on during both the day and night, or only at night.
Starting the motion sensor into operation, it is mandatory to test it. To do this, set the light level control to the position corresponding to daylight. The time control knob is set to the minimum.
After connecting to the power supply, you must wait about 30 seconds - the sensor will work and turn on the lighting also for 30 seconds. Next, direct the sensitive area of the sensor to the area that should be monitored, check the sensitivity and range.
Test whether the time interval for the operation and operation of the lamp corresponds to the set parameters. They also check the operation of the device at night and finally set the parameters that are comfortable for themselves.
More complex devices that are used for security purposes also have a range controller (SENS) in their design. With it, the sensitivity zone is adjusted. The sensors are also equipped with a built-in microphone with a noise level control (MIC), at which the device should work.
The last two regulators are rarely used for inexpensive sensors, since their functionality in domestic conditions is rarely in demand.
Options for connecting an IR device to a lamp
Using various schemes connections and additional devices, you can achieve a wider functionality of the motion sensor. For example, expand the controlled area, disable automatic control lighting system or temporarily control a lighting group without the participation of a motion sensor, etc.
Connection for switchless control
The circuit consisting of a lamp and a detector is the simplest. It is applied by the manufacturer on the back of the device or described in the attached instructions.
When arranging elongated rooms, along paths in the yard or along the perimeter of the building, one device for detecting movement is not enough to control the lighting - its limited view does not allow this.
In such cases, two or more detectors are used. Their terminals of the same name are connected by parallel circuit and then lead to the lamp.
Connecting to a light bulb with a switch
To disable the auto-on system, which is based on motion detection, in working scheme add a switch. Connect it to the section of the incoming power cable in front of the sensor.
In the on position of the switch, the circuit works in the same way as if it was drawn up without it. When it is turned off, the motion sensor module is completely de-energized and the system does not work.
If it is necessary that when a person is in the room, the light is on, while being in a fixed position does not lead to turning off the lighting, then the following scheme is used.
A switch is connected to the input and output phase conductor of the sensor - thus, a branch of the electrical network is created, bypassing the main section. Now, using the switch, you can turn on the lighting, which will not depend on motor activity in the controlled area.

In this circuit, the switched on switch shunts the section of the electrical circuit passing through the light control sensor. This connection creates more comfort when controlling the lighting fixture.
Practically proven wiring diagrams for a lighting control device using a switch are disassembled and, which we highly recommend reading.
Conclusions and useful video on the topic
Video #1 How to connect the device according to a simple scheme and configure it:
Video #2 Two options for connecting the sensor to a lamp with a switch:
The way you connect the motion sensor to the lamp depends largely on the goals you plan to achieve. Based on the fact that it is necessary to organize automatic lighting in an apartment or on the street, near a guarded building or garage, a device and a working scheme are selected.
Want to talk about how you connected the motion sensor to the light bulb with my own hands? have useful information on a topic that can help site visitors? Please write comments in the block form below, place a photo in it and ask questions.