Do-it-yourself renovation of a private house. Drawing up a design project and estimate
You bought new house or does your existing home need renovation? Each of us knows that repair is a useful, but very lengthy procedure. It must be approached responsibly and conscientiously. And you definitely can’t rush in this matter, because any defect can lead to irreversible consequences, which may, over time, force you to carry out the repair again. But you want the repair to be done quickly, efficiently and painlessly. Everything will be so only if you take the time and approach this issue with all seriousness, choose the desired design and carefully make all the calculations.
DIY renovation of a private house
Where to begin DIY repair a private house ? First of all, you need to decide what kind of repairs your home needs. And this can only be determined after a high-quality inspection of the premises has been carried out.
As for private houses, it is imperative to look at the foundation of the premises at the very beginning. After all, the fate of your future home depends on its condition. In case of the slightest damage, it is necessary to DIY house foundation repair. This may be superficial reinforcement of the foundation, or it may require its complete replacement. It all depends on his condition. The cost will depend on the type of work. Only after the foundation has been inspected and brought into proper condition can you move on to other types of work.

If you are interested in the question: “?”, then carefully read our article, in which we will reveal the sequence of work in a private house. After repairing the foundation, you need to carefully inspect the walls and roof of your private home. If the walls and roof leak, all internal repairs will be in vain, the wallpaper may come off, and stains will remain on the walls or ceiling. And these are just the best variations of the consequences after a building gets wet. If necessary, you need to strengthen the walls and replace the tiles.

Private houses are usually colder than apartments in multi-storey buildings. Therefore, it is impossible to do without additional insulation of the building. First of all, it is necessary. Insulation in this case will not only prevent cold from entering the house, but will also serve as additional strengthening. As we know, the roof of any house bears the greatest load and, accordingly, the greatest impact from environment Therefore, it is through the roof that the most cold air enters the house. This suggests that the ceiling and roof need insulation the most.

In addition to roof insulation, you will also need. In private houses and apartments on the first floor, moisture and cold come out from the ground and foundation. It will be very cold to walk on such a floor, and in the cold season there may also be a feeling of dampness. But frozen feet can cause a wide variety of diseases. Therefore, you should not delay insulating the floor, especially if there are small children living in the house who love to crawl and lie on the floor.

You shouldn't give up either. Insulation can be carried out both from the inside and from outside. It is very difficult to judge which option is better. The only plus in the direction of external insulation is that it is carried out on the outside of the building and, accordingly, does not eat up usable area Houses. Therefore, it is better to focus on insulation from the outside of the building, especially if your house is no different large sizes. In this case square meters better to save it.
WITH general repairs at home the issue is resolved, that's it internal views the work has been completed, now you can safely carry out do-it-yourself private house renovation from the inside. The issue of repair is not an easy one, especially when a lot of effort, time and material resources have already been spent on the previous stages. But, most often, internal repairs cannot be done without. Where to start renovating a building?
First you need to decide what type of repair you will need: major or cosmetic? The choice of type of repair will determine not only the total cost of the work, but also the time it takes to carry it out. Redecorating much simpler in type and quantity necessary work, accordingly it is cheaper. This type of repair is a complete replacement of interior decoration. That is, the old wallpaper, paint, etc. are removed, the walls are plastered, and prepared for new finish. On next stage new wallpaper is pasted, walls are painted, tiles are glued, and so on. If necessary, the floor covering may also be replaced.

In the case of a major overhaul, everything is much more complicated. Here you may need to replace electrical wiring, air conditioning and ventilation systems, as well as sewerage. Agree, the task is not an easy one, and it’s also quite expensive. In addition, replacing all equipment for normal life will take a lot of time and nerves. So thinking about major renovation, immediately set yourself up for a lot of problems. Unfortunately, they cannot be avoided. Therefore, if you are just about to purchase a new home for your family, carefully review the condition of the house. Believe me, if the wallpaper has peeled off the walls, it’s not as bad as if the sewerage system in the house has worn out over time.
When starting a renovation, almost all of us try to save money. But, as they say: the miser pays twice. This applies to several stages of repair, which are definitely not worth saving on. In some cases, the savings will not affect the condition of the house and interior decoration, but in others it will result in irreversible consequences. So what should you not save on when doing renovation work?

Let's start with the fact that there is no need to save on basic building material who bear the primary responsibility. Among such materials, it is worth noting paint, putty, plaster and primer. Agree, it’s much easier to replace wallpaper than to do a complete interior decoration if the plaster or putty starts to peel off? Therefore, we suggest that you better save on wallpaper by choosing not too expensive models. Wallpaper that is simpler and cheaper does not always last less or look less bright. If you have taste, then you can use fairly cheap wallpaper to do interior decoration that will look much better than decorating the room with expensive and higher quality wallpaper.

It is extremely important to purchase only expensive and high-quality plumbing elements, which include pipes and all possible connections. This is especially true for those who plan to hide pipes inside the walls. In case from high pressure and a low-quality pipe will burst, you will have to break the wall to find the problem, fix it, and then do it again Finishing work. But you can immediately choose high-quality pipes, the condition of which you won’t have to worry about for a long time.
Wiring is also not a component of the house on which you could save money. Many people often use aluminum wires for wiring. But in reality they are not so high quality and durable. Copper wires are considered much better, although they are much more expensive. But it’s definitely not worth saving on them. In addition to wires, it doesn’t hurt to purchase good quality protective devices, protecting the building from voltage surges, as well as on the number of circuit breakers installed in the distribution panel.

DIY home renovation video includes not only repair work of the foundation, roof, walls, replacement of wiring and pipes, as well as strengthening of floors. Repair is also high quality interior decoration premises, which is assigned a task no less important than the building itself. Your home should bring you pleasure from being in it, give you positive emotions and lift your spirits. Having spent a lot of money and time on repairs once, you should not think about it for many more years.
Inner space The home should be cozy and comfortable for the household. Each room should be decorated in accordance with the purpose of the room, location and wishes of the person who will constantly be in it. Design options in Lately it got even bigger. Modern styles so many that it is very difficult to single out among them the one that is most suitable for decorating the rooms of a private house. Each is good in its own way, has its own advantages and disadvantages. Therefore, you should choose only according to your personal considerations and preferences. If you are more attracted home comfort, warmth and comfort, then you should opt for a classic or country style. These two directions will bring into the atmosphere of the room all those components that you have long dreamed of. The classics have been loved by everyone for centuries, and will remain popular for the same period. Therefore, choosing classic style, you definitely won't go wrong.

Country attracts with its cuteness, home environment. Many people attribute this style to rural areas. The thing is that Country includes many elements in its design. self made, including a variety of blankets, chair covers, candles, vases and so on. And all this is done with your own hands. The interior is dominated by a lot of textiles warm colors, Stuffed Toys and lots of decor. Agree, such an interior will look very nice and comfortable.

IN recent years Styles such as Minimalism and Art Nouveau are gaining particular popularity. Of course, they are very fashionable and ultra-modern, but at the same time they cannot be called cute and homely. The fact is that they are quite strict, there is practically no decor, everything is stylish, strict and laconic.
Do-it-yourself house renovation photo– this is not an easy task and you need to approach it conscientiously so as not to make mistakes and not perform the same work several times.

And here repair wooden house with your own hands a little more complicated than a brick one, but if you try, there won’t be any problems. Never rush, and then you can create a warm and cozy nest for yourself and your family. All your efforts will always pay off. The main thing is to take into account all our recommendations and carry out repairs in good faith. And if you don’t have special skills in performing repairs, and even more so, complex work, it is better to seek help from specialists than to do it yourself, but not correctly.
Repair is a sore subject for most owners. country houses and apartments. It often takes a lot of investment and effort to make rooms look stylish. modern look. Do not know, how to renovate an apartment with your own hands inexpensive and fast? Replacing windows, painting the ceiling, re-gluing wallpaper, covering the floor - all this can be done without outside help quickly and inexpensively. At correct selection materials and a little more effort, you can make high-quality and beautiful renovation with modern finishes.
The area that requires the participation of a specialist if repairs or replacement is necessary is electricity. Most economical option in this case, it is a call to a specialist. Installation of sockets in the apartment can be carried out without his help. The cheapest way to rent tools for apartment repairs is to rent them.

Photo of inexpensive ceiling repair
Before starting inexpensive repairs, first of all, determine suitable design and a plan is made. Best time for repairs it is autumn. In warm weather they are carried out facade works, A interior work performed with the windows open.
In addition, prices for materials are always reduced by 15% by autumn. Many materials, such as putty, plaster, sealant, assembly adhesive, leveling screed, have limited period expiration date, and the store sells it at a big discount in the fall.

Photo of inexpensive room renovation
If you need to replace old plumbing for a quick repair, you can try to restore the old one, but if this is not possible due to significant damage or chips, you can buy the plumbing second-hand. Many new settlers in apartment buildings they replace new equipment immediately after moving in, and the equipment, when it goes to a landfill, is sold by the employees of this organization at a bargain price.

Photo of the bathroom before inexpensive renovation
Removing construction packaging and garbage is a rather expensive repair item in an apartment, but if you wish, you can take everything out in bags to the nearest trash can.
How to choose the right materials for inexpensive repairs
Plywood, beams, slats, boards can be bought on the building materials market. The slats for cladding can be taken unplaned. Croaker is bought raw in advance and dried. By autumn, this material dries completely when purchased in the spring. plywood required thickness can be taken from waste packaging material (containers). The material can be made waterproof using two buckets of PVA-based putty.

Photo of inexpensive bathroom renovation
The floor is covered with film. The temperature should not fall below thirteen degrees. A sheet is laid out. Putty is poured into the center and applied to the ends with a paint brush. plywood sheet covered with plastic, another sheet is laid, the puttying process is repeated until all sheets are covered.

Photos of inexpensive home renovations
A bend is placed on a stack of putty plywood (over the entire surface). After a week, the sheets are turned over and puttied on the other side, then also pressed. After two weeks, you can use moisture-resistant plywood. Thick timber and boards can also be taken from disassembled containers and pallets. Inexpensive option for finishing walls and ceilings, this is covering the surface with laminate, MDF.

Handsome and inexpensive repair in the bathroom
If slab stitching is done on a wooden sheathing, leveling the surface is practically not necessary. Wall covering in an apartment can be done at chest or waist level, the remaining space can be finished inexpensively and quickly with non-woven wallpaper.
Inexpensive finishing for quick renovation
An economical type of flooring in an apartment is marmoleum. For wet areas this material is not suitable. For baths and toilets, any type of tile is used. When using laminate, the floor requires leveling before installation. For the walls in the bathroom you can use laminated hardboard.

Photo of inexpensive flooring in an apartment
If it is necessary to insulate or glaze the balcony, this is done in spring period. The outer part is covered with siding. The internal part is finished with plywood with surface gluing self-adhesive film. Used for windows wooden frames, which you can install yourself. Windows are purchased in early spring, installation closer to summer.

Where to start inexpensive repairs
The doors can simply be updated. The door is sheathed on both sides with moisture-resistant plywood. Plywood is glued to removed door using assembly adhesive, then everything is placed under pressure. Before gluing the sheets, the previous lining is removed from the door. Afterwards, the door in the apartment is covered with self-adhesive wood-like tape and varnished. The slopes are covered with the same plywood.
Old plumbing fixtures can be inexpensively cleaned of contaminants using acetic acid and washing powder. For stubborn stains rapid elimination hydrochloric (technical) acid is used. Cracked tiles can be restored quite easily. First cleaned with pemolux and vinegar.
The edges are covered with masking tape. The seams are painted with two layers (from a spray bottle) of nitro paint. Splashes and drips are removed with solvent, the tape is removed.

Photo of a beautiful inexpensive bedroom renovation
Tiles and seams are sprayed after cleaning silicone grease(liquid) from a can. The lubricant is applied until it stops being absorbed. After three days, the silicone surface is wiped with vinegar. Cast iron bath can get a second life after painting with epoxy or acrylic compound. The heated towel rail in the bathtub is cleaned down to the metal surface and coated with a compound.
Useful article: DIY liquid wallpaper, made from paper
Before repairing, it is better to look at the photo, then make a plan and get to work. Make the apartment attractive appearance It is also possible with the help of inexpensive repairs, which can be done fairly quickly.
Looking for ideas on how to change the interior of a private home? For your inspiration, we have collected here 40 photos of rooms before and after renovation. From small decorative changes to complete space redesigns, here you will find examples of effective design solutions for different tastes and budgets.
The most common problem of small private houses is the lack of free air in the space. The reason for this may be small windows, too bright suffocating color scheme, massive furniture, curtains, etc. By eradicating this reason, you can make any interior of a private home look freer and more elegant.
- Replace massive floor furniture with lighter models with thin legs;
- Place a large mirror;
- Clear the windows;
- Remove closed cabinets and put open shelves or shelves in their place;
- Replace large patterns on carpets, curtains and wallpaper with smaller patterns;
- Choose a cool color scheme (not lighter, but fresher);
- Get rid of massive lamps.
Let's look at following photos Interiors: Which of the above methods were used to redesign these rooms?


How to make the interior of a private house more comfortable
Often the problem is completely opposite to the previous one. The lack of comfort and warmth in a room can be no less depressing than their excess. To make the interior of your private home more cozy and welcoming, try applying some of the above tips in reverse, i.e.:
- Use large patterns instead of small ones;
- Choose a warmer color scheme;
- Use a few antique or faux-worn items;
- Hang a chic oversized chandelier on the ceiling;
- Decorate the windows with heavy curtains.
At the same time, you don’t have to install massive furniture at all, because the interior can become cozy without unnecessarily cluttering the space. This can be facilitated by the same open shelves with many bright trinkets, thin , carpets on the floor, paintings or photographs in frames, etc.

But if you don’t want to take on the responsibility of caring for big amount interior details, then go the other way. Select dark color for one or more walls, warm and bright shades- for massive upholstered furniture, and add to all this several sculptural decorative items, such as floor lamps, floor statues, tall houseplants, large paintings, etc.


We save the interior design of a private home from chaos
Does your interior look too jumbled and unfocused? This may be due not only to clutter, but also to an overabundance of different shades, patterns and decorative items. To make the interiors of a private home look more calm and elegant, designers can use the following methods:
- Create a central point around which all other decorative items will be focused (fireplace, painting, Wall Clock, coffee table);
- Divide the interior using different carpets or other floor coverings, and organize separate ordered zones on each of them;
- Use oversized multifunctional furniture with additional storage compartments, as well as glass and acrylic furniture;
- Add an object to the room that will unite everything else (for example, if the room has a lot of decor in blue, pink and green tones, then you can buy a rug or large wall art that will combine these 3 shades);
- Add shiny mirror or metal surfaces. They will easily smooth out any excess in your interior, be it an excess of shades or an abundance of any material, for example, wood;
- Place items symmetrically or balanced ( );
- Add a vertical accent that will visually increase the size of the room. To do this, it may be enough to replace or rehang the curtains so that they appear longer, install high shelves on the sides of the fireplace, buy high shelves, hang wall decor under each other, etc.


When the interior of a private home just needs a bright style
Neutral color palette makes you bored? Do you think that the interior of a private home lacks the brightness of life and style? Or maybe you just wanted to radically change the background and environment? In this case, we offer you 10 examples spectacular transformations rooms in the house that will tell you in which direction to move. You can also read the following articles on our blog for inspiration:
This is how it looked before the renovation... Rotten wooden frames, covered on the outside with double film, from the cold and wind... On the left old veranda with a sagging porch canopy...

For those who are about to make repairs in their home, it seems...
These were the windows and window sills.

We started putting the house in order from the foundation.

We open the corners of the house one by one, remove the rotten crown logs using a chainsaw, install the formwork, lay large stones and crushed stone, lay the reinforcement so that its ends remain open (for subsequent fastening it to the poured foundation), wrap the crown log with roofing felt and fill it with concrete. There you have it. finished cabinet.

And so on all four corners of the house and its middle, around the perimeter. Total - 8 cabinets. The process is labor-intensive and difficult, but the result is worth it... When the cabinets were finished, we made a pile around the entire perimeter. The continuation of external work was postponed until next summer. And we got busy internal renovation Houses...
This a large room and let's start with it. This is what it looked like before the renovation:

This is her right corner... and this, in the photo below, is the left corner. In the process of writing the topic, I will stick to these two corners...


First, we completely tore off all the layers of old wallpaper. The windows were still old, but we were already waiting for specialists to install plastic windows.
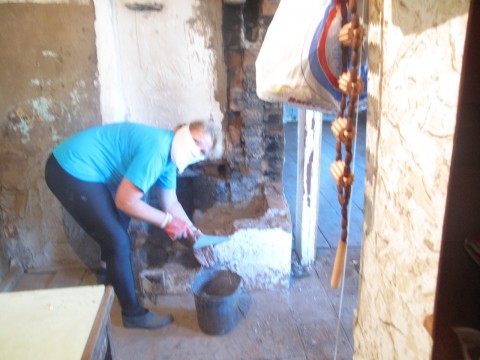
The old stove was dismantled...and the stove maker put together a new one.


AND THE RESULT DID NOT KEEP MYSELF WAITING LONG...I decided to close one window completely and make one big one - there will be a dining room there.


After installing the windows, the men began to dismantle the old floor, level the joists and place brick cabinets under them...

Then they laid the floors with old boards (they will last for a very long time, since they are thick and dry), and in places where there were rotten ones, they replaced them with new boards.

I installed a metal profile frame for the walls and ceiling... my mistake was that first you need to do the ceiling, and then the walls, and not vice versa. I found the technique for performing this work on the Internet, I won’t go into detail on it. If you If you have any questions, I will be happy to answer what I know...

Attaching the frame to the ceiling is much more difficult, my neck hurts...

When the metal frame is completely ready, you can sew gypsum boards onto it, preferably in a checkerboard pattern, starting from the ceiling! Don’t forget to spread out the electrical wiring and hide it in the corrugated channel, behind the profile, and install the distributor boxes in a place convenient for you.

In this photo you see wooden blocks, I screwed them on for later mounting of bookshelves. I attach exactly the same ones, only thinner, under the ceiling above the windows (for attaching cornices).
When all the walls and ceiling are covered with gypsum board, we putty with a putty knife and level all the joints between the sheets and the places where the screws are screwed in with this compound...

We lay along the corners and seams reinforced mesh for the strength of the joints, and after everything is dry, we sand it and apply a primer to the walls and ceiling.
And now the most interesting moment - wallpapering. I took white vinyl for the ceiling and with delicate roses for the walls...

When the wallpaper was dry, I mutually agreed
I invited a team of craftsmen to finish their work in this room on the windows (slopes and window sills).

After that, I glued the ceiling plinth, hung the shelves on the wall, put my flowers on the window sills, which the guys from the company had already installed for us...


The carpenter helped install the interior door, only later did I find out that it was upside down... (what difference does it make!) as long as it functions normally...

Doorways pasted a white corner on liquid nail. WITH right side The stove is new and heats all the rooms at once.
The firebox itself is located in the bathroom...

I laid underlayment on the subfloor, then fiberboard and linoleum. Then floor skirting boards I screwed it on with self-tapping screws and voila - beauty!!!

Here's the thing about this big room...
Some of you wanted to see more details about the concrete cabinets, so I added the details... So, the windows are installed, the house is sheathed on the outside flat slate and a pile was made around the house until next summer...
Now let's continue with exterior work, after the cold winter and spring...next summer.
When all the cabinets are ready, gradually, opening each side of the house from the rubble, we remove the rotten logs of the lower crown, wrap the dry ones with waterproofing,

we install the formwork, lay the reinforcement, connecting it to the ends of the reinforcement corner cabinets and fill it with concrete...


This is how it looked before the renovation... Rotten wooden frames, covered on the outside with double film, from the cold and wind... On the left is an old veranda with a sagging porch canopy...
For those who are about to make repairs in their home, it seems...
These were the windows and window sills.

We started putting the house in order from the foundation.

We open the corners of the house one by one, remove the rotten crown logs using a chainsaw, install the formwork, lay large stones and crushed stone, lay the reinforcement so that its ends remain open (for subsequent fastening it to the poured foundation), wrap the crown log with roofing felt and fill it with concrete. There you have it. finished cabinet.

And so on all four corners of the house and its middle, around the perimeter. Total - 8 cabinets. The process is labor-intensive and difficult, but the result is worth it... When the cabinets were finished, we made a pile around the entire perimeter. The continuation of external work was postponed until next summer. We started renovating the house internally...
This is a large room and let's start there. This is what it looked like before the renovation:

This is her right corner... and this, in the photo below, is the left corner. In the process of writing the topic, I will stick to these two corners...


First, we completely tore off all the layers of old wallpaper. The windows were still old, but we were already waiting for specialists to install plastic windows.
The old stove was dismantled...and the stove maker put together a new one.


AND THE RESULT DID NOT KEEP MYSELF WAITING LONG...I decided to close one window completely and make one big one - there will be a dining room there.


After installing the windows, the men began to dismantle the old floor, level the joists and place brick cabinets under them...

Then they laid the floors with old boards (they will last for a very long time, since they are thick and dry), and in places where there were rotten ones, they replaced them with new boards.

I installed a metal profile frame for the walls and ceiling... my mistake was that first you need to do the ceiling, and then the walls, and not vice versa. I found the technique for performing this work on the Internet, I won’t go into detail on it. If you If you have any questions, I will be happy to answer what I know...

Attaching the frame to the ceiling is much more difficult, my neck hurts...

When the metal frame is completely ready, you can sew gypsum boards onto it, preferably in a checkerboard pattern, starting from the ceiling! Don’t forget to spread out the electrical wiring and hide it in the corrugated channel, behind the profile, and install the distributor boxes in a place convenient for you.

When all the walls and ceiling are covered with gypsum board, we putty with a putty knife and level all the joints between the sheets and the places where the screws are screwed in with this compound...

We lay reinforced mesh along the corners and seams to strengthen the joints, and after everything is dry, we sand it and apply a primer to the walls and ceiling.
And now the most interesting moment - wallpapering. I took white vinyl for the ceiling and with delicate roses for the walls...

I invited a team of craftsmen to finish their work in this room on the windows (slopes and window sills).

After that, I glued the ceiling plinth, hung the shelves on the wall, put my flowers on the window sills, which the guys from the company had already installed for us...


The carpenter helped install the interior door, only later did I find out that it was upside down... (what difference does it make!) as long as it functions normally...

I pasted over the doorways with a white corner using liquid nails.

I laid underlayment on the subfloor, then fiberboard and linoleum. Then I screwed the floor skirting boards with self-tapping screws and voila, beauty!!!

Here's the thing about this big room...
Some of you wanted to see more details about the concrete cabinets, so I added the details... So, the slab windows were inserted, the outside of the house was sheathed with flat slate and a heap was made around the house, until next summer...
Now let's continue with exterior work, after the cold winter and spring...next summer.
When all the cabinets are ready, gradually, opening each side of the house from the rubble, we remove the rotten logs of the lower crown, wrap the dry ones with waterproofing,

we install the formwork, lay the reinforcement, connecting it to the ends of the reinforcement of the corner pedestals and fill it with concrete...


We make brickwork on the finished foundation...

Everyone works for us!!!

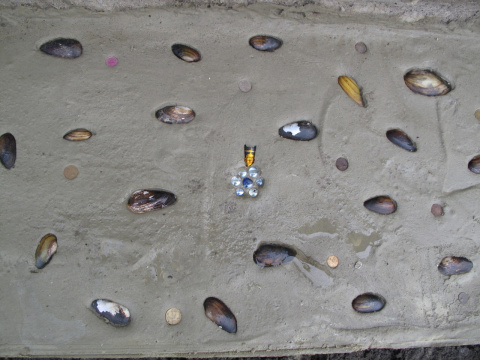
And as expected, a blind area was made... not quite ordinary...


That's all for exterior work and home renovation. If you have any questions, ask, I’ll be happy to know what I know, and I’ll answer. And for everyone who is interested, a continuation of the interior renovation - the dining room!