Minimum temperature for potatoes in open ground. How long do potatoes grow from planting to harvesting?
Even without delving into statistics, we can say with 100% confidence that potatoes are a popular product that is grown everywhere, despite the striking difference in conditions - from the damp, cool North-West to the hot steppes of southern Russia. And this is only in the European part of the Russian Federation.
The widespread practice of planting potatoes on the May holidays has only one explanation - combined weekends are the best fit for this. Planting potatoes from the Far East to the Baltic in these 3-4 days is not the best choice: in the southern regions the soil has already lost winter moisture, and in the north it has not yet warmed up.
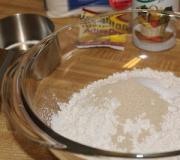
Soil temperature is the determining factor that is easiest to focus on. The rest - structure, humidity, breathability - are somehow related to temperature.
There are no exact dates for planting potatoes, even for a specific area. The only sure guideline for starting spring field work is the ripening of the soil. It is necessary to choose those few days when the soil has warmed up sufficiently, but has not yet lost its supply of winter moisture.
Experienced summer residents know that the yield and quality of the crop depends on the timing of sowing potatoes. There is a simple explanation for early planting of tubers:
- Early planting gives an early harvest. No one has canceled the growing season, and you can gradually enjoy early young potatoes 40 days after planting.
- Early planting is the best prevention of various viral potato diseases. It has been scientifically proven that viral diseases on garden crops are spread by sucking insects, in particular aphids. By the time of the mass summer of aphids, potato bushes have time to grow stronger and become resistant to many diseases.
- The earlier potatoes are planted, the higher their yield, which is confirmed by statistics.
Dependence of potato yield on planting time (Northwestern Federal District of the Russian Federation)
Note:
Traditionally, summer residents calculate potato yields in buckets.
- 100% means that from 1 bucket of potatoes a harvest of 1 bucket was obtained;
- 600% - 6 buckets of potatoes are obtained from 1 bucket, which is considered the norm for the region.
In other regions, only the timing in the 1st column differs, the trend remains: the maximum yield is observed with early planting.
Potato planting dates - how not to make a mistake
You also cannot rush into early planting of tubers: it is completely pointless to plant potatoes in frozen ground. It is necessary to take into account the main factors that affect the timing and find a middle ground.
The weather is the weakest link in making plans. The forecast for 1-2 weeks before the proposed planting should be monitored. Sometimes you have to completely rebuild carefully constructed plans - no one will plant in the rain and mud.
Weather conditions are a decisive factor in the “ripening” of soil. The soil is “ripe” and ready for planting vegetable crops when the required humidity and temperature are established.
Agronomists are unanimous in the opinion that it makes sense to plant potatoes only when the soil temperature at a depth of 10-12 cm is +7...8°C. Experienced summer residents know that this temperature of the top layer of soil is established when the average daily air temperature does not fall below +8°C. 
Soil temperature and growing potatoes
This lower threshold is like “absolute zero” for tubers - starting from a temperature of +7°C, potato roots begin to sprout and work actively. If the temperature is lower (combined with high humidity), there is a high chance that the potatoes will simply rot. If the bed has not had time to warm up, you can use a life hack.
In extreme cases, sprouted tubers can be planted in cold (3...7°C) soil.
Potato sprouts can withstand temperatures starting from +3°C - slowly, but still develop. The risk is justified if warming is expected in the near future.
It is also undesirable to delay planting tubers. Well-heated and dry soil does not contribute to the rooting of potato sprouts. In the absence of soil moisture, the plant has only the water supply in the tuber to form a bush.
Let us recall that the mass of a standard seed tuber does not exceed 100 g - it contains no more than 50 ml of water. There can be no question of a full-fledged potato harvest without high-quality watering.
Soil structure and warming up times
Within one garden plot, let alone an entire region, the soil map can vary significantly. How quickly the bed warms up and matures for planting potatoes depends on the mechanical composition of the soil.
- Light soils, sandy and sandy loam, quickly warm up and very soon lose their water supply: literally and figuratively, “water goes into the sand.”
- Medium-density soils, light and medium loam, are the most successful option for growing garden crops. The bed warms up quickly and retains a supply of melted winter water for a long time.
- Heavy loam and clay complicate the agricultural technology of growing potatoes, since the soil warms up and ripens slowly. This is not critical, since preparatory operations (cutting combs, etc.) help to cope with the problem.
The presence of clay in the composition makes the soil moisture-absorbing. The silicates that make up clay chemically bind water molecules. The heat capacity of the soil increases - the bed warms up much longer.
In this case, the presence of a significant amount of water is rather a disadvantage: water has the highest heat capacity - it delays the maturation of the soil. Potato planting dates are being pushed back.
Among summer residents, there is an idea of chernozem as a separate type of soil. This is not so: the very concept of “chernozem” speaks only of a significant content of vermicompost, but not of the main component of the soil - sand or clay. In the same way, sandy loam chernozem and nutritious loam are found. 
How to determine that the soil has warmed up for planting potatoes
It would be good for open ground beds to calculate suitable planting dates from temperature measurements, as is practiced when growing vegetable crops in greenhouses. Using a thermometer in the garden does not give an accurate picture - the soil warms up differently in different areas.
How can we determine that, on average, the earth has warmed up to +7...8°C at a depth of 10-12 cm? It is impossible to take into account all possible factors - moving day shadow, the angle of inclination of the site in relation to the sun's rays, preliminary preparatory work on the site, uneven soil composition, groundwater occurrence, etc.
Traditionally, summer residents, and not only others, are guided by signs based on centuries-old observations of nature and the phases of plant development.
Traditional methods for determining when to plant potatoes
- buds opening on a birch tree;
- cherry blossom.
In fact, these events occur at intervals of 7-10 days. We can summarize:
- the earliest start of planting corresponds to the opening of birch buds;
- Bird cherry blossom is the latest date for planting potatoes, when it is no longer possible to postpone field work.
Scientific methods for determining timing
City summer residents will not come to the site to trample barefoot on the beds. It’s easier to wait for warmer weather, when the risk of frost has passed, and plant your couple of hundred acres of potatoes.
For planting tubers, the optimal temperature is from +12°C to +15°C, which approximately corresponds to the established daytime temperature of approximately +16...20°C.
You should definitely take into account the composition of the soil and do not delay planting in sandy loam areas. 
How to increase soil temperature
In order to plant potatoes earlier, including in areas with heavy soils that warm up slowly, preparatory work is carried out.
- In the fall, ridges are cut for early planting of tubers. The soil raised above the level of the bed dries out and warms up faster - it is ready for planting 10-14 days earlier.
- Deep plowing of the site shortly before the planned planting allows you to dry the top layer of soil and warm it up, since it is done by turning the layer over.
- Organization of warm beds, when the top fertile layer seems to lie on an air cushion of plant waste.
The local temperature of the bed layer also increases due to the introduction of organic fertilizers, humus or compost.
Each summer resident has his own approach to determining planting dates: one closely follows weather forecasters, the other watches the trees. Despite the differences in methods, the goal is the same: not to miss the optimal time for planting tubers. I was delayed for 2 weeks - the harvest was 1/3 lower.
What conditions are necessary for growing potatoes? How to grow potatoes in a summer cottage?
South America is the birthplace of potatoes. And today you can find its wild varieties there. It is a plant from the nightshade family and is related to eggplant, peppers and tomatoes.
➣ Some vegetable crops are completely unpretentious, for example, rutabaga, cabbage, onions, carrots, parsnips, parsley, radishes, lettuce, beets, spinach.
In Russia, potatoes began to be eaten relatively recently - just over 200 years ago. In the modern world, potatoes have become one of the most important food products for many people, for which they have earned the title “second bread”. It contains a very large amount of starch, which is therefore in second place after cereals. Therefore, due to their role in nutrition, potatoes are often classified as starchy foods.
Useful properties of potatoes
Potatoes contain many vitamins, such as C, PP, D, K, E, group B, folic acid and carotene with carotenoids, potassium salts and many other useful elements. In addition to potassium and sodium salts, it contains mineral compounds of calcium, magnesium and manganese, iodine and copper, sulfur, phosphorus, fluorine and chlorine. The composition of potato tubers includes a small amount of complete proteins and sterols; citric, malic, oxalic and other organic acids.
The main biological feature of the potato plant is its ability to form tubers on underground stems-stolons. The tuber has eyes - these are buds that appear in the axils of scaly, underdeveloped leaves. The maximum number of eyes is in the upper part of the tuber, i.e. at the top. The fewest of them are in the lower, umbilical part of the tuber, which is attached to the stolon.
Potatoes have a fibrous root system; most of it is located in the fertile soil layer at a depth of 20-25 cm.
Necessary conditions for growing potatoes. Agricultural technology for growing potatoes
Potatoes love light, sandy, fertile, loose soil with a slightly acidic reaction. The most favorable soil for plants is a soil with a pH value of 5.5-6. Stolons and tubers develop well in loose soil, because the potato root system consumes more oxygen than the roots of other plants. Normal access of oxygen to the root system ensures good taste and friability of the tubers. In dense, clayey soil with increased moisture, small and often severely deformed tubers with low taste are formed. Compost and sand must be added to such soils before planting potatoes to improve their physical properties. Although potatoes can withstand high acidity, they also respond well to liming.
Potato is a light-loving plant. Shaded places are not suitable for its cultivation. Lack of light leads to the stems stretching and turning pale. The plant blooms poorly and produces very small tubers or few tubers. Under normal conditions, the plant stem reaches 40 - 80 cm in height. Early potatoes are grown in a well-lit area where the soil is sufficiently warm.
Potatoes are planted only in an area dug up in the fall to a depth of 25-30 cm. The shallow fertile layer is gradually deepened, adding 3-5 cm every year, thus gradually increasing the depth to 28-30 cm.
Before digging, add 30-50 kg of rotted manure or good compost for every 10 m2. Fresh manure creates a risk of tubers becoming infected with various diseases. Along with organic matter, it is advisable to add wood ash - 1-1.5 buckets for every 10 m2. On poor and sandy soils, organic matter is introduced in large volumes - 70-90 kg for every 10 m 2.
In the fall, phosphorus and potassium fertilizers are scattered and covered: per 1 m2 - 20-25 g of double granulated superphosphate and potassium sulfate. If fertilizers were not applied to the soil in the fall, this is done when digging the site in the spring.
In the absence of organic fertilizers, mineral fertilizers are used: in a volume of 150-200 g of ammonium nitrate or 300-500 g of ammonium sulfate, 500 g of superphosphate or 100-150 g of urea per 10 m 2. It is advisable to replace ammonium nitrate with ammonium sulfate, and potassium chloride with potassium sulfate or potassium magnesium, which also contains magnesium. The addition of magnesium, especially in acidic soils, improves the quality of tubers (starchiness). Intensive phosphorus-potassium nutrition accelerates crop ripening and increases plant resistance to diseases and low temperatures.
Nitrogen fertilizers are added only in spring. When cultivating potatoes, they are treated with caution. Excess nitrogen increases disease damage. Tubers that have accumulated nitrates are worse stored. Excess nitrogen with a simultaneous lack of potassium causes darkening of the tuber pulp and loss of taste.
The soil for potatoes cannot be fertilized with ammonium chloride, sodium chloride and kainite. It does not tolerate the effects of chloride salts, which reduce yield and worsen the taste and starchiness of tubers.
It is best to plant potatoes after cabbage and various root vegetables. It cannot be cultivated after tomatoes. They have common pests and pathogens. You can repeat planting potatoes in the same place only after 2-3 years.
Potato propagation is carried out vegetatively using healthy large tubers weighing 60-100 g, whole or cut. Such tubers produce a harvest earlier and more than small ones.
The preparation of tubers for planting begins in the fall. First of all, they are greened immediately after harvesting, then solanine is formed in them, giving them resistance against putrefactive bacteria. It is best to plant selected tubers of early varieties by spreading them in 1-2 layers in an open area in a shaded place. During the greening period (8-15 days), the tubers need to be turned over 2-3 times. These potatoes should never be eaten or fed to animals, because solanine is poisonous.
➣ Among the crops that do not require light include vegetable plants from the group of cabbage, onions, greens, root vegetables and all perennials.
During storage, make sure that the tubers are well ventilated and do not sprout. Tubers are germinated only before planting. During storage, tubers lose a lot of water, so before germination, keep them in water at room temperature for about 10-12 hours. Then they will germinate well and give a high yield. The tubers are laid out for germination 30-45 days in advance. In order to receive ultra-early products, this must be done 60-75 days before planting. For germination, tubers are laid out in a bright room in a single layer on the floor, shelves, racks, shelves or in small boxes.
In the first week, seed potatoes should be kept at a temperature of +18-20 °C, and later at + 10-15 °C. If there is no suitable room for laying out the tubers, a small number of them can be sprouted by stringing them on twine, wire or nylon fishing line. Stringed tubers are hung on the veranda or in another bright place. For the same purpose, use plastic film: pour the tubers into bags made from it. In the bags, holes of 1.5-2 cm in diameter are made every 10-12 cm. Bags with tubers are hung in a bright room, from time to time they are turned in different directions and the potatoes lying in them are transferred. Every 6-10 days, the tubers are inspected and those with diseased or thread-like sprouts are removed.
If it is intended to obtain very early products, the sprouted potatoes are checked again after 28-32 days. Throw away all diseased and degenerate tubers. Healthy tubers are placed in a box for wet germination, sprinkled with humus, peat or sawdust in the following sequence. First, pour a layer of humus or other material 3-4 cm thick, put the tubers on top with the sprouts facing up, carefully covering them with a layer of material. This is how 3-4 rows of tubers are laid. It is best to moisten the humus with a solution of mineral fertilizers. A bucket of water contains 60 g of superphosphate and 40 g of potassium sulfate. After 5-6 days, the transfer material is again watered with the solution until completely moistened, adding 40 g of ammonium nitrate to the fertilizer.
You can carry out wet germination without preliminary exposure to light. To do this, the tubers are immediately laid out and processed in the described way. It is advisable to maintain the temperature in the room within +14-18 °C. You can speed up the germination of tubers by dusting them with stove ash or spraying them with a solution of copper sulfate. For 10 liters of water - 1 g, 150 g of solution per 10 kg of seeds.
Tubers of mid-late and late-ripening varieties, allocated for harvesting in August-September for winter storage and consumption, should be heated for 7-10 days at a temperature of +10-15 °C. If possible, they are also sprouted.
Is it possible to save energy on planting potatoes and get a good harvest? Easily! - says the famous gardener Andrei Tumanov
http://www.forumhouse.tv/video/69/
Potatoes grow quite well in any climatic region. For a good potato harvest, looseness and breathability of the soil and normal water regime are important. ( discussion of the peculiarities of growing vegetable crops)
| Light | Potato is a light-loving plant. For uniform lighting, potato rows are oriented from north to south. |
| Ph soil acidity | 5.0-5.5. Although potatoes tolerate acidic soil, the yield is higher after liming. |
| Watering potatoes | Excess moisture immediately after planting a tuber prevents the formation of a deep root system. The maximum amount of water is consumed during the period of potato budding and flowering and before the tops die off (watering rate is 10 liters per 2 bushes). After abundant watering, the soil is loosened and mulch. 20 days before harvesting potatoes, watering is stopped. |
| Preparing for landing | Autumn digging of the soil is carried out to a depth of 30 cm and, better, with a turnover of the layer. For autumn digging, up to 300 kg of manure and 1 kg of ash are added per hundred square meters. Spring digging is carried out 4 cm smaller than autumn digging. Only high-quality tubers are selected for planting. Before planting, the tubers must be warmed up, germinated and greened in the sun. It is a good idea to treat the tubers with growth regulators (Epin, Zircon, Krezacin, Albit, Immunocytophyte, etc.). To stimulate bud germination, a deep transverse cut is made on the potato tuber (around the entire tuber), leaving the tissue in the center intact (1-2 cm). |
| Fertilizers | Potatoes love organic fertilizers Manure can be applied directly to the crop, which can double the potato yield, but this will increase the risk of potato scab. Manure can be applied to potatoes in two ways: by scattering it throughout the area or by placing it in furrows or holes (on the same day). You can use peat manure composts (3:1). On average, 5-10 kg of organic matter is added per 1 m². Instead of manure you can use green manure(green fertilizers), which will enrich the garden bed with organic matter, is equivalent to applying 200 kg of manure per hundred square meters. Mineral fertilizers for potatoes use ammonium nitrate (before planting 1 kg per hundred square meters) or urea (1 kg per hundred square meters before planting), double superphosphate (1 kg per hundred square meters in spring or autumn), potassium sulfate (2 kg per hundred square meters in spring or autumn) , angry at (5 kg per hundred square meters). From complex mineral fertilizers, nitrophoska (5 kg per hundred square meters) or nitroammophoska (3 kg per hundred square meters) is applied to potatoes before spring digging. Light sandy soils need magnesium, which is added in the form of magnesium sulfate (at the rate of 80 g) or dolomite flour - 20 g per 1 m². When the height of potato seedlings is 10-12 cm, fertilizing is carried out with nitrogen fertilizers; potassium fertilizers are fed during the first hilling. Liquid fertilizers are prepared from 30 g of nitrogen and potassium fertilizers, 60 g of phosphorus, dissolving them in 10 liters of water. Water the soil around the potato bushes with the solution. If there is growth retardation, you can feed mullein infusions or bird droppings. Liquid consumption is 1-2 liters per bush. Late potato varieties are fed twice a season. When fertilizing, you need to avoid getting the solution on the green parts of the potato bush. Feed ash potatoes are needed at the rate of 20 g per bush. Good results are achieved by foliar feeding with macro and microelements. For 10 liters of water, 40 g of ammonium nitrate, 200 g of superphosphate, 10 g of potassium salt and 2 g of copper sulfate (solution for spraying one hundred square meters). The solution is infused for 4 hours, stirring occasionally, and the potato plants are sprayed in the morning or evening in dry weather. At the end of flowering, foliar feeding of potatoes with phosphorus fertilizers is effective, which accelerates the outflow of nutrients to the tuber (1 x superphosphate per 10 liters of water). Before the potato blooms, tubers form on it; after flowering, new tubers will no longer appear, but those that have formed will increase in weight. Potatoes do not like chlorine. With excessive doses of nitrogen and calcium, scab appears on potatoes. It is better to add nitrogen simultaneously with potassium, and limit the use of ash. Potassium and phosphorus fertilizers increase the resistance of potatoes to diseases. In places of distribution late blight, rhizoctoniosis, bacterial diseases, scab, the doses of potassium (2 times) and phosphorus (1.5 times) should be increased. |
| Good predecessors | Good predecessors of potatoes can be green manure, beets, cabbage, cucumber, greens. |
| Bad predecessors | Potatoes are not recommended to be planted after plants nightshade family |
| Potato planting time | Potatoes are planted in late April - early May (when leaves appear on the birch tree). For planting, use healthy tubers aged in the light (30-45 days at 15 ° C), 50-80 g each; if the tubers are larger, they can be cut into pieces after germination, but they are not suitable for early planting, because may rot. The planting material is ready if thick sprouts 1-1.5 cm long have formed on the tubers. If at this point the soil is not yet ready for planting potatoes, the sprouted tubers are transferred to a cool room. If tubers of unknown origin are used for planting, it is better to treat them for possible infection. To do this, they are washed from adhering earth and kept in a 1% solution of boric acid for 20 minutes. Or you can warm the tubers in water at a temperature of 40-43 ° C for 20 minutes. Potatoes are planted when the soil is sufficiently dry, otherwise air access to the tubers will be difficult. The optimal temperature for growing potatoes is +15 °C. |
| Potato tuber planting scheme | Potatoes are planted in rows according to the following pattern: 25-30x80 cm. The tops of early potatoes are not so thick and they can be planted thicker than late potatoes. Experienced gardeners have noticed that joint planting of early and late potato varieties has a beneficial effect on each other (early varieties “spur” the ripening of later ones). For the best illumination of potato bushes by the sun, the rows are oriented from north to south. Some people place a bean seed in each hole with a tuber to repel underground pests. The disadvantages of such plantings are as follows: beans develop earlier than potatoes, so they take away potassium from the tuber and shade the young tops. The root system of beans enriches the soil with nitrogen; its excess can provoke the growth of potato tops to the detriment of the formation of tubers. It is enough to plant beans around the perimeter of the potato field. |
| Tuber planting depth | The yield of potatoes depends on the depth of planting. The tubers are placed at a depth of 2-3 cm, which ensures their better heating and germination. The emerging shoots are completely covered with soil. A week later, the same operation is repeated. As a result, stolons are formed on the covered part of the stem, which increases the potato yield. (planting depth - the distance from the top of the tuber to the soil surface) If the planting time has been missed, the tubers are buried another 2-3 cm (especially during dry periods). |
| Problems | Potato diseases and pests: late blight, rhizoctonia blight, macrosporiosis, common scab, potato cancer, dry rot, carrot rot, phomosis, viral diseases, brown leaf spot, leaf bronzing, glandular spot, Colorado potato beetle, wireworm (click beetle larvae). In the fight against the Colorado potato beetle, bait bushes are effective, which are planted in several places in the potato field in early May before planting the tubers. By the time the main shoots appear, a large mass of Colorado potato beetles will have already “chosen” the formed bait potato plants, from where they can be easily removed along with the bush. Treatment of plants with insecticides containing the active substance - imidacloprid (Aktar, Confidor, Prestige, etc.) is effective. Many plants in joint plantings are able to take care of their neighbors and protect their. From late blight and Alternaria blight, you need to spray the potato tops 2-3 times per season with Fitosporin-M or Bordeaux mixture or Ordan or Kurzat. |
| Care and cultivation of potatoes | Caring for potatoes consists of fertilizing with fertilizers, combating weeds, hilling. When hilling potatoes, it is important not to damage the roots. The first hilling is carried out at a seedling height of 20 cm, while covering the entire lower part of the stem up to the leaves with soil. The second hilling is carried out when the soil is waterlogged to provide air access to the tubers. When there is a threat of frost, potato seedlings are covered with earth in a layer of 2-3 cm, which will help them withstand even -5 °C; if the seedlings are already quite large, they are first bent down and covered with earth (there is no need to dig up small seedlings later). Sprinkling will protect against light frosts. Flowers (or better yet, buds) of potatoes need to be torn off so that the plant does not waste energy on producing seeds. |
| Potato varieties | Potato varieties are divided into early (ripening period after planting 50-60 days): Belorussky early, Vesna, Vorotynsky early, Vyatka, Priekulsky early, Prigozhiy 2, Ural early, Falensky, Rosalind, Dolphin, Mid-early potato varieties (ripening time after planting 60-80 days): Arina, Detskoselsky, Domodedovsky, Zorka, Iskra, Kolpashevsky, Nevsky, Prizer, Sudarynya, Dina. Mid-season potato varieties (ripening time after planting 80-100 days): Gatchinsky, Kameraz, Ogonyok, Stolovy 19, Yantarny, Jelly, Dubrava, Zhivitsa. Medium-late potato varieties (ripening time after planting 80-100 days): Turquoise, Berlichingen, Loshitsky, Sulev, Polonaise, Vetraz. Late potato varieties (ripening time after planting is 120 days or more): Olev, Temp, Shpekula. Potato varieties resistant to nematodes: Dolphin, Vetraz, Dina, Dubrava, Zhivitsa |
| Potato harvesting | The greatest yield is observed when the tops naturally dry out (one day of the growing season brings 8 kg of potatoes from 1 hundred square meters). When harvesting, tubers from plants with strong tops and a large number of tubers are immediately put aside for seeds. The harvest time for early potatoes is early August. The harvest time for late varieties of potatoes is September. It is better to mow the tops 5-7 days before harvesting potatoes, which helps thicken the skin of the tubers and make them shelf-stable. If the tops are cut too early, the yield will be reduced by 25%. In dry weather, potatoes are dried in the open air for 3-5 hours. Storing potato tubers in the sun leads to their greening - the accumulation of solanine, which gives potatoes a bitter taste and is poisonous to humans. But for seed material such changes are even useful. Cold damage to tubers occurs at -2 °C. Storing potatoes at low positive temperatures and at 0°C promotes the accumulation of sugars in the tubers. This is a reversible process and at a temperature of +10 °C established in the storage, the normal taste of the potatoes returns. When potato tops are affected by late blight, macrosporiosis and other diseases, the tops are first mowed and destroyed, and the tubers are left in the ground for 2-3 weeks to form a strong peel. |
In the middle zone, potatoes ripen in approximately 4 months. Modern varieties provide maximum yields from 400 to 800 c/ha. Successful cultivation requires high-quality seeds and proper care.
Growing conditions: how to grow potatoes
Potato tubers germinate when the soil at their depth warms up to 7-8 °C, and then the development of the above-ground part begins. The tops do not tolerate frost and die at -1 – 3 °C.
The optimal temperature for growth, flowering and tuber formation is 16-22 °C. At 20 °C at night, 29 °C during the day, tuber growth stops, so from the second half of July to the end of August the harvest does not increase. The time for planting potatoes should be chosen so that by this time the tubers are almost formed. In the middle zone this is the second ten days of April, in the northern regions - the first ten days of May, in the southern regions - the beginning of April. By the time of planting at a depth of 10 cm, the soil temperature should not be lower than 5 °C.
Suitable soils for growing crops are light and medium in structure, chernozem, loamy, sandy, with a slightly alkaline or neutral reaction. Heavy loams are not suitable, because due to strong soil compaction and lack of air, the tubers develop poorly, and with excess moisture they are severely affected by rot.

The site for planting is chosen to be sunny, open, with a deep arable layer and a high humus content. To prevent diseases, crop rotation is observed; potatoes are returned to their original place after 3-4 years. The best predecessors are legumes and winter grain crops; they enrich the soil with nutrients and cleanse the soil of pests and potato pathogens. In garden plots, the crop can be grown after any vegetables except nightshades.
The soil for planting is prepared in the fall, it is plowed with a shovel, mechanically tilled to a depth of 25 to 27 cm, cleared of weeds, and fertilizers, organic and mineral, are applied. Nitrogen fertilizers are best used in spring.
Planting potatoes and applying fertilizers
Since it is possible to grow potatoes of proper quality and in sufficient quantity only by using varietal seed material that is free from fungal, viral and bacterial diseases, it is best to purchase tubers from specialized farms. When using your own planting material, it is prepared in the fall. For seeds, tubers of regular shape without signs of disease are selected from the most productive bushes. Pear-shaped and spindle-shaped potatoes can be carriers of viral diseases, so they are discarded. Selected seeds are thoroughly dried and greened, kept for about 2 weeks in diffused light and periodically turned. All the flesh of the finished tubers should be green; they do not need to be sorted until spring; they are not damaged by rodents, but due to the poisonous solanine they contain, they must be stored separately from food and fodder potatoes. Before planting for the winter, the seeds are sorted by weight and size; in the spring, each fraction is planted separately so that the plants sprout, develop and ripen at the same time.

In the spring, the tubers are sorted again, separating damaged, diseased, and thread-like sprouts. In order for the harvest to form before the onset of the hot period, potatoes are sprouted. About a month before planting, it is laid out on racks or the floor in well-ventilated areas, and rotated every 8-10 days to ensure uniform formation of sprouts.
Unsprouted tubers are dried. 10-12 days before planting, they are poured into heaps, covered with mats or burlap and left at a temperature of 12 to 16 ° C until short sprouts appear.
To obtain an early harvest from sprouted potatoes, seedlings are grown by placing them in pots with a mixture of leaf soil and humus. Before emergence, the pots are kept in the dark at 10-12 °C, then transferred to the light. Seedlings are planted in the ground in mid-April; if there is a threat of frost, they are covered with film or hilled up high. With this method of planting, harvesting begins at the end of May.

Planting is done with sprouted tubers to a depth of 6 to 8 cm, at a distance of 25-30 cm between plants, 60 cm between rows when manually and 70 cm when mechanically processed. Plant in furrows, simultaneously plowing in mineral or organic fertilizers. If the groundwater is close, the tubers are laid out on the surface, then they are covered with soil from the rows, forming ridges 6-8 cm high.
Further care: processing, harvesting and storage of potatoes
Caring for potato plantings begins before germination. Tubers growing in the ground need access to air, which is provided by loosening. The soil must be kept clean of weeds; in the initial stage of development, they are easily removed with a harrow or rake. Subsequently, they loosen the inter-rows and rows after each watering or rain, preventing the formation of a crust on the soil, while simultaneously removing weeds.
Hilling up of potatoes is carried out when they reach a height of 15-18 cm. In the southern regions, where there is not enough moisture, the plants are not earthed up, limiting themselves to loosening.

To feed potatoes, use mineral fertilizers (5-6 g of superphosphate, 2-3 g of saltpeter and 3-4 g of potassium sulfate per bush) or ash; they can be scattered around the bushes no closer than 10-15 cm from the stems, and then during hilling embed into the ground. When using liquid fertilizing, grooves are made in the middle of the rows, where fertilizer is poured at the rate of 2 tablespoons of potassium, nitrogen and 4-phosphorus fertilizers per bucket of water, spending 1-2 liters per bush. Slurry or pre-fermented bird droppings are used as liquid organic fertilizers for potatoes. After complete absorption, the plants must be loosened or hilled.
Starting from the budding phase, the soil should be sufficiently moist. If during a drought it dries out 6-8 cm deep, the potatoes need to be watered. Watering is carried out in the evening, spending 2-3 liters of water on each bush. In dry weather, water several (3-5) times during the season, mainly during budding and tuberization, after which loosening is carried out the next day.
Throughout the season, they are regularly treated against diseases and pests.
Potato harvesting begins after the tops have completely died off. In the middle zone, early varieties are dug up starting from the end of July, the rest from the second ten days of September to the first ten days of October. Two weeks before harvesting, the tops are mowed, which helps to thicken the peel and improve the ripening of the tubers. Digging is done with a shovel, pitchfork or industrial digger. In this case, it is necessary to avoid damaging the tubers, since damaged potatoes are more susceptible to disease during storage.

Store potatoes at a temperature of 2 to 4 °C and a humidity of 90-92%. They use cellars, storage facilities, and in their absence, special pits or piles are installed. Before storing for the winter, the tubers must be dried, cleared of soil residues, and sorted from diseased and injured specimens, which will significantly reduce storage losses.
In March, gardeners in the middle zone remove seed potatoes from storage for germination. To properly prepare planting material, it takes 35 to 40 days.

Preparation of potato planting material
It is better to select tubers for planting in the fall, when harvesting. Planting potatoes are taken from the best bushes, choosing healthy tubers approximately the size of a chicken egg. Probably the most common mistake: setting aside small potatoes for planting, which are not suitable for food. In this way, they themselves worsen the harvest and contribute to the degeneration of varieties, because in fact the worst specimens are selected - insufficiently fertile, insufficiently developed.
It is good to green up the planting tubers in the fall, that is, leave them in the light for some time so that they turn green. Such potatoes are stored more reliably, and for some reason rodents do not touch them.
In the spring, if sprouts begin to appear prematurely, they need to be broken off. If you feel bad throwing it away, try getting seedlings. Strong, dense sprouts are carefully broken out of the eyes and buried approximately 2/3 into the soil in seedling boxes. Watered; You can cover it with film until it takes root, but it’s not necessary. Such sprouts can be taken twice from one healthy potato; the third time the sprouted tuber needs to be planted in the ground.

Potatoes are sprouted in boxes, perforated plastic bags (perforated for normal ventilation), in bulk on the floor - as conditions permit. It is important that the tubers receive enough light (in the dark the sprouts will stretch and weaken) and are kept at a temperature of +12 °C to +15 °C. At higher temperatures, germination will accelerate, and the tubers will wither and weaken.
Can be germinated in sawdust or peat. To do this, the tubers are placed in layers in boxes, baskets and similar containers and covered with soil, evenly moistening them. It will take about three weeks for sprouts and root buds to appear on the potatoes.
Sometimes these two methods are combined: first they germinate in the light, and then carefully lay them out in boxes and sprinkle them with moistened soil, and keep them in this form for another 10 days before planting. The goal of all these manipulations is to speed up germination, obtain friendly and strong shoots, and an earlier harvest.
Planting potatoes
There are a lot of ways to plant potatoes, so we will only talk about the most common ones. The first thing to consider: the denser and heavier the soil, the shallower the planting depth. So, on clay soils, potatoes are planted no deeper than 4-5 cm, and on light and loose sandy and sandy loam soils - 10-12 cm.
The choice of planting method also depends on the soil and conditions. On light soils, as well as in hot and dry climates, it is better to plant potatoes under a shovel - in holes made on a flat, cultivated area - or in furrows. If the soil is damp, dense, and warms up late, ridges are cut under the potatoes, raising the plantings above the soil level.

When planting potatoes, the distance between the rows should be at least 60-70 cm. This is necessary, firstly, so that there is somewhere to get soil for hilling, and secondly, so that the potatoes have enough light - this crop is very light-loving and reacts to the slightest shading by decreasing harvest. The distance between plants in a row is 25-30 cm.
It is strictly forbidden to apply fresh manure under potatoes - it can cause real epidemics of various diseases. Potatoes need phosphorus and potassium, but excess nitrogen fertilizers can reduce the yield. In spring, it is undesirable to use chlorine-containing potassium fertilizers; if the soil has not been amended since the fall, in the spring only fertilizers without chlorine are applied to the holes.
The method of planting potatoes under straw is now popular: sprouted potatoes are laid out directly on the surface of the soil or in small holes, and the entire area is covered with a thick layer of straw on top. As the potatoes grow, straw is added. This method has both supporters and opponents: some say that the potatoes come out excellent, clean, and digging them is a pleasure; others note that potatoes are dry in straw and mice quickly breed in it.
There are also ways to plant potatoes under non-woven material, in high beds (containers) filled with organic matter, in barrels, in mounds, and so on - there is room for experimentation.

Potato care
As the potatoes grow, they must be hilled up, that is, they add soil to the base of the bushes, raking it from the rows. As a result, even if you planted potatoes under a shovel, ridges gradually grow in the area. Hilling is necessary so that the potatoes form additional underground stems - stolons, on which the crop is formed. In addition, hilling prevents the bush from falling apart.
Hilling up can also protect spring seedlings from return frosts: if cold weather is approaching, hill up the plantings high; You can even completely cover them with soil to prevent them from freezing. Hill up at least twice: the first time when the plants reach 14-16 cm in height; the second - before flowering, two to three weeks after the first. And it is better to do this after rain, when the soil is still wet.
Potatoes do not tolerate drought well, so it is necessary to water them in dry, hot summers. If this is not done, the rains that come after a drought can lead to the formation of ugly tubers. Plants need the most water before flowering and during the flowering period - at least 2-3 liters of water per bush.
Feed the potatoes with slurry or diluted bird droppings; If necessary, apply mineral fertilizers, preferably in the form of a solution. But the quantity and composition of fertilizers very much depend on the composition and quality of the soil, as well as on how well it was filled with fertilizers before planting. You should not overuse fertilizing, because this can deteriorate the quality of the tubers.

When growing potatoes, you have to deal with pests, of which the worst are the Colorado potato beetle and wireworm. Folk remedies for controlling the Colorado potato beetle: onion peels (sprinkled on the plantings, added to the holes); dusting plantings with sifted wood ash; planting calendula along with potatoes, beans - along with potatoes or along the perimeter of the field, beans - along the perimeter of the potato field. According to the observation of many gardeners, sowing leaf mustard and peas as green manure crops before planting potatoes helps against wireworms.
Selection of potato varieties
Potato varieties are divided into early, medium and late. It is important to consider several rules:
1. Choose only zoned varieties. No matter how good and productive a variety is, it will not fully manifest itself in soil and climatic conditions that are unsuitable for it.
2. Always choose and plant several varieties. Firstly, it will help to extend the fruiting time - if you plant varieties with different ripening periods. Secondly, this way you can insure yourself in case of some weather or other difficulties: different varieties withstand unfavorable conditions in different ways, and you will always have a harvest. If only one variety grows, unexpected drought or rain or disease can destroy everything.

3. Plant, harvest and store different varieties separately. You've probably noticed that plants develop differently on the same ridge. This most often happens when planting varieties mixed together. In this case, the yield will be lower.
4. Periodically update planting material: Grow potatoes from seeds or buy quality seed tubers from reliable sellers. If you don't do this, over time you may notice that your yield decreases, despite your best efforts.

Our interlocutor today - Mikhail Grigorievich VERKHOV– on his personal plot he receives record harvests of all vegetable crops, including potatoes.
– 500-600 kilograms of potatoes per hundred square meters is the dream of every gardener, many get much more modest results. What is the yield of this crop for you?
– From a ton and above. Such a high result is achieved thanks to many factors: healthy fertile soil, high-quality seeds, strict adherence to all the rules of agricultural technology. Why doesn't every farmer get high yields? All of the dachas are old, the plots, as a rule, were allocated to inaccessible areas, all are clogged. In addition, we ourselves “poiled” them with all sorts of fertilizers and sprays against diseases and pests. And therefore, in order to get a decent potato harvest, you must first put the land in order, that is, make it healthier. Healthy soil is the basis for yields for any crop, whether we grow cucumbers, tomatoes or potatoes. On my site the land has a high agricultural background. I have been achieving this, of course, for many years; I have been working with potatoes for 15 years. In recent years, I have switched to new technology.
– What does it mean to put the earth in order?
– I am not a supporter of chemical fertilizers. In recent years, the only fertilizer on my plot is compost. Nevertheless, I get a stable harvest. Firstly, you need to add at least 5-6 kilograms of good compost and 100-200 grams of ash per square meter to the area where you will grow potatoes. This is the first thing you can do with the land. Secondly, to obtain a high yield, you need to have good seed material, at least the first or second reproduction, and even better, elite.
– Mikhail Grigorievich, please tell me which potato variety do you consider the best?
– There are a lot of potato varieties, and it’s difficult for me to give a definitive answer to this question. You need to be aware of the purposes for which you need potatoes. Let’s say that such an excellent productive variety as Rosara “serves” for certain purposes. Rosara makes wonderful fried potatoes into strips, ideal for salads and vinaigrette. The tubers have a low starch content and do not boil softly. What is good about the mid-late variety Itessa? His tubers are cooked medium-well, and they make a tasty puree. I don’t like it when so-called “soapy” potatoes are used for soup, borscht or mashed potatoes. The early ripening variety Arosa is distinguished by the fact that its tubers, among other advantages, have a high marketability. They are especially good for stir-fries and salads. The universal variety Phellox has excellent qualities. Its tubers are good in any form - for frying, for salads, and boiled, seasoned with herbs. I work with varieties such as Arosa, Rosara, Zekura, Itessa, Red Lady, Sprint, Miranda, Fellox.
– Agricultural technology for growing potatoes is, in general, well known. And yet, each potato grower brings something of his own to this process. What “highlights” do you use when planting and caring for it?
– As for the planting method, there are three types. The most commonly used method is the so-called continuous planting. Another way is to plant in ridges. And the third, which I prefer, is planting potatoes in beds. Each of these methods has its pros and cons. When planting using conventional technology, it becomes difficult to care for potatoes (weeding, spraying against the Colorado potato beetle) at a time when the bushes are closing. Planting in ridges is good where the ground is very heavy.
I will dwell in more detail on the advantages of my method. I have two rows in the ridge, the distance between the ridges is 1 m. I plant potatoes in two paired rows in a checkerboard pattern. This results in a so-called triangle landing. I adhere to the rule: where the plant is planted, there should be no human footsteps; I process the potatoes by walking along wide rows. When I hill up the bushes, a groove forms between two rows. These grooves are very convenient for watering and feeding the plantings: put a hose between the rows and there are no problems with watering. It is convenient to approach the rows when collecting the same Colorado potato beetle.
– What other advantages are there of planting on ridges?
– All gardeners, of course, have noticed that the outermost bushes of any plants, including potatoes, are always more productive, since they are more illuminated by the sun and receive a larger area of nutrition. When planting potatoes on ridges and always in a checkerboard pattern, all the bushes turn out to be outermost. They are equally illuminated by the sun, and each bush has the same feeding area in the triangle allocated for it. And the more nutrition, the higher the harvest. Thickened planting leads to its great loss.
The potato harvest depends 40 percent on seeds, the remaining 60 percent on the human factor, that is, on how you care for it. You need to clearly know when potatoes especially need watering and when they need fertilizing. I water my potatoes twice during the growing season. At the same time as watering, I also fertilize. The first time during budding, and the second time after the end of flowering - at this time the strong growth of tubers begins. The plantings must be watered abundantly, so that the soil is wet at a depth of 30-40 cm - this is the soil horizon in which the tubers grow.
Kira Stoletova
To get a high-quality and abundant harvest, you need to know what soil temperature is required for planting potatoes in the spring. Of course, in different regions of the country, the climate varies and it will not be possible to establish an exact planting date. The timing of when potatoes can withstand cooling or warming in the spring directly depends on weather conditions, since they are the only ones that affect soil temperature. From year to year, the weather tends to change at the same time.

In this case, the gardener needs to know when it is best to plant potatoes and how much the soil should warm up. If you can cope with this task, then your plantings will not freeze and form large tubers. Different soils (chernozem, loam, sandy) each warm up at their own pace. Also, the potato variety you choose may require compliance with certain recommendations regarding planting dates.
Folk signs
Why does one of the old superstitions prohibit planting potatoes on Palm Week? If this was connected with ancient Slavic rituals, it was also not accidental. In fact, this is a warning for those who are in too much of a hurry to land. Palm week can begin either at the beginning of April or even at the end of March. Of course, the weather in different regions is different, but still by this time the earth has not yet had time to fully warm up.
The most intelligent predictions seem to be those that relate planting dates to changes in the condition of other plants. For example, you cannot plant potatoes earlier than the leaves bloom on the birch tree and later than the bird cherry blossoms. You can also stand on future potato beds with bare feet and stand. If your feet don’t get cold and they feel comfortable on the ground, then it’s quite possible that the potatoes will feel good in it.
Scientists' opinion
It’s clear why the desire to put the tubers in the ground as early as possible is based - who doesn’t want the potatoes to grow faster. And this does not at all contradict the scientific point of view. The fact is that the sooner the potato takes root and grows, the more stable its natural immunity to various diseases, in particular viral ones, will be.
And early varieties of potatoes have time to fully form tubers and you can get a harvest even before late blight spreads through the gardens, which loves an air temperature of 20-25 ° C and rainy weather, which quite often corresponds to the climate of many regions in Russia in the middle of summer.
Optimal soil temperature
What should be the minimum soil temperature to plant potatoes and get a bountiful harvest from them? Take a centimeter thermometer and measure the soil temperature. If the soil has warmed up to 7-8° degrees, then this is already good and such indicators are considered acceptable for cultivation. Be sure to take measurements at a depth of at least 10-12 cm. Pay attention to the air temperature - if it remains stable at around 8-10 degrees, then the soil is most likely already suitable for growing your planting material.
Why should the soil temperature be exactly this? Because this is the optimal temperature for planting your potatoes. At this temperature, plant roots begin to actively penetrate into the soil. If the soil is colder than this level, and even saturated with moisture, the sown will most likely begin to rot before it has time to gain volume, and if it does not rot, it will grow.
Even sprouted crops will most likely not survive if you grow them in cold soil. A temperature from 1 to 5 is already a risk. Sprouts will slowly and reluctantly develop only starting from 3 degrees, but are you sure that a sharp cold snap will not occur? Therefore, to be sure, wait for the stability of the daily weather.
Soil moisture

You also need to pay attention to soil moisture. Tubers planted at 7-8 degrees, but in too wet soil, will easily become infected with ring rot and black leg (these are bacterial diseases) or rhizoctonia (popularly black scab). The critical level of soil moisture in the spring that potatoes can withstand is 75%.
But how can you determine whether the soil is too saturated with water without special equipment? In this case, it is recommended to trust people's experience. Take a handful of earth, squeeze it into a ball and, stretching out your hand, drop the lump onto a hard place. If the lump crumbles, this means that the humidity does not exceed a critical level. If there is a sticky lump of dirt lying in front of you, unfortunately, you will have to wait until planting; planting potatoes in such soil is like throwing them into a swamp.
How to determine the type of soil?
- If you find a damp and wet lump of dirt in your area, which does not crumble when thrown onto the soil, then your garden soil type is heavy. These are loam and clay soils.
- Medium soil is also loam, which varies between light and medium.
- Light soils are sandy.
Why is it important to know this? Because with this method of determination, you will be able to find out what kind of soil is in your garden and what the approximate soil temperature will be for planting potatoes. The lighter the soil, the faster it warms up, but it also dries out. If the soil is light, you should not delay planting potatoes. If you miss the right moment, the plantings will not have enough moisture to develop.
There is also another method for determining the type of soil. To do this, the gardener needs to pick up a handful of wet soil. Next, you need to roll the soil into a ball and try to roll it out so that you get something like a sausage. If the sausage stubbornly does not stick together, then you have light soil. If they are easily molded and bent into a ring, then the soil is moist and flexible. If it immediately cracks, then such soil belongs to the average type. Well, if viscous earthen soil molds perfectly into a sausage or anything else, then your site is solid clay, that is, heavy soil with high humidity. But in moist and clayey soils, there are no problems with watering.
Super potato digger
Carrots Without Weeding. Planting Carrots in Spring. (05/16/17) A simple and correct way to plant carrots
If you have just such potatoes, then there are several ways to prepare raw and cold seed material for planting.
- Vernalization is pre-planting germination: 2-3 weeks in advance, place the tubers in a room where there is diffused light and store at a temperature of 12-15 degrees; light and heat will naturally accelerate the development of buds.
- If you didn’t have time to carry out the germination procedure, it doesn’t matter, dry the potatoes (let them spend 8-10 days in a dry place at a temperature of 14-16 degrees).
Of course, standard germination of seed material is more profitable in terms of time - such tubers sprout within 8-14 days, and the crop ripens 1-2 weeks earlier. Potato bushes will rise higher, and the tubers will develop immunity against bacteria and pathogenic fungi. Follow the schedule and timing of planting your potatoes, then you will have every chance of getting a bountiful and healthy harvest.
Potatoes: what temperature can they withstand, mulching and watering for cultivation Example of mulching with cut grass
How to plant potatoes under grass clippings mulch
Mowed grass for mulch Best mixed with tree leaves or coarse compost to allow aeration and decomposition of the material without rotting. Freshly cut grass can damage the plant; decomposition leads to a destructive build-up of heat that blocks air and moisture circulation, so it is best to dry it before use.
Comparison of mulch, grass clippings and straw
| Cut grass | Straw |
| Mixed with dried leaf litter Forms good compost with a healthy balance of nutrients (nitrogen, phosphorus and potassium; this dramatically reduces the need for artificial fertilizers). | Controls humidity and reduces high temperature stress of the plant, but is more vulnerable to frost and wind. |
| Decomposes quickly due to the correct ratio of carbon and nitrogen, which also helps to avoid problems such as mold and the unpleasant smell of rotting. | Controls weeds, but at the same time there is a possibility of contamination with seeds (weeds). |
| Fresh grass has a relatively high nitrate content, and most of it returns to the soil. Do not apply too thick a layer, as grass clippings decompose into slimy cellulose, which becomes very hot and can burn the plant. | Mostly carbon. It dries nitrogen out of the soil and therefore should be mixed with grass, manure, and compost to minimize losses. |
| Microbes Can suck nitrogen and others Nutrients from the soil during the decomposition process, for this reason a little fertilizer is added to it, compensating for the loss. | An ideal environment for slugs, attracts mice and voles. |
The benefit of any mulch is higher yields and easier harvesting of potatoes.
 An example of straw mulching
Growing potatoes under mulch
Any biodegradable material will work. But the most preferred method for growing high-yield potatoes is freshly cut grass or straw mulch. They keep the soil cool and moist, protecting against the Colorado potato beetle and other crawling insects.
Potato Needs a thick layer, unlike other vegetable crops. Every few weeks it is checked for gaps and another layer is added.
To ensure the best results from growing potatoes using mulching, you must:
Loosen the soil well. Prepare the area for planting. Dig a furrow about 10 centimeters deep and 25 cm wide four to six weeks before the last frost. Mix the garden compost thoroughly (it Prevents soil compaction After landing). Plant the seed tubers cut side down (or whole) with the eyes pointing up, about 30cm apart. Whole tubers are pressed into the soil about 8 cm deep, cut ones - 2 cm deep. Fill the furrow with a 15 cm layer of clean straw. When the plant breaks through the covering litter, Add another layer 10 cm thick.  The crop requires a thick layer of mulch
Water as needed, keeping the soil evenly moist but not soggy. There is no need to remove the mulch.
Temperature conditions for potatoes: optimal indicators during growth, ripening, storage, what to do if tubers and tops are frozen
Temperature conditions for potatoes: optimal indicators during growth, ripening, storage, what to do if tubers and tops are frozen
If potatoes are frozen in the underground, then you need to:
- Do not panic; determine the magnitude of the temperature drop below zero; try to establish the duration of such a decrease; identify the cause of the temperature drop.
In other words, you need to analyze the situation and assess the scale of the disaster. The result of such an analysis should be a conclusion about whether the potatoes were frozen or only slightly damaged by negative temperatures.

In any case, a final assessment of the consequences can only be made by taking an inventory of stocks. If the potatoes are just frozen, then the tuber will be damaged in some part. However, this verdict is not so comforting: the damaged tuber will now begin to rot. Such potatoes cannot be stored; they urgently need to be disposed of.
If negative temperatures persist for a long time, this can only mean one thing - the potatoes are frozen. Of course, you can no longer use it as a product for sale, but it is quite suitable for food. We eat fresh frozen vegetables.
Frozen potatoes do not lose their nutritional value. It’s just that when exposed to negative temperatures, some of the substances turn into sugars, and the potatoes become sweetish. Some people find their charm in this. You can’t eat sprouted and rotting potatoes, but you can and even should eat frozen ones. Just cook it immediately in boiling water, without defrosting it first.
Temperature range of adaptations for growing potatoes
This vegetable's sensitivity to temperature varies depending on what stage of growth it is in.
Storing potatoes: 5 common mistakes
Storing potatoes: 5 common mistakes We make a huge mistake by storing tubers of early ripening potato varieties. And the point here is not at all in its taste - they are excellent - but these potatoes cannot be stored for a long time. Even under ideal conditions, early-ripening potatoes are stored only until November. Then it begins to quickly germinate and withers, completely losing its qualities, which means it becomes unsuitable for food needs.

Suitable for long-term storage only Potatoes of medium and late ripening– remember this.
Mistake 2: Poor quality potatoes can be stored
Sometimes, succumbing to a fleeting temptation, we store potatoes of questionable or low quality, hoping that they will successfully overwinter. Most often this happens in lean years, but believe me, this is a serious mistake! Potatoes can be successfully stored throughout the long winter only if the tuber harvest is of excellent quality and absolutely healthy.

That is why, before storing tubers, they must not only be thoroughly dried, removing all the soil and various foreign impurities, but also sorted, throwing aside all small, frozen, rotting, damaged and diseased ones. Even if you store them at optimal temperature and humidity, Stock only high-quality healthy potatoes for the winter.
Mistake 3: Potatoes and other vegetables
This is how we are used to it: we put the potatoes in boxes for storage, and we also distributed the beets, carrots, onions and garlic into separate boxes. And if there is no space, what to do? Can't potatoes be stored together with other vegetables?

It is possible, but not with everyone. Potatoes are simply ideally stored with beets, which are placed on top of the tubers. And they do this not only to save storage space. Beets perfectly absorb excess moisture, which only benefits it, thereby protecting potato tubers from rotting.
Mistake 4: Potatoes do not require special storage conditions
In order to preserve the harvest in winter, we adapt cellars and crawl spaces, basements, and some urban gardeners have to use a loggia or balcony for this, or even a storage room in the apartment. But if there should be no problems with storing potatoes in cellars and basements (with the right approach to the matter, of course), then in the case of loggias and balconies, troubles happen quite often. By the way, you can read about how to properly store potatoes in basements and cellars in the article The best ways to store vegetables in winter.

If a loggia or balcony is the only place where you can store your harvest, approach this difficult task responsibly. You should not leave an uncovered bag of potatoes on the balcony and hope that they will be preserved normally - a miracle will not happen. Try using simple home storage instead:
Potato storage box
It can be built from wooden boards or shields. It is best when there are two such boxes (of different sizes), inserted one into the other - like nesting dolls. The volume of the inner box should be slightly smaller - so that there is a distance of about 5 cm between them. By the way, the bottom and lid of the box also need to be made double. It is best to fill the void between the boxes and lids with thick foam or dry sawdust. The outside of the storage must be lined with plastic, a piece of galvanized steel, linoleum, or simply painted - this will protect its contents from moisture.
Household thermal container Balcony cellar
If you have neither the time nor the desire to build a stationary container for storing potatoes on the balcony, I suggest an alternative - a household thermal container Balcony Cellar. This is essentially a double bag made from durable tent fabric that is quite attractive to look at. It is insulated with a special, highly durable padding polyester and equipped with electric heating. In such a cellar, any vegetables will be stored on the balcony even at a frost of -40 ° C, because inside this miracle device the temperature is always automatically maintained at +1 ... + 7 ° C.
You can control the temperature using an electronic thermostat with a special convenient screen. The cellar opens with an ordinary zipper. It is also very easy to care for - you just need to clean it in the spring, wash it if necessary, and you can put it away until the next season. The Cellar is available in 3 modifications: 100 liters (about 1 bag of potatoes), 180 liters (about 2 bags of potatoes) and 300 liters (about 3 bags of potatoes).
Mistake 5: You can’t sort potatoes into storage
There is an opinion that by putting potatoes into storage, we only harm them - we unwittingly damage the tubers and mix sick ones with healthy ones. It's a delusion.

During winter storage Potatoes need to be sorted, since various infectious diseases can manifest themselves in it. Tuber picking should begin as soon as you notice decaying tubers - this is bacterial soft rot.
When sorting through potatoes, you need to remove from storage not only rotten tubers, but also all those that come into contact with them. If only healthy tubers lie on the surface, but an unpleasant odor emanates from the container and small flies - fruit flies - appear in the room, these are also signs of rot. Such potatoes must be sorted out all over, removing diseased and infected tubers.
I hope that thanks to my tips you will be able to preserve your potatoes for as long as possible. I would be very interested to know how you store potatoes? What mistakes were made when storing it, how did you manage to eliminate them, what secrets did you discover for yourself?
More articles about storing vegetables:
- The best ways to store vegetables in winter How to preserve the potato harvest until spring without loss How to store beets for the winter in a city apartment How to store carrots correctly How to store onions so that they “endure” until spring colds