What program to write the windows image to a USB flash drive. Instructions for creating a bootable USB flash drive on Windows
If you want to create a bootable flash drive or write a distribution kit of some utility/program onto it, you need the appropriate software. This article will present some of the most convenient and easy-to-use programs and utilities. It remains only to choose the most suitable for yourself.
The first solution is official program from Microsoft, called the Media Creation Tool. Its functionality is small, and all it can do is update the current version of Windows to the current 10ki and / or burn its image to a USB flash drive.

The advantage is that it will save you from searching for a clean and working image, thanks to the fact that it will write the official distribution kit to a USB drive.
Rufus
This is a more serious program that has all the necessary functions to create a full-fledged bootable USB media. First, Rufus suggests formatting before burning the distribution. Secondly, it carefully scans the flash drive for bad sectors so that you can replace the media if necessary. Thirdly, it offers two types of formatting: quick and full. Of course, the second will delete information more qualitatively.

Rufus supports all types of file systems and is portable. By the way, thanks to the possibility of Windows To Go, you can burn Windows 8, 8.1, 10 to a USB flash drive and run this system on any PC.
WinSetupFromUSB
The next solution is Win Setup From USB. Unlike the previous program, this utility is able to record several images at once, creating a multi-boot media.

Before using it, she suggests doing backup all information on the media, as well as configure the boot menu. However, the utility is not Russified, and the menu through which the control takes place is quite complicated.
SARDU
This program will save you from having to search for the necessary distribution kits on the Internet, since you can select the ones you need right in its interface. She will download everything you need from official sites and write it to the desired media. The created image can be easily checked for performance through the built-in QEMU emulator, which was also not the case in previous software solutions.

There were some downsides as well. The fact is that you can download most of the images via the SARDU interface for subsequent recording to media only after purchasing the PRO version, otherwise the choice is limited.
xboot
This program is easy to use. All that is required to get started is using the mouse to drag the necessary distributions to the main program window. There you can also categorize them and create a description for convenience. In the main window, you can see the total size of all distribution kits thrown into the program in order to select the media of the required volume.

As in the previous solution, you can download some images from the Internet directly through the XBut interface. The choice, of course, is small, but everything is free, unlike SARDU. The only disadvantage of the program is the lack of the Russian language.
Butler
This is a utility created by a Russian developer, which is not very different from previous solutions. With it, you can record several images and create unique names for them so as not to get confused.

The only thing that still distinguishes it from other similar programs is the ability to choose the design of the menu of your future bootable media, but you can also choose plain text mode. One bad thing is that Butler does not provide the ability to format a flash drive before recording.
UltraISO - a lot of functional program for burning images not only to a USB flash drive, but also to CDs. Unlike some previous programs and utilities, this one can create an image from an existing disk with a Windows distribution for later burning it to another medium.
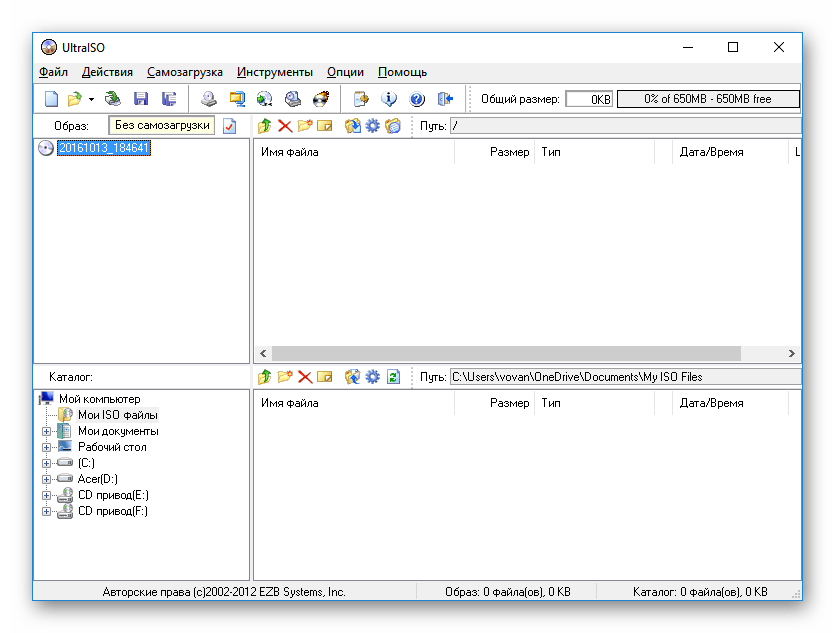
Another one good feature- creating an image from an already installed on the hard drive operating system. If you need to run a distribution but don't have time to write it down, there's a mount feature that lets you do it. In addition to all this, you can compress and convert images to other formats. The program has only one drawback: it is paid, but there is a trial version for the test.
UNetBootin
This is a simple and portable utility for writing images to a USB flash drive. As in some previous programs and utilities, the functionality of YunetButin is limited to writing an existing image to media and the ability to download the one you need from the Internet through its interface.

The main disadvantage of this solution is the inability to record several images at the same time on one drive.
PeToUSB
Another free portable utility for creating bootable media. Of its capabilities, it is worth noting the formatting of a USB drive before recording, which is clearly lacking in the same UNetBooting. However, the manufacturer has long ceased to support his offspring.

It is supported to write OS images to a USB flash drive with a capacity of no more than 4 GB, which will not be enough for all versions. In addition, the utility has not yet been Russified.
WinToFlash
The selection is completed by a functional program for burning images - WinToFlash. With it, you can record several distributions at once and create multi-boot media, unlike the same Rufus. As in UltraISO, through this program you can create and burn an image of an existing disk with a Windows distribution. It is also worth noting the function of preparing the media for recording - formatting and checking for bad sectors.

Among the features there is also the function of creating a bootable USB flash drive with MS-DOS. WinToFlash has a separate item that allows you to create a LiveCD, which may be necessary, for example, for Windows Recovery. There are also paid versions of this program, but the functionality of the free version is quite enough for simple creation bootable flash drive or disk. In fact, WinToFlash has collected all the useful features of the previous software solutions that we have discussed above.
All the programs and utilities listed in this article allow you to create a bootable USB flash drive, and some even a CD. Some of them are modest in terms of functionality, while others offer whole line opportunities. You just need to choose the most suitable solution and download it.
For every PC user, there comes a time when you need to reinstall Windows. But here's the problem. The disk drive is broken or it is not in the device at all. What then to do, there is only one way out - to create a bootable USB flash drive. How to make a bootable Windows USB flash drive, learn about it by reading this article.
Preparation
Before you create a bootable USB flash drive with Windows, you need to prepare. You must have with you:
- flash drive with sufficient memory
- Windows 7 ISO image;
- program for burning ISO-image.
The operating system required for reinstallation can be downloaded from the official Microsoft website. This can be done by paying a certain amount or by entering a special code that comes with a licensed Windows boot disk. However, not every user can afford to purchase an operating system. In this case, the ISO image can be found on the World Wide Web without any problems. However, you should be careful. In hacked operating systems, attackers can insert various malware. Therefore, you need to download the image only on proven resources.
It is also worth noting that the storage device will be completely formatted when the image is written. If it contains some valuable data, then it is worth writing them to a separate disk or any other storage medium.
Create a bootable flash drive
Making a bootable flash drive is very easy. Anyone can cope with this simple task if you follow certain instructions. There are at least 4 ways to install Windows 7 from a flash drive. They differ from each other in the software that is used to install Windows on a flash drive.
Windows 7 USB/DVD Download Tool
To create a bootable USB drive, you can use the official tool from Microsoft. The program can be downloaded directly from the Microsoft website. To create a bootable USB flash drive with Windows 7, follow the instructions below:
When the process of copying the image is completed, you will have a bootable USB flash drive with Windows 7 ISO at your disposal. Now you can install Windows 7 on your PC.
UltraISO
You can make a USB flash drive with Windows in a different way. This method implies a program called UltraISO. UltraISO- paid software to interact with images. You can download a 30-day trial version. The program has a fairly extensive functionality. With its help, you can record, edit, convert images, etc. But we are interested in the recording function. You can write a Windows 7 image to a USB flash drive using the following instructions:

As you could understand, the process of creating a bootable USB flash drive through UltraISO does not require any specialized knowledge. In the same way, a bootable USB flash drive for Windows XP can be made.
WinSetupFromUSB
To create a bootable Windows flash drive, you can use WinSetupFromUSB. The program has several functions for working with images. Nevertheless, we are interested in creating a bootable USB flash drive. The program consists of only one window and is quite simple in terms of operation. To create a flash drive, do the following:

Now the Windows 7 bootable USB flash drive is ready and you can use it.
Windows command line
You can create a bootable Windows flash drive using command line OS. Creating a bootable flash drive this way is a little trickier. However, you do not have to download any additional programs.

After preparation, you need to write the OS installation files to the device by simply unpacking the image downloaded from the Internet. And thus, at your disposal will be a flash drive with Windows written down.
Conclusion
This article addressed the question of how to create a bootable Windows 7 USB flash drive to reinstall this OS. To solve this problem, you can use one of the four methods proposed above. Each user has the right to choose any of them, based on their preferences or capabilities. To obtain the desired result, you must follow the instructions given above and related to the selected method.
Related videos
In articles on how to install Windows from a USB flash drive, we have already described some ways to create a bootable USB flash drive, but not all. Below are instructions on this topic, but we recommend that you first read the article itself - in it you will find new, simple and interesting ways.
This review will look at free utilities that allow you to create a bootable USB drive for Windows installation or Linux, as well as two programs for burning a multiboot flash drive. All download links in the article lead to the official websites of the programs.

Bootable flash drive Windows 10 and Windows 8.1 without programs
Those who have a modern computer equipped with motherboard with UEFI software (A novice user can determine UEFI by a graphical interface when entering the "BIOS"), and who need to make a bootable USB flash drive to install Windows 10 or Windows 8.1 on this particular computer, may not use any third-party programs at all to create a bootable flash drives.

Everything you need to use this method: support for EFI boot, a USB drive formatted in FAT32 and preferably an original ISO image or a disk with the specified versions of Windows OS (for non-original ones, it is more reliable to use the creation of a UEFI flash drive using the command line, which is described later in this material).
Microsoft Windows Installation Media Creation Tool
For a long time, the Windows 7 USB/DVD Download Tool was Microsoft's only official utility for creating a bootable flash drive (originally designed for Windows 7, described later in this article).
And now, after more than a year since the release of Windows 8 and 8.1, the following official program has been released - Windows Installation Media Creation Tool for recording the installation USB drive with the Windows 8.1 distribution kit of the version you need.

With this free program, you can easily make a bootable USB or ISO image by choosing a professional, single language or basic version of Windows 8.1, as well as the installation language, including Russian. This downloads the official distribution from the Microsoft website, which may be important for those who need the original Windows.
Detailed instructions for using this method and how to download the program from the official Microsoft website here: http://remontka.pro/installation-media-creation-tool/
Multiboot flash drives
First of all, I will talk about two tools designed to create a multiboot flash drive - an indispensable tool for any computer repairman and, with the skills, a great thing for the average computer user. As you can understand from the name, a multiboot flash drive allows you to boot in different modes and for different purposes, for example, one flash drive can have:
- Installing Windows 8
- Kaspersky Rescue Disk
- Hiren's Boot CD
- Installing Ubuntu Linux
This is just an example, in fact, the set may be completely different, depending on the goals and preferences of the owner of such a flash drive.
WinSetupFromUSB

Main program window
In my personal opinion, one of the most convenient utilities for creating a bootable USB flash drive. The functions are quite wide - in the program you can prepare a USB drive for its subsequent transformation into a bootable one, format it in the most various options and create the necessary boot entry. The main function, which is also implemented quite simply and clearly, is writing a bootable USB flash drive from Linux installation images, utility disks, as well as Windows 8, Windows 7 and XP installations (Server versions are also supported). The usage is not as simple as some of the other programs in this review, but, nevertheless, if you are more or less familiar with how this kind of media is made, you will not have a hard time figuring it out. For everyone else I will write one day detailed instructions with a description of the process of creating a multiboot flash drive for work.
Easy2Boot and Butler (Boutler)

Programs for creating a bootable and multiboot USB flash drive Easy2Boot and Butler are very similar to each other in terms of the principle of operation. IN in general terms, the principle is as follows:
- You prepare the USB drive in a special way
- Copy the bootable ISO images to the created folder structure on the flash drive
As a result, you get a bootable drive with images of Windows distributions (8.1, 8, 7 or XP), Ubuntu and other Linux distributions, utilities for computer recovery or virus treatment. In fact, the number of ISOs you can use is limited only by the size of the drive, which is very convenient, especially for specialists who really need it.

Of the disadvantages of both programs for novice users, one can note the need to understand what you are doing and be able to manually make changes to the disk if necessary (not everything always works the way you want by default). At the same time, Easy2Boot, given the availability of help only on English language and lack of a GUI, somewhat more complex than Boutler.
xboot
XBoot is a free utility for creating a multi-boot flash drive or ISO disk image with multiple Linux versions, utilities, antivirus kits (for example, Kaspersky Rescue), Live CD (Hiren's Boot CD). Windows is not supported. However, if we need a very functional multi-boot flash drive, then we can first create an ISO in XBoot, and then use the resulting image in the WinSetupFromUSB utility. Thus, by combining these two programs, we can get a multi-boot flash drive for Windows 8 (or 7), Windows XP, and everything that we have written in XBoot. You can download it on the official website https://sites.google.com/site/shamurxboot/

Creating bootable media in this program is done by simply dragging the desired ISO files into the main window. Then it remains to click "Create ISO" or "Create USB".
Another opportunity provided by the program is to download the necessary disk images by selecting them from a fairly extensive list.
Windows bootable flash drives
This part presents programs whose purpose is to transfer the installation files of the operating system Windows systems on a flash drive for easy installation on netbooks or other computers that do not have optical CD drives (does anyone say so?).
Microsoft Windows 7 USB/DVD Download Tool
The Windows 7 USB/DVD Download Tool is an official free program from Microsoft designed to burn a bootable USB flash drive with Windows 7 or Windows 8. Despite the fact that the program was released for the previous version of the operating system, it also works fine with Windows 8.

Selecting a Windows ISO image in a utility from Microsoft
The use is not difficult - after installation, you will need to specify the path to the Windows disk image file (.iso), specify which USB drive to write to (all data will be deleted) and wait for the operation to complete. That's all, a bootable USB flash drive with Windows 8 (7) is ready.
Bootable flash drive in Windows command line
If you need a flash drive to install Windows 8, 8.1 or Windows 7, then it is not necessary to use any third party programs to create it. Moreover, some of these programs are simply a graphical interface, doing everything that you can do yourself using the command line.

The process of creating a bootable flash drive on the Windows command line (including with UEFI support) looks like this:
- You prepare the flash drive using diskpart on the command line.
- Copy all operating system installation files to the drive.
- Make some changes as needed (for example, if you need UEFI support when installing Windows 7).
There is nothing complicated in such a procedure, and even a novice user can handle it by following the instructions.
WiNToBootic
Another free and perfectly working utility for creating a bootable USB flash drive with Windows 8 or Windows 7. Little known enough, but, in my opinion, noteworthy program.

Benefits of WiNTBootic over Windows 7 USB/DVD Download Tool:
- Support for Windows ISO images, unpacked OS folder or DVD
- There is no need to install on a computer
- High operating speed
Using the program is as simple as the previous utility - we indicate the location of the files for installing Windows and which flash drive to write them to, after which we wait for the program to finish.
WinToFlash Utility

This free portable program allows you to create a bootable USB flash drive from the installation CD of Windows XP, Windows 7, Windows Vista, as well as Windows Server 2003 and 2008. And not only that: if you need a bootable MS DOS or Win PE flash drive, you can also make it using WinToFlash. Another feature of the program is the creation of a flash drive to remove the banner from the desktop.
Rufus
Rufus- free utility, which allows you to create a bootable USB flash drive for Windows or Linux. The program works on all current versions of Windows OS and, in addition to its other functions, can check the flash drive for bad sectors, bad blocks. It is also possible to place various utilities on a flash drive, such as Hiren's Boot CD, Win PE and others. Another important advantage of this program in its latest versions is the simple creation of a bootable UEFI GPT or MBR flash drive.

The program itself is very easy to use, but quite limited. It is somewhat reminiscent of the truncated WinSetupFromUSB, which was mentioned above.
Considering the fact that many users in Russia do not pay very much for programs, using UltraISO to create bootable flash drives is quite common. Unlike all the other programs described here, UltraISO costs money, and allows, among other functions available in the program, to create a bootable Windows USB flash drive. The creation process is not entirely obvious, so we will describe it here.

- With a flash drive connected to the computer, launch UltraISO.
- Select the menu item (top) Boot.
- Specify the path to the distribution boot image to be written to the flash drive.
- If necessary, format the USB flash drive (done in the same window), then click "write".
That's all, a bootable Windows or Linux flash drive created using the UltraISO program is ready.
Other utilities related to bootable flash drives
Windows Bootable Image Creator - Create Bootable ISO

WBI Creator - is somewhat out of the general range of programs. It does not create a bootable USB flash drive, but a bootable ISO disk image from a folder with files for installing Windows 8, Windows 7 or Windows XP. All you need to do is select the folder where the installation files are located, select the version of the operating system (for Windows 8 we specify Windows 7), specify the desired DVD label (the disk label is present in the ISO file) and click the "Go" button. After that, you can create a bootable USB flash drive with other utilities from this list.

Universal USB Installer window
This program allows you to choose one of several available Linux distributions (as well as download it) and create a flash drive with it on board. The process is very simple: select the version of the distribution, specify the path to the file with this distribution, specify the path to the flash drive formatted in advance in FAT or NTFS and click Create. That's all, it remains only to wait.
These are not all programs designed for these purposes, there are many others for various platforms and purposes. For most common and not quite tasks, the listed utilities should be enough. I remind you that it is quite easy to create a bootable USB flash drive with Windows 8 or Windows 7 without using any additional utilities - just using the command line, which I wrote about in detail in the relevant articles.
Introduction
At the time of buying Windows 7 in the shop Microsoft (Microsoft Store), you will be able to download an ISO image of this product. allows you to create ISO copies Windows files 7 on disc, USB flash or DVD. To create a bootable DVD or USB flash drive, download the ISO file and then run the Windows 7 USB / DVD Download Tool. After that, you can install Windows 7 directly from a USB stick or DVD.If you are not sure how much bit Windows version 7 (32-bit ( x86) or 64-bit ( x64)) you need for the upcoming installation, you can learn more about the difference between Windows 7 x32 and Windows 7 x64. The ISO file contains all Windows 7 installation files combined into one uncompressed file. When you download the ISO file, you must save it to your hard drive in order to install Windows 7. To install Windows 7 on a USB Flash or DVD, all you have to do is insert the USB Flash into a free USB port or insert the DVD into your DVD -drive and run setup.exe Windows 7 USB / DVD Download Tool from the root folder on the disk.
Note: You will not be able to install Windows 7 using the Windows 7 USB/DVD Download Tool if the ISO file is saved on a USB drive or DVD.
A copy of the Windows 7 ISO file created with the USB / DVD Download Tool is bootable. The boot disk allows you to install Windows 7 without first starting the existing operating system on your computer. If you change the boot order of disks in BIOS your computer, you will be able to install Windows 7 directly from your USB flash drive or DVD when you turn on your computer. Please refer to your computer's documentation for information on how to change the boot priority of drives through the BIOS.
Upon acceptance of the license terms for Windows 7, you will only be allowed to make one copy of the ISO file on disc, USB flash drive, or other media as a backup for reinstallation on the licensed computer. If you do not remove the copy of the ISO file that you made to install the software on your computer, then this copy of the ISO file will be your backup.
Installation
For installation Windows 7 USB/DVD Download Tool You need:
Step 1. Click here to download Windows 7 Setup File USB/DVD Download Tool .
Step 2 When prompted to save the file to disk or run it, select Run.
Step 3 Follow the installation instructions. You can determine where to install the Windows 7 USB/DVD Download tool and whether to create shortcuts in the menu Start or at desktop.
You must have administrator rights on the computer where you are installing Windows 7 USB / DVD Download Tool. This requires Microsoft NET Framework 2.0 or higher. If this tool is missing on your computer, the program will install it for you. In this case, you may need to restart your computer to complete the installation.
System requirements
- Windows XP SP2, Windows Vista, or Windows 7 (32-bit or 64-bit);
- recommended Pentium 233 MHz or higher ( 300 MHz);
- 50 MB free disk space on the hard drive;
- DVD-R disc or removable USB-Flash at least 4GB.
Burning an ISO image
Before launch Windows 7 USB/DVD Download Tool make sure you have already purchased Windows 7 and downloaded the Windows 7 ISO file on your HDD. If you bought Windows 7 but haven't downloaded the ISO yet, you can download the file from your account at Microsoft.To burn ISO-file with Windows 7 you need:
Step 1. Click the button Start and select Windows 7 USB/DVD Download Tool from the list "All programs".
 Figure 1. Windows 7 USB / DVD Download Tool - program window
Step 2 Enter the name and path of your original Windows 7 ISO file, or click the button "Review" and select the file in the dialog box "Open".
 Figure 2. Windows 7 image file selection window
Step 3 Select USB device to create a copy on a USB flash drive, or DVD to copy to a DVD disc, and then click "Further".
 Figure 3. USB or DVD Burn Selection Window
Step 4 If you are writing the file to a USB flash drive, select the USB device from the drop-down list and click the button "Start Copy".
If you are copying files to DVD, click the button "Begin" to start recording.
 Figure 4. Selecting a USB flash drive
After your ISO- file with Windows 7 will be written to the selected media, you can start installing Windows 7, to do this, go to the root directory of your DVD or USB flash drive and run setup.exe.
FAQ
Below are some of the most frequently asked questions about usage Windows 7 USB/DVD Download Tool:- What size USB Flash Drive is required?
You need a USB Flash Drive with at least 4 GB of free disk space. - Can I use my CD or flash drive with an ISO file written to it to install Windows 7 on someone else's computer?
No. The disc or flash drive with your burned ISO file is for installing Windows 7 only on the licensed user's own computer. - Can I back up to CD-R?
No. The Windows 7 ISO file is too large to fit on a regular CD. - Can I use Blu-ray DVD for backup?
Yes, if your DVD drive can burn to Blu-ray DVD. - If I have some files on my USB flash drive, will Windows 7 USB/DVD Download Tool delete them?
This program requires a completely empty USB flash drive to copy Windows 7 files. This ensures that this device will be bootable after the copy is complete. - Is it possible to make a backup using an iPod, camera or other device with enough free space on disk?
Yes, but this is not recommended. The device must be formatted in order for the recording media to be bootable. A dedicated USB Flash Drive will be the best option. - Can I use Windows 7 USB/DVD Download Tool to backup other files?
This tool is designed to burn only Windows 7 ISO files from the Microsoft Store.
Troubleshooting
The following tips may help you if you encounter a problem while using this tool.- My USB device is not in the list of available devices.
If you don't see your USB Flash device in the list of available devices, make sure the drive is inserted into the USB port or click the Refresh button next to the list of available drives. - I inserted a blank DVD-R disc into my DVD drive, but Windows 7 USB/DVD Download Tool cannot recognize it.
If there are several DVD drives in the system, then select the first one capable of burning DVD. If you have several DVD-R discs, try inserting a blank DVD-R into another DVD drive. If this does not help, please check that your disc is not damaged and that your DVD-R disc is usable, or contact product support.
Sadly for many, the era of CD/DVD drives is slowly but surely coming to an end... Today, users are increasingly thinking about having an emergency bootable flash drive if they suddenly have to reinstall the system.
And the point here is not only to pay tribute to fashion. OS from a flash drive is installed faster than from a disk; such a flash drive can be used on a computer where there is no CD / DVD drive (and USB is available on all modern computers), well, you should not forget about the ease of transfer either: a flash drive can easily fit in any pocket, unlike a disk.
1. What is needed to create a bootable flash drive?
1) The most important thing is a flash drive. For Windows 7, 8, you will need a flash drive with a size of at least 4 GB, preferably 8 (some images may not fit in 4 GB).
2) Image boot disk Windows, which is most often an ISO file. If you have an installation disk, then you can create such a file yourself. It is enough to use the program Clone CD, Alcohol 120%, UltraISO and others (see how to do this).
3) One of the programs for writing an image to a USB flash drive (about them we will talk below).
Important point! If your PC (netbook, laptop) has USB 3.0 in addition to USB 2.0, connect the USB flash drive during installation to the USB 2.0 port. This applies primarily to Windows 7 (and below), because. these OS do not support USB 3.0! An attempt to install will end with an OS error about the inability to read data from such media. By the way, they are quite easy to recognize, USB 3.0 is shown in blue, the connectors for it are the same color.
usb 3.0 on laptop
One more thing... Make sure your Bios supports booting from USB media. If the PC is modern, then it must definitely have this function. For example, my old home computer, bought back in 2003. can boot from USB. How configure bios to boot from a flash drive - .
2. Utilities for burning a bootable ISO disk to a USB flash drive
2.1 WinToFlash
I would like to dwell on this utility mainly because it allows you to burn bootable USB flash drives with Windows 2000, XP, Vista, 7, 8. Probably the most versatile! You can read about other functions and features on the official website. Here I also wanted to consider how you can create a USB flash drive in it to install the OS.
After starting the utility, by default, the wizard starts (see the screenshot below). To proceed to creating a bootable USB flash drive, click on the green checkmark in the center.
The process of transferring Windows system files usually takes 5-10 minutes. At this time, it is better not to load unnecessary resource-intensive PC processes.
If the recording was successful, the wizard will notify you about it. To start the installation, you need to insert the USB flash drive and restart the computer.
One of the best programs to work with ISO format images. It is possible to compress these images, create, unpack, etc. There are also functions for recording boot disks and flash drives (hard drives).
This program was mentioned quite often on the pages of the site, so here I will give only a couple of links:
2.3 USB/DVD Download Tool
A lightweight utility that allows you to burn flash drives with Windows 7 and 8. The only negative, perhaps, is that when recording, it can give an error of 4 GB. flash drive, supposedly not enough space. Although there is enough space for other utilities, on the same flash drive, with the same image ...
By the way, the question of writing a bootable USB flash drive in this utility for Windows 8 was considered.
2.4 WinToBootic
Website: http://www.wintobootic.com/
Very simple utility, which will help you quickly and effortlessly create bootable USB media with Windows Vista/7/8/2008/2012. The program takes up very little space - less than 1 MB.
At the first start, it required the installed Net Framework 3.5, not everyone has such a package, but downloading and installing it is not a quick matter ...
But the process of creating bootable media is very fast and pleasant. First, insert the USB flash drive, then run the utility. Now click on the green arrow and specify the location of the image with the Windows installation disk. The program can directly record from an ISO image.
2.5 WinSetupFromUSB
Simple and main free program. With it, you can quickly create bootable media. By the way, interestingly, not only Windows OS can be placed on a flash drive, but also Gparted, SisLinux, built-in virtual machine and etc.
To start creating a bootable USB flash drive, run the utility. By the way, please note that there is a special add-on for the x64 version!
Once launched, you only need to specify 2 things:
- First - specify the flash drive to which the recording will be made. Usually, it is determined automatically. By the way, under the line with a flash drive there is a fad with a check mark: “Auto Format” - it is recommended to check the box and do not touch anything else.
- In the "Add USB dick" section, select the line with the OS you need and check the box. Next, specify the location on the hard drive where the image with this ISO OS is located.
- The last thing you do is press the "GO" button.
 By the way! The program during recording may behave as if it is frozen. In fact, most of the time it works, just don't touch the PC for about 10 minutes. You can also pay attention to the lower part of the program window: messages about the recording process appear on the left and a green bar is visible ...
3. Conclusion
In this article, we looked at several ways to create bootable USB flash drives. Some tips for burning such flash drives:
- First of all, copy all the files from the media, in case you need something later. During recording - all information from the flash drive will be deleted!
- Do not load the computer with other processes during the recording process.
- Wait for a successful information message from the utilities with which you work with the flash drive.
- Disable antiviruses before creating bootable media.
- Do not edit the installation files on the flash drive after it has been burned.
That's all, all successful OS installation!