How to sew a pillow for pregnant women with your own hands. Educational soft book-pillow Video: master class on sewing a pillow for pregnant women
Expectant mothers are painfully familiar with the problems of having to purchase certain products for pregnant women. For some it is difficult to find this or that item in their city, for others the cost is too high. Today we will talk about how to sew a pillow for pregnant women with your own hands, so as not to incur unnecessary financial costs.
Why do you need a pregnancy pillow?
No matter what they say about the delights of pregnancy, we should not forget that it is also associated with certain problems. The longer the period, the more difficult it is for a woman to fall asleep due to her expanding belly. It is difficult to find a comfortable position; lying on your back for a long time is uncomfortable and dangerous, which results in lack of sleep, swelling of the legs, headaches, back pain, and fatigue.
A pregnancy pillow will provide you with a sound sleep and help avoid health problems.
As a rule, pregnant women try to sleep on their side, and for greater comfort, place folded blankets or towels under their stomach. There are a wide range of special pillows for pregnant women on sale - you can choose the appropriate size, color, texture. But, unfortunately, many people cannot afford them. The solution is simple: you can sew such a pillow yourself. It will cost much less, and you can easily customize this product to suit you.
In addition to its intended purpose, this pillow will serve you after childbirth.. There are at least 2 use cases.
- During the breastfeeding period, you can use pillows as soft seating. Wrap it around your waist and tie the pre-sewn ribbons at the back. This way you won't have to constantly hold your baby in your arms while feeding.
- Tie the pillow in the same way and place it on the floor or sofa. You will get a kind of playpen, in the center of which you can put the baby.
Babies love to lie in a large soft playpen pillow
Different shapes
The classic pregnancy pillow looks like the English letter U. This feature ensures the most comfortable position of the body: the head is located on a rounded area, and the arms and legs are on the sides.
Advantages:
- the stomach and back are evenly supported, the load is distributed correctly;
- a good option for those who like to turn from side to side, because such a pillow will not need to be shifted, unlike products of other shapes.
Flaws:
- The pillow size is large, the bed must be appropriate;
- It is unlikely that you will be able to hug your husband with such a pillow.
Most often, such pillows are available in 2 sizes: for tall girls and for average height.
U-shaped pillow is equally comfortable on both sides
G-shaped pillows have recently appeared on the market, but have already become popular. Among their advantages is that they are well suited not only for sleep, but also for daytime rest. This pillow can easily be tucked under your head, stomach, wrapped around your legs, or leaned against your back. This form of the product helps relieve muscle tension.
The G-shaped pillow is universal: it supports the back, stomach and relieves heaviness from the hips and legs
In a bagel pillow you will comfortably spend not only your sleep time, but also your evening watching TV. It is especially convenient because it allows you to relieve not only your back and stomach, but also your legs.
Some people compare a bagel pillow to a hug.
True, in some cases this accessory will have to be turned over: when you turn on the other side, your stomach will rest against the back of the pillow, and your back will be without proper support.
Banana pillow is simple and mobile. It will provide good support for either the stomach or the back; will not take up much space; ideal for sleeping on your side (on later this is especially important). In addition, you can take this pillow on a trip to rest on it in a half-sitting or half-lying position.
The banana pillow is comfortable, easy to use and mobile.
An L-shaped pillow is a simple long cushion that is curved on one side.. It will not take up much space and will be convenient in almost any situation. True, when turning from side to side, you will have to shift it every time.
The L-shaped pillow is not universal, but it is very comfortable in many ways.
The I-shaped pillow is the simplest option. Compact, inexpensive and very easy to make if you decide to sew it yourself. The shape of this pillow relieves the spine and neck joints, relaxes the muscles, and allows the body to rest. Yes, and turning over with her in an embrace is not difficult.
This pillow is the most compact and simple, but very comfortable
As you can see, a pillow for pregnant women is not a luxury, but very useful and convenient thing, which anyone will be happy about future mom. Are you ready to start crafting? Then let's talk about the progress of the work.
We sew a pillow for pregnant women with our own hands
What you will need
You will need what any woman probably has:
- sewing machine;
- threads;
- needles;
- scissors;
- pencil;
- paper for patterns (any - newspapers, magazine pages, old notebooks);
- fabric for pillow;
- pillowcase fabric;
- filler.
And if everything is clear with tools, then we need to talk in more detail about fabrics, and especially fillers.
Choose high-quality and natural fabrics for the pillow
Naturally, the fabric for such a pillow should be natural, not cause allergic reactions and pleasant to the touch. Therefore, choose cotton, linen or calico.
For a pillowcase you can take fleece, plush, velor, knitwear and even fur - it all depends on your imagination. if you have free time and knitting or crocheting skills, a pillowcase can be knitted. But do not forget that the threads must be of high quality and hypoallergenic.
About the filler
The comfort of a pillow for pregnant women depends on the quality of the filler. It should be soft enough, but at the same time retain its shape well. In addition, you need to take into account other important criteria: hypoallergenicity, ease of care (after all, even such a large pillow will have to be washed), as well as your personal preferences for hardness and elasticity.
First of all, go to a store that sells products for pregnant women and ask the seller about how much the pillow weighs and what it is filled with. At the same time, you can choose the appropriate style. This will help you figure out how much filling you need to buy for your homemade pillow. The filler itself can be of several types:
- polystyrene foam balls;
- buckwheat husk.
The most popular type of filler is polystyrene foam in balls (foam). It holds the shape of the product perfectly and does not sag due to its elasticity. Hypoallergenic, easy to clean, environmentally friendly, repels odors. It is very important that this material does not attract bacteria, mold and mites. There is one drawback: over time, the foam decreases in volume by about 20% due to air loss. In addition, some women complain that the rustling of the balls in the pillow makes it difficult to fall asleep.
Expanded polystyrene is the most popular filling for pregnant pillows
Holofiber is soft and elastic
Synthetic down (synthetic down) is similar in almost all qualities to holofiber.
Synthetic fluff is cheaper than holofiber
Buckwheat husks - absolutely environmentally friendly pure product, with whom you should not be afraid of allergies. True, the pillow will turn out to be a little heavy, and such a filler is not cheap.
Buckwheat husks have long been used as a filler for mattresses and pillows.
Now that you have everything you need, you can start making the pillow.
Step-by-step instructions with photos
Classic U Shape Pillow
Its main advantage self-made is that you can determine the size of the pillow for your height. The provided pattern shows standard indicators. You will need two identical pieces of fabric. So, let's start our master class.
Pattern of a classic pillow for pregnant women, on the right - the fold or middle of the fabric
- Place the pattern on paper and cut out. Fold the fabric in half, right side inward. Connect the center of the pattern to the fold of the fabric.
Transfer the pattern to the fabric
- Pin the pattern to the material, outline with a pencil or chalk.
- When cutting off a pattern, immediately fasten the fabric back, otherwise it will move to the side.
Secure the fabric with pins
- If you felt more comfortable laying the fabric out in one layer, turn the pattern and align the center on top. Pin and trace the pattern again.
- Make the second fabric piece in the same way.
- Put away the pattern until you sew the pillowcase. Place two pieces of fabric facing each other (the one on which the pattern is transferred lies on top) and fasten with pins.
Fold the pieces of fabric to make 2 parts of the product
- Carefully cut along the drawn line, leaving a 1.5 cm seam allowance.
Carefully cut out the pieces with seam allowances
- On top, along the fold, mark a section about 20 cm long. You cannot sew it yet: through this hole you will turn the pillow inside out and place the filling.
Leave the area at the top of the product unsewn
- Baste the details along the outline line and stitch on sewing machine. Don't forget to leave it unstitched open area on top of the product.
Sew the cover with a straight stitch along the entire outline, except for the hole for stuffing.
- Finish the edges with an overlock, zigzag or overlock stitch.
Finish the edges
- Now you can turn the cover inside out front side. These are the “pants” you get.
Turn the pillowcase right side out
- Insert the filling through the hole left at the top. Distribute it evenly. Adjust the density according to your own preferences.
Fill the case with filler
- Sew the hole by hand or machine stitch.
Sew the cover all the way
- As a result, you will get a pillow like this.
Ready-made pregnancy pillow
- Using the same pattern, adding 1 cm on each side, sew the pillowcase in the same way. Allowances are needed to make it easier to place the pillow inside. Leave a 50 cm long section at the top unstitched and sew a zipper there.
Pillow in a pillowcase
Note! A pregnancy pillow should be clean - this is the main rule of hygiene. It’s better to sew 2-3 pillowcases at once so that you can change and wash them as needed.
Is it really very easy and simple? Rest assured, you can easily cope with other shapes of pillows. They are sewn in the same way.
"Bagel"
This product is no more difficult to sew than the previous one. Essentially, the difference is only in form. For this pillow you will need a piece of fabric 1 m X 2.20 m and the same amount for the pillowcase. Select the amount of filler according to the same principle as in the first option. In addition, you will need a zipper 40 cm long.
First of all, transfer the provided pattern onto paper. For simplicity and convenience, it is divided into squares. The size of each is 5 X 5 cm. You will need two identical parts.
Pattern for a bagel pillow, on the right - the fold or middle of the fabric
If you are of average height (150–160 cm), leave the pattern as is. For taller girls, you can add about 20 cm more by extending the fold line.
Transfer the pattern to the fabric in 2 copies and cut it out. Sew the pieces right sides together, leaving a hole at the top for the filling.
Sew the pillow parts together and add filling to the desired degree of firmness.
Turn the cover right side out, stuff and sew by hand or by machine.
Sew the hole by hand or machine stitch
All that remains is to sew the pillowcase. Also transfer the pattern to the fabric, adding an additional 1–1.5 cm to the width of the pattern, cut, stitch and sew in a zipper. Place a pillowcase on your pillow and enjoy the coziness!
A bright pillowcase will lift your spirits
If you are confident with a sewing machine and are not afraid to experiment, then a pillow can become a real toy, cute and funny. Use multi-colored fabrics, make an appliqué, and the pillow will become a full-fledged interior detail that will be loved by all family members, including the future baby.
Give your bagel pillow a fun and funny look
Take the time to sew ribbons or fasteners to the ends of the pillow so that it can be easily rolled into a bagel playpen and secured.
"Banana"
This version of the product is extremely simple to implement. And you will need less fabric than for previous pillows.
Transfer the pattern onto paper (dimensions are given in millimeters).
Pattern of half a banana pillow, on the left - the fold or middle of the fabric
Transfer the pattern onto the fabric. Cut without forgetting the seam allowances. You will need two identical parts.
Transfer the pattern to the fabric
Sew the parts from the wrong side, leaving a 20 cm hole for the filler.
Turn the napkin right side out and fill with filling. Sew the hole left for stuffing. The banana pillow is ready! All that remains is to sew a pillowcase with a zipper using the same pattern.
Video: master class on sewing a pillow for pregnant women
Here's another one useful idea to the needlewoman's piggy bank. We hope our article was useful to you. Ask your questions in the comments and share with us your experience of sewing pillows for pregnant women. Have a nice rest and creative mood!
DIY pillow book “Look, touch, rattle, rustle”
Master class from Natalia Nichepurenko
 Recently my youngest daughter Dashenka turned 6 months old, she no longer wants to lie in one place, for example in game center– a rug with arcs. Studying pictures in books on your own is problematic, since everything ends up in the mouth or torn.
Then I decided to sew her an exclusive book that performs maximum functions:
- allows you to get acquainted with different textures by touch
- teaches simple skills (unfastening buttons, zippers, lacing, Velcro, ties)
- demonstrates a variety of colors
- makes various sounds (rattles, rustles, crackles)
- introduces us to the objects around us
- can be used as a pillow during the game Having gathered together the swarming ideas, all suitable materials
(mostly natural: cotton, linen, leather) and patience (I must say, this is a rather painstaking task) I began to make a small “masterpiece”.
I cut out 12 22x30 cm pages of different colors from cotton and duplicated them with non-woven fabric.
Almost all appliques are sewn with a zigzag stitch with a step width close to 0.
The soft looped part of the contact tape (Velcro) is sewn onto the page parts, Velcro with tenacious hooks is sewn onto the underside of the removable parts.
Details of appliqués and removable items are glued with serpyanka or dublerin.
|
For rustling details, a layer of bags (like pasta) is inserted between the layers of fabric. 1) On the cover there is an octopus, the voluminous head of which is stuffed with padding polyester and a rattle is also included (a Kinder Surprise box with buckwheat). Tentacles – 8 strips of 25x5 cm, in finished form |
|
You can rattle, tug on the “legs”. |
|
3) A tree with Velcro flowers on which you can attach apples and even a pear! The grass is made with a fringe of flax scraps, releasing longitudinal threads. |
|
4) Ladybug teaches how to use a zipper, the wings are double, sewn only at the top, the antennae made from a hat elastic band can also be pulled. |
|
5) The seven-flowered flower has a soft (stuffed with padding polyester) core and rustling, folding petals. |
|
6) The boot is cut from a piece of leather and needs to be laced. |
|
7) A house with an opening door and window, behind which little animals are hiding. |
|
8) The rustling butterfly is attached with its tenacious belly to the place of the caterpillar dancing on the flower (the petals fly away and rustle). |
|
9) The boat has a pocket, the sail is fastened with a button on the leg, and the fish is attached with Velcro. |
|
10) A Christmas tree in the snow (made of soft Velcro) turns into a New Year's beauty. Ribbons are tied into a bow on the gift. |
|
11) A mitten made of terry cloth, where you can stick your handle or hide it Christmas decorations from the previous page. |
|
12) The sun with rays made of satin ribbons is attached to 2 pieces of Velcro. |


 When all the pages were ready, I sewed them in pairs: 12 and 1, 2 and 11, 10 and 3, 4 and 9, 8 and 5, 6 and 7. I cut out 6 rectangles of 42x30 cm from synthetic padding. The resulting pairs were folded back and forth, inserting 2 layers of padding polyester inside. I framed 3 double sheets with a satin ribbon cut on the bias, placing 4 ribbon ties under it on the cover.
Then it was necessary to assemble the book and stitch it in the center. But I am in no hurry to perform this operation, since it is not convenient for a child to leaf through a large book lying on his tummy. For now, my daughter is playing with three mini rugs, but as soon as she sits well, she can finish the job.
To diversify the interior of the living room, it is not at all necessary to rearrange the furniture or change the wallpaper. Original and unusual pillows that you can easily sew with your own hands will help add some zest to your relaxation area. How to do this is very simple, show a little imagination, and bright fabrics and scraps will also help you.
The shape of the pillow can be very different - from simple rectangular to stylish and unusual hearts or animal figures. Take a fairly dense material for it - satin, brocade, fleece, you can sew fur pillows or products made from scraps. Color range choose at your discretion, but the fabric should be in harmony with the overall interior of the sofa and room. “Cool” fabrics, such as satin or silk, are good for summer. various elements The pillow should be stuffed with padding polyester or padding polyester, you can also use foam rubber or fibertek. These fillers hold their shape well after washing, give the product fluffiness and softness, and are hypoallergenic. Do not stuff with feathers or cotton wool, they will quickly become crumpled, lose their shape and can cause allergic reactions. The pillow can be decorated . For example, do on finished product

- To sew a simple rectangular pillow for a sofa, you will need:
- Thick plain fabric for the pillow itself; Bright and original fabric
- for pillowcase;
- Decorative elements;
- Threads matching the tone;
- Filler;
- Needle, pins, scissors, thread;
Sewing machine.
Decide on the size of the pillow. The optimal size for a sofa is a square of 40x40 cm. Fold the plain fabric in half, right side inward. Mark a square on the fabric required size, plus 2 cm on each side are left for allowances. We cut out a square with sharp scissors and pin it around the perimeter, or you can baste the pieces with a loose seam. We sew the base of the pillow on a machine, leaving a small space for stuffing, turn it inside out and stuff it with filling. The hole through which we stuffed the pillow can be sewn up by hand, or you can sew in a zipper - this makes it more convenient to replace the filling and wash the pillow. The main part of the product is ready. Now let's start sewing a bright pillowcase or pillow cover. The cutting principle is the same - cut out 2 squares, 3 cm larger than the base. You can make a cover with a zipper, or you can cut out the back part 20 cm longer and fold it according to the principle of a regular pillowcase.
We sweep the cut parts by hand and sew them on a machine. We sew a zipper into one of the sides. Turn the finished pillowcase inside out and put it on the pillow. A stylish DIY cushion for the sofa is ready.
Step-by-step master - classes and patterns or how to sew a pillow with your own hands
A lot of master classes are waiting for you now. Let's start with children's pillows.
Pillows - toys for adults and children
Soft plush friends are always appreciated by children. What if we made them a little more practical, but no less original? In this section you will see a lot of children's pillows in the form of toys and simply unusual and bright designs for a great holiday baby.
Children's pillow - toy “Rosalina”
With this shy beauty children's sleep will always be a joy. To sew a soft blanket for your child, you will need:

- velsoft (for the base of Rosalina, you can take faux fur and fleece);
- thin felt (for decorating the muzzle);
- threads in the color of the fabric + black;
- lace of 2 colors (for decoration);
- small rose (for the central part of the bow);
- padding polyester (for stuffing);
- dry pastel (to give a delicate blush);
- cotton pad (optional);
- chalk or pencil (for transferring patterns onto fabric);
- needle;
- pins (for chopping parts);
- scissors.
Here are the patterns for Rosalina (click to enlarge):


Cut them out carefully, velsoft is a capricious fabric. We start with the ears. Sew them like below. Turn the ears out and stuff them with padding polyester.


Place the ears inside the head. Pin along the edge, baste and sew, leaving an opening at the bottom.


Turn your head inside out along with your ears. I got it like this:

Stuff Rosalina with padding polyester and sew up the bottom hole with a hidden seam.

Now we have to make Rosaline's face. To do this, take all the details of the face, pin them to the head (so as not to move), and then sew them with a small hidden seam.
To apply blush, just take a pastel chalk and rub the bunny’s cheeks, rub it with your finger. If the pile on the fabric is not very long, you can do this using a cotton pad, after first applying pastel to it.


Rosalina definitely needs to make a cute headband! To do this, cut the lace so long that it is slightly longer than the distance between the ears.
Sew the ends of this piece to the ears, as if stretching it.

Now let's make a bow! To do this, take another piece of lace, fold it in half and sew the ends together.

Now simply sew a line of running stitches down the center of the bow. And pull it off.


Quadrocat
Necessary materials
What will we need for a pillow - a Quadrocat toy?

Here is the list:
- fleece in 2 colors (for the muzzle and head);
- felt (for the eyes and nose);
- threads in the color of the fabric;
- padding polyester or padding polyester (for stuffing);
- white acrylic paint for the pupil (or rhinestones)
- a glass of water (if you use paint);
- second glue (if you chose rhinestones);
- pencil or chalk for transferring patterns onto fabric;
- stitching needle;
- paper for transferring patterns onto fabric;
- scissors.
Before you start sewing, you will need the patterns that I have prepared for you (click):

First of all, I want to say: this is only a quarter of the pattern (for the head and muzzle), for the nose it is half. For felt parts, allowances are not needed. For everyone else, half a centimeter should be enough.
First of all, cut out and sew the ears together. Trim off excess seam allowances. Turn out the ears.


You can put the ears aside for now, take the muzzle and head. Sew the muzzle into the head as shown below.
To avoid confusion, you can make small notes in the same places on the muzzle and border.

This is what the cat's face looks like:


Now place the ears inside the Quadrocat where you like and sew them in. Also sew the seal along the edge, leaving small hole at the bottom.

Turn the pillow inside out. So far Quadrocat looks like this:

And now you need to stuff the pillow with padding polyester as tightly as possible, since fleece is very sensitive to stretching and can simply turn out “orange peel” if the stuffing is not dense enough

Sew the bottom hole with a hidden seam. Below you can see the hole that is already completely sewn up.

Our cat is still without a face! Let's fix this. Take the eyes and nose and place them where you would like to see the muzzle.

We will sew on the eyes and nose. To do this, bring the thread out as below and sew with a buttonhole stitch, but VERY fine. That is, there should be no distance between the stitches at all.

This process is quite painstaking, but it’s worth it! Final photo:

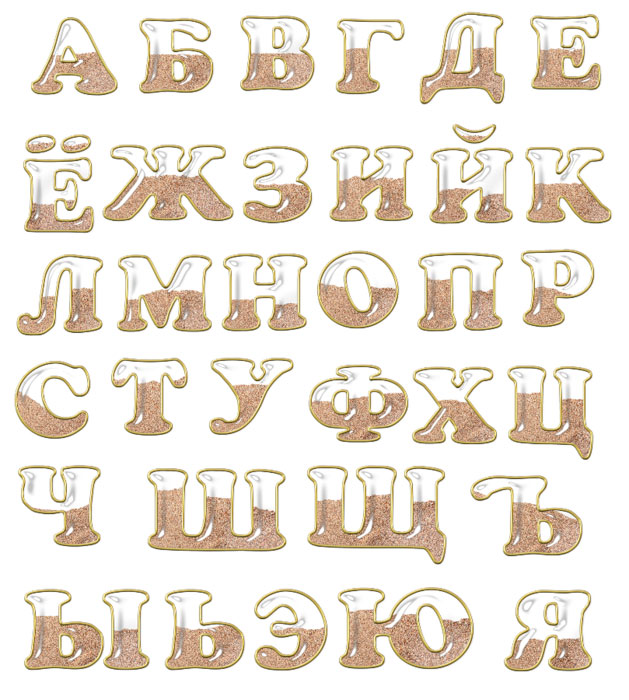
DIY letter pillows
A very common type now sofa cushions. They are sewn quite simply, the main thing is to have the alphabet with the desired language on hand. And enlarge the letters to the desired size, of course.
The most important thing is not to forget to cut off the required amount of strip for the side jumper.

I found two such alphabets, but there are many more on the Internet. a large number of different fonts, each of which is suitable for lettering creativity. 
Photos of baby pillows


There will also be a lot of inspiring photos at the end of the article, so don't miss it
DIY decorative pillows: photos and creation schemes
There will be cushions, flower pillows, and simply unusual, practical and easy to implement ideas.
Soft heart for dear
Now we’ll talk about how to give a gift to your loved one with your own hands. Otherwise, Valentine's Day is about to come, and somehow I rarely prepare you for it)
What gift am I talking about? We will sew a beautiful pink heart-shaped pillow with voile frills.
Necessary materials

- faux fur for the heart itself (the pillow is quite large, so the dimensions of the material are decent: 110 x 40 cm);
- veil, chiffon or organza for frills and flowers (dimensions: 300 x 30 cm);
- synthetic padding or padding polyester for stuffing;
- threads in the color of the fabric;
- satin ribbon for bow;
- rhinestones;
- paper for patterns;
- pencil for transferring patterns;
- scissors;
- needle;
- pins for pinning patterns and frills.
You will need patterns (click to enlarge):


As you can see, this is only half of our heart. Therefore, when you cut it out, transfer first one half, then the other. And so on for both parts.
Cut out two parts so that the direction of the pile on them is the same. Cut a strip of the following dimensions from the veil: 300 x 18 cm. Such a long length is needed so that when further gathering this strip you can insert it into the edges of the pillow.

Now fold the strip in half lengthwise. Sew two lines on a sewing machine at a distance from the edge and from each other by about 5 - 7 mm. But do not fasten the ends of the thread! And leave more thread on all sides.

We haven't secured our stitching, so now we can tighten it. Just pull both threads and slowly gather our frill to the desired state (the length of the finished frill should be equal to the length of the edge of the pillow itself).

Once the threads are tight, tie all the threads into knots at the ends and trim off the excess threads.


Now you need to put the frill inside the pillow, as shown below, and pin it.
 And then baste and sew without sewing to the end. Leave a small hole. After everything is sewn, turn the future pillow inside out and fill it with synthetic down.
Now sew the ends of the frill together, as in the bottom photo.

If you have a small reserve of frill left, you can slightly hide the seam by making a small fold. All that remains is to sew up the left hole.

Our pillow, of course, is good, but there are not enough decorative elements on it, so we will make roses with you. To make roses, you will need 3 strips of veil with the following dimensions: 9 x 50 cm, 5 x 30 cm and 4 x 17 cm. Process them as well as a frill for a pillow.

It's time to wrap our rose! To do this, start rolling the rosette as below. But when wrapping the flower, bend the edges of the rose so that it looks more natural. Using this principle, make all 3 roses.


The roses turned out great, didn't they? I hope everything worked out for you too. By the way, I wrote about creating similar roses in one of previous posts.
All that remains is to sew or glue the rose to the pillow. It turns out very nice:

Other sofa cushions
I think a few more detailed master classes will not hurt you)
Butterflies

Lamb

Bear and dog


Frill

Roses 
Roller “Princess Hotdog”(don't worry about the name, this is a character from one stoned cartoon)
I don’t have a detailed photo description, but I can say one thing: for the body you will need six elongated wedges and two parts (almost semicircles) for the muzzle.

Other fabric fantasies


It's nice to know that blog readers are inspired by my posts. The wonderful needlewoman Marina Grudzinskaya sewed pillows based on the works presented in this article. Come visit her (profile in In contact with And Instagram) and evaluate the products yourself:


I want to show you where to buy excellent materials to create super-soft and delicate pillows that are indistinguishable from store-bought ones. I bought this myself wonderful fleece- I couldn’t be happier, he’s so nice. The most important thing is - color palette on high.
With this, dear friends, I bid you farewell. This time the article turned out to be very full of ideas (personally, I counted about 50 ideas). I hope that we found exactly the option you wanted. See you soon!
Sincerely, Anastasia Skoracheva