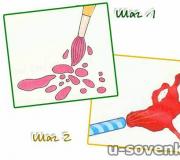
How to make a rough wall. Textured plaster for walls: a spectacular transformation of the surface
How to make an exclusive renovation and at the same time save a lot on materials? One of the most interesting ways wall decoration is the application decorative plaster. But is it possible to create complex textures, patterns and designs on the walls without buying expensive materials or mastering complex construction techniques? It turns out that this is quite easy to do. You can use the most common gypsum putty.
Advantages of using decorative plaster in the interior
It’s not difficult to get interesting texture options for the decorative surface of walls using simple putty; just use your imagination and don’t be afraid to experiment. Moreover, gypsum mixtures, both ready-made and dry (which are prepared independently) have excellent adhesion. They fit perfectly on brick, foam concrete, drywall, and plaster. Special additives that manufacturers add to mixtures do not allow gypsum plaster to harden quickly.

Additional coating of decorative plaster with varnish will ensure longer service life and the possibility of wet surface treatment in case of contamination.
Gypsum putty can be colored before starting work. Using multiple colors or shades can provide amazing visual effects. Decorative plaster can also be painted after application. There are several ways to process textured surfaces, each of which will create a unique color.
By following all the technological processes and getting a little hands on, everyone will be able to create their own unique pattern on the walls of their apartment.
A special positive quality of gypsum mixtures is their environmental friendliness, because its main component of natural origin is gypsum. The putty does not absorb foreign odors, allows the walls to breathe, does not cause allergic reactions, and does not emit any toxic substances.
Decorative plaster made from a gypsum mixture, if done correctly, will last for quite a long time. In terms of durability, it will compete with decorative stone or ceramic tiles.
Caring for decorative plaster is quite simple. Its only drawback is its relative fragility. Therefore, in children's rooms, where children play outdoor games, may not move a chair carefully or hit the wall with something, such a covering is not recommended. It is quite difficult to make sure that the broken part is not visible. Maybe hang a small picture on top.

How to make a mixture for decorative plaster?
Putty for decorative plaster is used both as a starting (coarse-grained) and finishing putty. It is up to the master to decide which putty to use, since the result of the work will depend to a certain extent on the structure of the mixture.
There are ready-made compositions on sale. Their structure and consistency are optimal for application. However, they are quite expensive. Considering that decorative plaster requires several layers of coating, the cost of the material will be high and it is unlikely that you will be able to save money.
It’s easy to prepare your own working solution from a dry gypsum mixture. Pour some water into a plastic bucket and, gradually adding the dry mixture, actively mix the solution using a drill and mixer. This way we bring the composition to the desired consistency, at which it will be convenient to work with it. The manufacturer indicates the relative proportions of water and dry mixture on the packaging.
If the design requires a colored coating, we make decorative plaster from putty using pigments. You can take dry powder or liquid colors and add as needed while preparing the solution.
Decorative plaster may contain hard particles (sand, marble chips) and soft particles (for example, polystyrene foam). With their help, various grooves and depressions are formed on the decorative coating.

Application of decorative plaster
Before you start applying the coating, you need to prepare a tool for working with decorative plaster. For this you will need:
- spatulas (regular, serrated and with rounded edges);
- rollers (with pile, fabric, rubber stamps and stencils and other devices);
- graters, a set of sanding meshes or sandpaper;
- building level or rule;
- available materials (fabric, pieces of foam, newspapers, maple).
The technology of applying decorative plaster includes several stages:
- the preparatory stage includes the initial processing of the walls and their alignment;
- applying the base layer;
- creating an invoice;
- final processing.

1. Surface preparation
At the first stage, it is necessary to clean the surface of the walls from old coatings, remove old wallpaper, paint, remove loose parts of plaster and other poorly adhering parts. Next, you should embroider and fill all the cracks and potholes.
The first layer, intended to level the surface, is recommended to be applied to a previously primed surface. The primer, penetrating a few millimeters deep into the base, glues and strengthens the surface, allowing the putty layer to adhere more tightly to it.
After checking building level the plane of the walls, apply a leveling layer of starting plaster and let it dry well. The next day, when the entire layer has become completely dry, we clean the surface from large irregularities. This can be done using a wide spatula. Before applying the next layer (textured), it is recommended to prime the surface again.
2. Applying a layer of decorative plaster
You don’t need much to prepare the mixture for decorative plaster. Since the thickness of this layer should be no more than 3 - 5 mm (depending on what texture will be applied), it will be necessary to experimentally calculate such an amount so that during the work the composition does not change its thickness, and all manipulations can be carried out in time directly on the wall.

To obtain the desired structure on the applied putty, a variety of methods are used. They are not limited to commercially available rollers and ready-made stencils.
Let's look at some ways to apply patterns and textures:
1. Nap roller
Most simple device To apply the texture of decorative plaster, use a regular lint roller. By rolling such a roller over a freshly applied layer of putty, the master creates rough surface. If you easily smooth out the “pile of putty” with a spatula, you will get a completely different pattern.
After drying, sharp areas of putty must be cleaned. To do this, lightly go over them with a spatula, sandpaper or a special abrasive mesh.
2. Roller with stencil
In construction stores you can find rollers with a variety of patterns. The stencil leaves an imprint on the putty applied to the wall. To successfully use stencils, you must follow certain rules:
- the putty layer should be as uniform as possible so that the depth of the print does not distort the overall picture;
- you need to roll with a roller in the same direction all the time;
- smoothness of the print will only be possible if the roller is constantly washed with water - this is the only inconvenience when working with such a tool.

3. Spatula
Using ordinary spatulas for putty, serrated spatulas for laying tiles, trowels and similar tools, the master can create the most unique patterns. The only limitation is imagination.
4. Available materials
If you don’t have standard tools at hand for creating decorative plaster, you can use a wide variety of available tools for this purpose. An ordinary kitchen sponge, brush, newspaper, plastic bag or oilcloth, pieces of fabric or foam wrapped on a wallpaper roller can be successfully used for a creative approach to creating a unique decorative finish.

Methods for creating a texture
Let's look at some of the simplest and most popular methods of applying decorative plaster using various spatulas and available materials.
1. "Scales"
To create a texture that will imitate fish scales on the wall, you will need a small spatula, but you can also use ordinary spatulas of different sizes.
Method 1. Apply a layer of plaster to the wall surface. Starting from the ceiling, use a polisher or spatula to make small semicircular movements, pressing and removing a little putty.
Attention! You cannot cut through the layer to the very base. We must remember that there is a minimum permissible layer thickness that will adhere well and will not crumble soon. For starting putty (plaster) this minimum is 3 mm, and for finishing putty - 1 mm.
Method 2. Scoop the solution onto a spatula and apply it in semicircular movements from top to bottom, gradually overlapping the previous strokes. They can be made of the same size in a checkerboard pattern (it will look like scales) or of arbitrary size and chaotically, without adhering to a strict order.
In this way, they usually do not cover all the walls in the room, but select a certain area and make a panel.
2. “Fur coat”
The long-forgotten method of decorative plaster, which our parents used to cladding houses, is found in the interior decorative finishing new life. The process of applying a “coat” of putty will also be different.

To create such a coating, it is necessary to apply a layer of putty to the wall about 3 mm thick. There is no need to worry about smoothness. Next, place a thin oilcloth on the fresh putty (you can use large garbage bags), smooth it out and press lightly so that it sticks tightly to the surface. The next day, carefully remove the film. There will be many small wrinkles, bumps and grooves on the putty.
3. "Flowers"
You can make an abstract pattern in the form of roses on the surface of the walls using a piece of newspaper and a bag. We take unnecessary newspaper and crumple it into a small ball, wrap it with a thin bag on top. This will create a kind of stamp. We press the improvised tool against the freshly applied putty and get an amazing impression that looks like a flower. Repeat in random order.
4. "Algae"
Attach a rubber band to a foam, rubber or wallpaper roller (you can use a thick rope). Rolling it over a fresh layer of putty will create a pattern that imitates algae. Move the roller in the same direction, for example, from bottom to top, as the putty will drag slightly behind the roller. After drying, you need to remove the protruding parts of the relief with a spatula.
5. "Feathers"
Dressing walls in light feathers is quite simple. To do this, you need a wide rubber spatula, cut with small teeth along the working edge. Apply a layer to the wall finishing putty up to 3 mm thick. Use broad, curved, wavy strokes in any direction to apply the design to the wall. It is necessary to cover the entire surface without gaps. For greater believability, orient the strokes relative to the guide lines, which will act as the spine of the pen.
6. "Furrows"
Using a masonry comb ceramic tiles, we create a relief surface on a fresh layer of putty. The putty is applied in a layer of about 3 mm. It is convenient to use a starting putty mixture. We draw vertical, horizontal or inclined stripes in any order you like.
Similarly, by turning on your imagination and trying it in practice, you can create a wide variety of patterns, even artistically designed bas-reliefs. But it’s not enough to make a unique texture out of putty. Without additional processing, any three-dimensional pattern will simply be lost on the surface. You need to think about the method and color of painting in advance.

Painting
Decorative plaster looks best if there are different shades or colors. There are several ways to give a textured surface a variety of colors.
Attention! Before painting, be sure to remove protruding parts from the surface of the decorative plaster with a spatula. Also, if possible, you need to remove dust and small particles of putty.
1. Removing excess paint.
This method provides beautiful shades of the same color. Minus this method is overuse of paint.
Apply paint over the entire surface with a hair roller and roll it out well, trying to cover the entire surface without gaps. You need to apply the paint quickly so that it does not have time to dry. We run a damp bath sponge over the fresh layer, removing excess paint. There is more of it in the depressions, and less on the hills.
2. Removing the dry layer of paint.
To highlight the texture of decorative plaster using this method, you should perform the following steps: paint the entire surface with a roller in the selected color and wait a day. Using a spatula, “scratch” along the convex parts of the plaster, removing excess already dried paint. Thus, the convex structure stands out and amazing patterns are formed.
3. Painting in several layers.
This method can be successfully used when the decorative plaster is quite small or very protruding. First of all, cover the entire surface with the base color using a roller or brush. After drying, we apply a roller, slightly moistened with paint of a darker or lighter tone, over the surface of the texture.

4. Painting the putty before application.
This method is appropriate to use for processing small areas, since when painting putty with colors, it is very difficult to achieve the same shades in different batches. It is also used when performing “Venetian plaster”.
To make a decorative surface made of putty more durable, after painting it is necessary to apply a protective layer to it. To do this, prepare a mixture of wallpaper glue and panel varnish (glaze). Using the tamponing method, the mixture is applied to the wall surface. After drying, everything is covered with acrylic varnish on top.
Either varnish on water based dilute in a 1:1 ratio with water so that it penetrates better into the putty and is applied in two layers.
How decorative plaster is made from putty is presented in the following video. It clearly shows the process of working on decorative coating and the end result of applying fantasy in practice.
Today, people are increasingly striving to furnish their homes in an original way, avoiding platitudes and cliches. In this sense decorative painting walls - enough interesting solution: manages to create incredible textures, artistic images and color combinations. The shops are replete with goods for every taste. Therefore, without much hassle, you can decorate your interior stylishly, even without professional design training.
The work surface needs to be cleaned. Often traces of old paint, whitewash, and wallpaper paste remain on the walls. They all have a different chemical composition, the substances interact with each other differently, and if you also want to repaint the walls, this may negatively affect the final result.

Preparing the surface for painting

In some cases, previously pasted wallpaper cannot be removed from the wall - then it is advisable to use alkyd primer paint. It is recommended to dilute it with white alcohol in a ratio of 1 to 3, mix thoroughly, and apply to problematic areas of the walls.
Another important point concerns the removal of dirt, oil and grease stains, fungus (fungal damage is typical for rooms in old buildings, as well as in conditions of high humidity). Treat oil stains with acetone or pure gasoline. Just apply a little onto a dry, lint-free cloth and wipe the areas where you see grease-containing dirt.

Examine the wall for old cracks. Most likely, they will also be found. Prime the cracks with as dense a substance as possible, preferably finely dispersed and with high adhesion. The most common materials are cement or gypsum, or a mixture of both. Apply the solution by first moistening the cracked areas with water (this way you will maximize the adhesion of the “native” material old wall and primers).

Which paint to choose
It’s useful to start choosing paint long before you get into the process. It is not very wise to grab the first thing that comes to hand from the store counter at the very last moment. In addition, you definitely need to try the properties of the purchased paint somewhere in a separate place.

What is it for:
- see how it dries (does it leave cracks, quickly or slowly, does it change its original color);
- find out whether the paint will emit a pungent odor (sometimes manufacturers write that the paint is neutral, but in fact it turns out that the paint contains sharp-smelling fractions - for living rooms this is unacceptable);
- make sure that the paint consumption corresponds to that indicated on the packaging (this value is very arbitrary, because you can never determine with absolute accuracy how thick a layer you are applying and how much substance will be used per unit square area).
Attention! When buying a product in a store, do not forget to look at the manufacturing and expiration dates so as not to buy expired paint with changed characteristics.
It should be noted that decoration through painting can be done in two ways:
- using special textured paint (the option is more expensive, since such paint has a high price, although it is worth it!);
- using regular wall paint, but combining different colors(in the form of applying stencils, patterns).

The consistency of wall paints is quite liquid. When applied, no lumps, grooves or sagging remain. Painting is usually carried out in several layers. The exception is the use of a spray bottle. With its help, it is possible to evenly paint every centimeter, but in most cases it is necessary to handmade. A brush and roller are your tools.
Attention! Apply paint only to a completely dry surface - after all cleaning, priming, etc. Otherwise, you will be left with imperfections after the new paint dries.
Maintain uniformity in the speed and amount of paint applied. Start with those sections of the wall where you plan to place wall furniture in the future, hang a panel or a carpet, where there is minimal illumination.

This is necessary so that possible defects are not as noticeable as in the most central places. Apply each subsequent layer after the previous one has completely dried.
Attention! Apply the very last, final layer in the direction of the light rays falling on the surface.
Decoration

Buy stencils at the store or make your own. Suitable material:
- thin sheet plastic;
- a piece of thin linoleum;
- thick oilcloth, etc.
The point is that the form does not collapse after several movements with a roller or brush. If this is not taken care of in advance, the edges of the form will become uneven and the applied design will have blurry outlines.
Stardust effect

A simple and at the same time interesting design technique: “speckles” of paint of a different color are applied to the dried surface. To do this, you need to take a rough brush with hard bristles, dip it in the paint, squeeze it thoroughly, and only then “spray” it in the right place: bend the bristles in the opposite direction, and then release it. Practice somewhere else beforehand to get the quality you need.


The decoration turns out to be very original when you paint the walls in a single color, but in different colors - individual areas or different walls the same room. Perhaps these will be large rhombuses or squares, stripes, circles, stains. Draw a design on paper in advance and act based on the picture.

Aging effect
Another name is stippling. Apply a glaze of a contrasting color to a plain surface. Use a wide flat brush for this. Without waiting for it all to dry, touch the surface repeatedly with the same coarse brush (or take a coarse round brush). Spread the “touches” either completely over the entire surface or zonally. As a result, an original texture is formed, and traces of brush marks will not be visible.
Attention! The same can be done not with a brush, but with a rough, dry sponge. The main thing is that the mechanical intervention is performed in a certain given style (the same nature of touches, their more or less uniform frequency).
Chaos pattern effect or abstraction
Make a simple roller coated with “torn” material. It will help you apply fine wall paint so that random shapes appear on the walls. Naturally, the applied layer should differ in color from the main one.


Video - Applying an abstract pattern with a torn roller

You will need:
- acrylic primer;
- vinyl paint in two shades;
- pearlescent azure;
- decorative paper.
The procedure is priming and painting, applying paper and crumpling it, painting again, removing excess paint from the folds of the “skin”.
Video - Decorative painting of walls with a wrinkled leather effect
Applying textured paint
By characteristics textured paint very close to textured plaster. But the paint is thinner, and therefore more flexible. Its use gives a stunning effect - exquisite surfaces that will delight the eye with exclusive decor for a long time.
What creates the relief:

You can further refine the coating as follows. After it has dried, apply regular paint of a contrasting shade with a soft brush to the base layer, not everywhere, but in places - you will get an original, chic decor. Some craftsmen even use not one, but two or three contrasting colors, applying them in a special cascading manner. If you want the same thing, be sure to train in advance, because without skill it’s unlikely to succeed.


Advantages of textured paints


The industry of modern finishing materials provides the widest field for bold experimentation. You are not limited in anything, and you do not need to undergo special training or acquire any specific skills. A relief paint application and experimental courage in artistic painting are enough.
Although textured paints are more expensive than regular “smooth” ones, they have a number of undeniable advantages:

Such a wonderful product is ready for use, and even the most untrained decorator can work with it.
The use of textured plaster is very popular not only for decorating building facades, but also structural elements indoors. Each specific case of using the material involves obtaining an exclusive design. In addition, textured plaster for walls indoors and outdoors creates an environmentally friendly, durable, moisture-resistant and durable surface.
Using textured wall plaster you can create amazing effects: wrinkled leather, silk, or concrete slabs
The textured mixture for walls is a heterogeneous viscous mixture of white color, which contains various fillers connected by a certain binder. Pebbles, ground brick, mica, gypsum, fine-grained sand, wood and cotton fibers are used as additives. It is the type, quantity, size and color of particles, as well as the application technology that determine appearance finishing material. The price of textured plaster for walls depends on the type of composition and manufacturer.

Using this material You can create a surface with different levels of grain, with a rough structure, three-dimensional reliefs, and imitate stone, wood, velvet or leather. The mixture is applied to any surface and allows you to hide all existing wall defects.
Depending on the binder, acrylic, silicate, mineral and silicone textured plaster are distinguished. Each option has its advantages and disadvantages. However, they all have basic distinctive features:
- ease of application, which does not require professional skills;
- elasticity of the material, which allows you to create an attractive and unusual surface;
- does not contain toxic substances;
- antistatic coating;
- fire resistance;
- high surface resistance to mechanical stress;
- resistance to UV rays and moisture;
- resistance to temperature changes;
- increased vapor permeability;
- the material creates good sound and thermal insulation;
- The surface is easy to clean and wash.

Technology of applying textured plaster
To obtain a neat, high-quality and durable surface, work should be performed in a certain sequence:
- Preparatory work.
- Basic stage.
- Creating an invoice.
- The final stage.
For preparatory work you will need a primer, a paint brush, putty, and sandpaper.
Scroll necessary materials For finishing works:
- metal and rubber spatulas of various sizes;
- trowel;
- rule;
- grater;
- level and plumb;
- rollers, brushes, paint;
- masking tape;
- various devices to add texture.

Preparing walls for decorative plaster begins with cleaning them of the old coating. The surface must be flat. Use putty to seal all cracks and crevices. Before plastering indoor walls made of aerated concrete, foam concrete, or brick, the installation of a reinforcing mesh is required, which will prevent the finishing material from cracking and crumbling after drying, but will create good adhesion between the plaster and the base.
Many types of plaster do not require preliminary leveling of the walls. If the surface has significant unevenness, they should be eliminated using gypsum, lime or cement-sand mixture, by plastering the walls along the beacons with your own hands, applied in several layers. It is worth considering that it may take about 24 hours for one layer to dry. The use of a cement-sand mixture involves the installation of a reinforcing mesh for plastering the walls.
To install beacons, you need to use a level or plumb line to hang the walls horizontally and vertically and identify all deviations from a flat plane. Beacons are attached using self-tapping screws. To determine the thickness of the plaster layer, the thickness of the beacon is added to the most convex section of the wall. If the wall has minor errors and unevenness, you can plaster the walls with your own hands without beacons.

Helpful advice! If leveling the walls turns out to be too costly and complex a process, it is recommended to use plasterboards.
The leveled surface is primed twice. For the best effect, you should use a deep-penetrating composition that will create good adhesion of the plaster to the base. Acrylic primer copes well with this task. Next, you should dry the wall well before applying the facing material.
If finishing work is carried out in a room with a high level of humidity, the surface should be treated with an antifungal compound, which will create additional resistance of the coating to the negative effects of moisture.
Carrying out the basic stage
The basic stage is the application of a decorative mixture, which can be done in several layers. The plaster consumption per 1 m2 of wall is 1-2 kg of material. With multilayer coating this figure increases.

Textured plaster, the price of which starts from 700 rubles, can be in the form of a dry powder, where it is necessary to prepare a working solution for plastering walls by adding a certain amount of water, or in finished form. Any texture has a traditional white color, which can be changed using special dyes. For rooms with high humidity, moisture-resistant dyes are used.
A small amount of the mixture is spread over the trowel with a spatula. Next, using a tool placed against the wall at an angle of about 30 degrees, the mixture is applied. The material should be applied to small areas, as it sets quickly enough. However, in working condition it is very pliable, which allows you to create any pattern on the surface. The layer thickness should be at least 3.5 mm, which includes a layer of about 1.5 mm thick to create texture.
Particular attention is paid to corners. Here the plaster is applied using a narrow spatula and stretched over the surface.
Helpful advice! Before applying textured plaster to the wall, you should carry out a test application of the mixture in order to “feel” the material, select the thickness of the layer, and try to create a future pattern. This will help avoid mistakes.

Methods of applying decorative plaster
Today there are many various options obtaining a unique pattern on the treated surface. It all depends on the type of plaster and the technology of its application.
There are two options for obtaining a decorative effect:
- Forming patterns using various instruments and the use of textured plaster with varying degrees of grain in its composition. This option is cheaper. In addition, you can make textured plaster with your own hands. A video of this process will help you study the technology.
- Application for decorative plaster with applied ornaments. In this case, to obtain a clear pattern, the roller is applied once along the entire length or height of the wall. You can also use a regular roller with various attachments (wrap it with a rag, paper, film), which can be rolled in different directions on textured plaster. Then, using a spatula, you can slightly smooth out the sharp corners.

To obtain a pattern or ornament, you can use a ready-made stamp by applying and pressing it to the plaster. You can buy it or make it yourself. In order for the impression to be clear, it is necessary to regularly clean it from the plaster and moisten it with water. To complete the design on narrow areas of the wall, you can use a soft version of a stamp made of rubber. Using a print will reduce the consumption of finishing material.
On the surface of the wall you can create an imitation of stone, leather or fabric. Using a trowel or notched spatula, you can create a coating under wild stone. Using a brush you can imitate fabric. To do this, apply a thin single-layer coating with a brush in a vertical or horizontal direction, or by turning it like a compass.
Important! When creating a drawing, you should not go deep to the very base of the wall, since some fragments may fall off the wall after drying.
When using a mixture with small fractions, you can use a wooden grater to create an ornament. By moving the tool up and down, you can get a “rain” effect; with horizontal friction, you get an imitation of wood. When you move the grater in a circle, you can get a “lamb” effect.

Popular relief textures of textured plaster in the interior. Photo examples
One of the most budget-friendly options is the application of textured plaster with a “fur coat” effect. This can be achieved by throwing the solution through a mesh, spraying it with a long-haired brush or broom, walking over the layer of plaster with a roller with a short fur coat, or applying the mixture with a pneumatic gun.
The most popular is textured plaster with small granules, creating a “” texture. The mixture is applied to the wall with a thickness of 3-7 mm using a spatula or trowel, depending on the size of the inclusions. After the surface has dried slightly, it is necessary to treat it with a grater in any direction, scratching the surface, thereby imitating a pattern.
No less interesting option It is considered to be the application of decorative plaster under traventine, which imitates natural stone masonry or aged stone walls. The mixture is applied in two layers. To decorate the surface for masonry, special grooves are made using available tools.

Helpful advice! If you make wide strokes you will get a calm pattern, small strokes will result in a more saturated pattern.
The technology of applying Venetian plaster requires a certain skill. The prepared wall should be perfectly flat and smooth. The material is applied using a polished trowel in a thin layer using sharp short movements. It is necessary to apply 3-10 layers, where each of them is sanded for a more pronounced marble effect. At the finishing stage, it should be done using a trowel, which is rubbed over the surface with force to give it a noble shine and glossy texture. After the surface has partially dried, it must be polished with wax.
Related article:
Photos of interiors using Venetian plaster. DIY mixture. Prices for decorative plaster and work on its application.

When applying this mixture, which includes marble dust or sand, a marble effect is created on the wall surface. If instead of lime as a binder, acrylic resins or other polymers are used, you can achieve the effect of leather, silk, suede, mother-of-pearl or velvet, as clearly shown in the photo of the interior of a room where Venetian plaster is used.

Another complex, but yielding amazing result, is the technology of applying textured sgraffito plaster. The essence of the technique is to apply several layers of plaster of different colors to the wall surface. Using a special stencil, the design is applied in the topmost layer of all those applied. The ornament that appears looks like a fallen shadow or appliqué.
The “world map” technique is performed using plasters with effects containing: pearl shimmer, mother-of-pearl, metallic or decorated with rubbing paint. The first layer is applied to the wall surface, which after 20 minutes is rolled with a roller to obtain a fine coat. After the surface has completely dried with chaotic masks, a second layer is applied unevenly using a trowel. Between strokes of the second layer, the surface of the first should be visible. After drying, the surface must be rubbed, smoothing out all contrasts and transitions.
Final stage
After completing all plastering work, the surface should be allowed to dry completely and harden. This will take at least 24 hours. Next, you should treat it with fine sandpaper to remove excess solution. Then the surface should be primed.

If the walls were plastered for painting, the surface should first be painted in a darker tone using a roller or long-haired brush, and after drying, cover the protruding parts of the textured surface with light paint using a roller or short-haired brush. Light tone will add volume to decorative plaster. If the finished texture already contained a coloring pigment, you can simply highlight the texture with a different shade.
In the case of applying textured plaster in rooms where the walls are exposed mechanical damage, you should cover the surface with colorless varnish or wax, which will increase the service life of the coating without losing its original appearance.
The surface obtained as a result of competent finishing with textured plaster will not only have an attractive appearance, but will also become practical and unpretentious in further use. It is easy to clean and wash without the use of special detergents. The final varnish coating prevents the formation of mold and mildew on the wall surface, even in rooms with high humidity.

Varieties of textured plaster with your own hands
There are many options for making textured plaster with your own hands from ordinary putty.
The most simple option Many craftsmen consider using lime mortar for plastering walls, which you can buy from 215 rubles, or make it yourself with the addition of cement, gypsum, sand or clay. Each component is added in a certain ratio. For a simple lime mortar for plastering walls, the proportions of lime paste and sand are 1:2 -1:5. The more lime you use, the cleaner the surface will be, but the likelihood of cracking will increase. If you add gypsum to this mixture in a ratio of 1:3, you can get a stronger composition with high adhesion. By adding cement in a 1:2 ratio, you can get a mixture that is suitable for cladding rooms with high humidity.
Helpful advice! To speed up the setting of the material, in addition to the lime-gypsum mixture, you can add PVA glue.

To create a gypsum-based mixture you will need:
- 2.5 liters of water.
- 6 kg of gypsum.
- 1 kg of marble chips to obtain a relief on the surface.
- 200 ml of PVA glue to give the material elasticity.
- Dye.
This mixture is suitable for any indoor surfaces. However, the base should be pre-primed and a reinforcing mesh should be installed for plastering walls made of brick, aerated concrete and foam aerated concrete blocks. The consumption of gypsum plaster per 1 m2 of wall is about 9 kg with a layer thickness of 10 mm.
For cooking cement plaster it is necessary to mix cement and sand in a ratio of 1:3-1:6, depending on the required strength of the material, and then use water to bring the solution to the correct consistency.

Helpful advice! To give the mixture elasticity, you can add 1 tbsp to a bucket of the finished solution. l. detergent.
When deciding which plaster is better, cement or gypsum, you should consider distinctive features each option, from which it will become clear that the gypsum mixture is superior to the cement mixture in some characteristics. It has high hydrophobic and adsorbing properties, which affects the creation of a favorable indoor microclimate. Having a high viscosity index, the gypsum solution is more plastic, easier to apply and sets quickly without cracking, which significantly reduces finishing time. But, it is worth considering that gypsum is susceptible to moisture. However, today there are compositions in which special substances are added, which make the mixture durable and moisture resistant.
Helpful advice! If you are not completely sure how to plaster walls gypsum plaster, video instructions from experienced craftsmen on the Internet or on specialized sites will help and clearly demonstrate each stage of such work.
Plastering walls cement mortar used for calving wooden surfaces, walls made of sawn shell rock, plasterboard and previously plastered, uneven walls. For work used special tools for example, a trowel, usually a grater and a floor grater, which after use must be thoroughly cleaned of excess cement.

How much does it cost to plaster walls?
Correct and high-quality wall finishing is an important component good repair. Having previously found out how much plaster costs 1 sq. m. walls, you can decide to finish the walls yourself or invite specialists. But, it should be remembered that only a good craftsman knows all the features and subtleties of finishing work, which are performed with expensive decorative mixtures. Therefore, to avoid mistakes, it is better to instruct this process a competent specialist who has extensive experience. Especially when it comes to Venetian, Italian, silk, terrazite, artistic or designer relief plaster.
Wondering how much it costs square meter plastering walls, you need to study in detail the prices for services offered by many construction organizations and choose the most appropriate option.
The price per square meter of wall plaster depends on several factors:
- surface geometry for plaster (marking, installing beacons, leveling the base);
- the type of base on which the facing mixture will be applied;
- type of decorative plaster;
- method of applying textured plaster.

If the walls are previously cleared of the old finish, then you will not need to spend money on dismantling the plaster from the walls, the price of which starts from 100 rubles/m² depending on the type of old finish, the thickness of the layer and the overall labor intensity of the work.
Today, the price of wall plaster per square meter of wall is on average 550 rubles, when using cement plaster. Work with decorative textured plaster will cost between 350-850 rubles/m². Coating with a relief mixture will cost 850-950 rubles/m². Cost of work with Venetian plaster will average 750-1350 rubles/m².
Cladding walls with textured plaster is a responsible and painstaking undertaking that requires minimal skills. To obtain an aesthetic and durable coating, you must choose the right finishing material, prepare the base and properly plaster the walls in compliance with all rules and recommendations.
Application of decorative plaster. Video instruction
There are many options for decorating a house or apartment. Currently represented on the market of construction and finishing materials the widest range solutions for gluing and wall coverings. These include all kinds of tiles, panels and stripes, wallpaper, etc. However, to create a truly original and interesting interior without extra costs only possible with textured plaster. It’s not difficult to figure out how to make textured plaster. There are many different ways its application and further decoration, so that you can create the interior you want. Textured plaster Do-it-yourself walls can be done without any particular difficulties or problems.
Small unevenness of the wall is hidden by textured plaster.
Features of working with textured plaster
Textured plaster, also known as structural and Venetian plaster, is a heterogeneous viscous composition of white color. It contains a binder and multi-fraction granules. Textured wall plaster allows you to create coatings with varying degrees of grain, rough texture, rich color palette. You can make textured plaster that will imitate the texture of stone, wood and other materials.

Textured plaster allows you to create coatings on walls that have different degrees of grain, rough texture, and a rich color palette.
Textured wall plaster does not limit your imagination. For example, you can add a special fine-grained material (the so-called “bark beetle”) to the mixture and decorate the surface to resemble wood eaten away by the beetle of the same name.
Textured plaster of walls can be done indoors and outdoors. For exterior wall decoration with your own hands, it is best to use a mixture that contains calibrated granules. Interior finishing is traditionally done using plaster containing small unsorted granules or granules of different fractions.
A coating with a large calibrated filler is applied using a special grater or trowel. The layer of plaster, however, should not exceed the size of the contained granules. Textured plastering of walls using a material with mixed filler is performed using a trowel and a roller. The spraying technique is also used. In this case, the order of application depends on how thick the mixture used is.
Fine-grained compositions are liquid solutions prepared on the basis of lime. They are easier to work with. This plaster can be applied using a vacuum cleaner or roller.

When working with textured plaster, you need to imagine the desired result and implement it correctly.
Having decided what the finished wall plaster will look like, you can begin preparing tools and materials for the job.
Textured wall plaster is susceptible to moisture and dust, so it is not recommended to use it in the kitchen.
If such compositions are used to finish a bathroom, the finished coating must be protected with polymers or varnishes.
Textured wall plaster is performed on a properly prepared surface.
First of all, the wall must be leveled and primed: it is recommended to use a deep penetration primer.
After applying the primer, the wall must be allowed to dry.
There is a textured plaster that can be applied to walls with slight unevenness. However, if there are significant unevenness and level differences, they must be eliminated.
Textured plaster of walls is performed using the following tools:
- plumb lines and rules;
- ironers;
- building level;
- a set of spatulas of different sizes;
- corner spatula;
- graters
Applying base coat

First, a uniform layer of plaster of the required thickness is applied over the entire wall or a separate section of it. On at this stage a smoothing iron is used. Minor errors are allowed. It is very easy to find out the required layer thickness. Determine the approximate thickness of the future pattern and add to this value at least 1.5 mm of the thickness of the solution that should be underneath it.
Before filling the entire required surface, practice on small area. This way you can choose the optimal thickness of the plaster layer and the order of application of the pattern.
Textured wall plaster takes a long time to dry, so you can easily apply the desired design. If ordinary cement-gypsum or cement-sand mortar is used, it is necessary to clearly think through your actions before applying it and divide the wall surface into several sections, which will be finished gradually.
Step-by-step instructions for adding texture

The technology for applying a pattern varies depending on what tool will be used and what result you want to get.
You can add texture using a roller. An ordinary tool with bristles will do. With its help you will apply a unique design to the surface. If desired, you can additionally run a spatula over the top to smooth the finish a little. You can use rollers specifically designed for working with textured plaster. Such instruments already have an ornament and design. It is enough to roll the roller once along the height or length of the surface. You can apply strokes in different directions to create a fragmented pattern. Using a roller can significantly reduce material consumption.
Textured plaster on walls is often done using stamps. There is an ornament or design on the working surface of such a tool. It needs to be applied to the wall and pressed so that the design is transferred to the plaster. As you work, you will need to frequently clean the tool from adhering plaster and moisten it with water. As a rule, such stamps come with soft rubber versions, which allow you to complete the ornament in narrow areas of the surface.
Textured plaster of walls can be done using a trowel, as well as various brushes and spatulas. An ordinary spatula allows you to turn the surface of a wall into a real work of art. The easiest way is to decorate the surface under a natural stone. To do this, you need to move the spatula in arbitrary directions, giving the surface a free shape. You can slightly deepen the spatula into the plaster, creating smooth stripes of varying depths. Working with brushes and a trowel follows a similar pattern.

Textured plaster itself is white, and if necessary it is painted with colored pigments, paints or varnished.
If desired, various fillers can be added to the plaster solution. They will help you create the required drawing. For example, to decorate walls to resemble wood damaged by bark beetles, granite chips or polymer granules are added to the composition. This textured plaster is first applied to the entire surface using a trowel. You need to wait until it sets a little, and then rub it over the surface with a grater. This way the crumbs and granules will be drawn through the solution, thereby creating specific grooves. The furrows can have different directions or be horizontal or vertical, parallel to each other.
You can add special soft granules with paint to the mixture. This textured wall plaster is applied in exactly the same way as the previous one. The granules will be crushed, causing the surface to turn different colors. When using liquid solutions, you can achieve the effect of smudges. If you work with a thicker solution, you can form a tall pattern. Consider the fact that the deeper the pattern, the faster dust will collect on it.
Initially, textured plaster is white; later, if necessary, it is painted with colored pigments, paints or varnished. To choose the right shade, it is best to contact the representative offices of the finishing material manufacturer or specialized companies. To finish ordinary mortars, paint is usually used, because... It is quite difficult to find suitable pigments.
Shutdown

Once you have achieved the desired texture, the plaster will need to be protected and prepared for finishing. First of all, a primer is performed. After this, 1 or several layers of paint are applied.
Before applying paint, you need to let the plaster dry. Depending on the thickness of the applied layer, the type of plaster used and the air humidity in the room, this may take from several hours to several days. There is no need to artificially speed up the drying of the surface using heaters or fans, because... This can cause the plaster to crack and even peel off completely.
To apply paint, you can use a roller, wide brush or rubber sponge. If you added coloring piment to the plaster before applying it, you can use a more intense tone of the same shade. The result will be a very interesting effect. If desired, you can apply gold or silver paint to a porous sponge and lightly touch the wall. This will create the illusion of a shimmering finish.
If there is no need for painting or if a color composition with coloring pigments is initially used, the surface still needs to be additionally protected. Clear varnish is perfect for this. Good luck!