How to work with clay plaster: prepare and apply the mixture with your own hands. Coating a house with clay How to coat a wooden house with clay
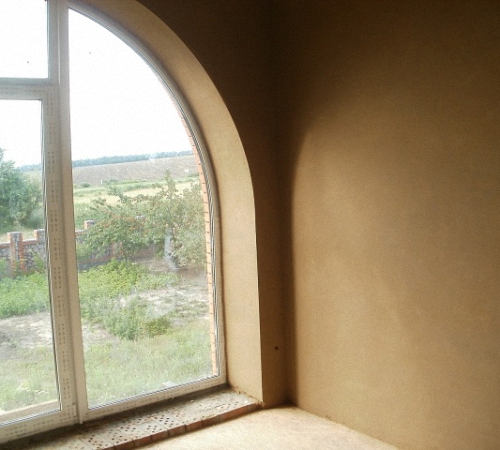
"Mazanka" or a house that is plastered with clay is a very comfortable and environmentally friendly housing. In the summer it is quite cool in it, and in the cold it is warm, while the organized microclimate has a beneficial effect on human health. Claying a house with clay is somewhat laborious work, for this reason it is Lately slightly lost demand, yielding to more simple varieties works. If you are not afraid of difficulties, and you are in full readiness to revive old method, try to build a "hut" on your own.
Well, if you are interested in planning and creating the interiors of public buildings, visit studio-practica.ru. Only there they will help you create a suitable and comfortable interior quickly and without problems.
Build the frame and foundation of the hut house. You can just drive stakes into the ground and carefully intertwine them with rods, it will be a fairly simple structure for storing things and relaxing in the summer. For the construction of more solid housing, it is necessary to build concrete foundation- install on it vertical bars, fill bars to them, upholster the structure with a board or slab.
The surface of all walls should be upholstered with willow or shingles to ensure excellent adhesion of the wall to the clay. The rods should be stuffed at an angle of 45o, while splitting thick branches into 2 halves with an ax. If possible, immediately build the roof of the structure.
Then start preparing the clay. To do this, take a container, it is recommended to dig a round hole in the ground large sizes. Lay sand and clay in layers in the hole, pour water into the center.
Perform clay mixing - it is recommended to do this using your feet. If the container is small, use a drill with an ordinary curved pin or a special nozzle. Gradually add the straw to the clay - the thicker the stem, the better.
Knead the clay, moving towards the edge starting from the center. If necessary, add straw or water. You should not immediately throw a large amount of straw, otherwise it will not be easy to mix. From the edges, clay must be thrown into the center of the pit. As a result of the above actions, you will get a fairly thick, homogeneous mass.
The wooden surface of the wall must be slightly moistened with water using a broom. Bring the clay closer to the building, you can load it into the cart. It is recommended to work with clay with a pitchfork, and not with a shovel.
Take a piece of clay with your hands and throw it with force against the wall. At the same time, the clay should stick well, turning into a pancake. When closing shingles or rods, smear them a little.
If the clay does not linger on the wall overnight, it should be torn off and the surface of the wall should be allowed to dry. Sometimes you need to wet your hands with water.
Photo: avillageinafrica.wordpress.com

European maple (Acer campestre) Family: Sapindo-colored Commercial names: field maple (UK); Ahorn (Germany); Norwegian maple, European maple, Bosnian maple (UK) Distribution: throughout Europe, including the UK, Asia Minor and Russia European maple - wood description The color of the wood is creamy white with a natural sheen. The older the tree, the darker the wood. Over the years, it becomes a light brown color. Grain like...

Mansonia (Mansonia altissima) Family: Triplochitonaceae Other names: aprono (Ghana); ofun (Nigeria); beta (Ivory Coast, Cameroon) Distribution: West Africa Description of wood Mansonia The color of the wood is gray-brown or light purple, often purple with lighter or darker spots. Wide range of colors. The grain is straight. The texture is fine and smooth. Weight about 590 kg/m3. Mechanical properties Mansonia is a wood that…

Litsea (Litsea calicaris) Family: Laurel Other name: tangeao Distribution: New Zealand Description of Litsea wood The color of the heartwood is creamy light brown with a dull sheen. The wood is straight grained, with a fine and even texture. Weight from 608-768 kg/m3. Mechanical Properties Litsea has medium bending and crushing strength, low stiffness and high impact resistance. The wood dries well. Working properties...
Despite the huge range of building mixtures, time-tested materials are always in demand. Clay plaster has a thousand-year history, and has proven itself only with better side. There is a rich formulation of solutions mixed with clay, the choice of components depends on the operating conditions of the finish.
In the article we will talk about the types of mixtures, how to make a mortar with clay for plaster, and give a few useful tips masters, .


Clay plaster - composition and recipe
There are many compositions of clay plaster, but there is no universal recipe, the quality of the composition depends on the components. And the main one is clay for plastering walls, it is divided into 2 types: light and oily, the latter is most suitable.
To check the quality, you should roll a ball of small diameter from clay, put it on a flat surface and flatten it. If the edges remain intact, then the material is suitable for plaster, cracks have begun - the composition is of little use. Another test is to roll up a flagellum with a length of 200-300 mm, a section of 10-20 mm and gently bend it, quality material edges do not crack.

Ways to check the quality of the material
Recipe table, proportions in parts:
| Clay | Gypsum | Sand | Cement | sawdust, fiber | Lime | Asbestos |
| 3 | 1 | 1 | 2 | 1/5 | ||
| 4 | 2 | 1 | 1 | 1/25 | ||
| 1 | 2 | 1 | 1/10 | |||
| 1 | 3 | |||||
| 1 | 3 | 0,5-1 |
How to avoid cracks when plastering with clay mortar
Moisten surfaces well before work. The basic rule is to pick up clay good quality, correctly prepare the solution. Strengthen surfaces with shingles (thin slats stuffed diagonally cross-over), for thin layers - jute or linen burlap. It is better to apply clay plaster in 2 layers: the first is thick - clay-sand-straw, the second - finishing, clay-cement-sand-lime, in order to achieve a smooth surface.

The shingles perform two functions - a crate for insulation and a reinforcing mesh for finishing.
Plastering a wooden house inside with clay - the secrets of the masters
Inside the house, clay begins with a careful sealing of the joints with tow, this will create an additional heat-insulating layer and help reduce the consumption of the mixture. Wooden walls should be treated with an antiseptic, then waterproofing - roofing material is stuffed onto the walls, the joints overlap 100 mm. After that, the crate is made and the plaster is applied. wooden house clay.
Important: For wooden houses reinforcing metal mesh is not recommended. Wood and clay are microphobic materials, and moisture will corrode the metal and damage the finish.It is eco-friendly, practical and inexpensive way finishes, but despite the clear advantages and disadvantages of clay plaster log house also exist: the tree works under the influence of the delta of temperature and humidity, with time small cracks are inevitable on the surface. But they can also be turned into virtues, turning them into trendy craquelure.
The composition of the mixture for this type of plaster largely depends on the area in which people live. In Ukraine, wall decoration with clay was carried out with the addition of chopped straw and horse manure to the solution, but now they are increasingly being replaced with wood shavings or sawdust. Some people prefer a clay-sand mix without any third-party fillers. Consider here the most traditional option, but with the addition of a fortress not a large number wallpaper glue.
Do-it-yourself plastering of walls with clay?

How to putty clay walls?
Consider the small features of how to plaster walls with clay. Much here depends on the composition of the filler. Wet clay wall conducts heat very strongly, three times better silicate brick. But as soon as she dries, she can already compete with him. But this is pure clay, and if straw, shavings, dung or other impurities are added to it, then such a solution will become much warmer. The thickness of the plastered layer should not be less than 1 cm. But it is worth noting that it is unlikely that you will get thinner with straw filler. Another feature of working with such a peculiar solution is that the smaller the fraction of additives, the better your wall will look. Therefore, for the finishing layer, if possible, you should take wood dust or very fine sawdust, as well as clean washed sand.
The range of building mixtures is constantly expanding, but old recipes should not be forgotten either. In pursuit of cheapness and beauty, we forget about environmental friendliness, which very soon affects our health. That is why in the West houses decorated with natural wood or clay.
The modern building materials market offers wide choose finishing products that allow you to clad the facade of the house in an original and high-quality way or internal walls premises. In this article we will consider the features of plastering walls with clay with detailed instruction preparing the solution and applying it to the surface.
Advantages and disadvantages of clay plaster
Clay plaster is considered environmentally friendly and natural material which has been used in construction since ancient times. The use of plaster in practice will ensure beautiful decoration rooms. Walls plastered with clay will breathe without emitting harmful substances to the air. Wherein given material is not harmful, unlike other putty solutions made on the basis of polymers and other synthetic substances.

Previously, plastering walls in this way was the only option for finishing work. Despite the fact that modern manufacturers offer a wide selection different solutions, yet many buyers prefer to use natural materials. Plastering a house with clay has many advantages, which will be described below:
- Ecological and natural product.
- Clay mortar is able to absorb moisture, which will prevent the destruction of walls.
- Low cost of materials in comparison with other types of products.
- After applying the solution, there is practically no waste left, while the remains of the clay can be reused.
- Simplicity of work on the preparation of the mixture.
- Clay for wall plastering will protect the surface from mechanical and other influences.
- The material is elastic in its structure.
- Clay can be used for finishing work indoors and for the facade.
- Clay application technologies will allow you to create an original decorative pattern on the walls, and the addition of paint forms a certain shade.
Plastering with clay has its drawbacks, which is determined by the following parameters:
1. Natural clay, which does not have various additives, is a kind of material that requires experience to work with. When preparing the solution, the main thing is to correctly calculate all the components, because there is no specific recipe for making the mixture.
2. Plastering the facade of a house is no easy task. It is important to consider that clay absorbs all moisture well, which is why small cracks appear from time to time around the perimeter of the building. Thus, clay walls will need to be updated every year.
3. Recently, there are not so many craftsmen who would be professionally engaged in plastering walls with clay, and therefore wages for workers can be expensive.
Most hardware stores offer a wide range of goods, while on the shelves you can see decorative clay, as well as mixtures of different shades and variations. The packaging usually indicates the physical and other characteristics of the clay, as well as manufacturers represent a little instruction by application. In fact, it is not necessary to purchase clay in its natural form, because it will be possible to buy a prepared mixture, which will facilitate the process of work for a beginner.
It is important to know! If you decide to choose natural clay for suburban area or other places, it must be remembered that the use of material without special additives can cause cracking of the plaster under the influence of moisture or active sunlight.
Clay plaster: composition and types of mortar
In order to preserve the properties and the original layer of clay, many advise applying a layer of plaster over the clay base of the wall. This will strengthen the finish or facade of the building, as well as protect the material from excessive moisture and the like. But, most experts use only a clay solution, the preparation technology of which has the following sequence:
- sand;
- clay;
- water;
- sawdust from wood or another type of material.
It is worth knowing that sawdust of various kinds, as well as various fibers, are added to the clay so that the solution is bonded and coherent. This will get rid of the cracking of the wall surface under the influence of the sun or other natural factors.
Clay mortar for plaster can be divided into several types, depending on the materials added to the mixture. So, there are such types of plaster mixture:
- solution with the addition of sand;
- mixture with sawdust from different tree species;
- combined combination with the addition of the two previous components.
IN certain situations when it is important to create a high-quality mixture for finishing the facade of a building, you need to add cement or putty. These materials will allow you to fasten the solution. Before starting finishing work, it is important to calculate climate zone Houses. This is due to the fact that clay is a heat-insulating layer. Before starting work on plastering with clay and sawdust, it is necessary to study the characteristics and features of the surface to be treated.

Technology for the preparation of clay plaster
When preparing a solution, you need to know that adding synthetic fibers it is recommended to use for rough finishing of walls or for forming an insulating layer. Cement or sand can be added to the plaster, which will reduce the elasticity of the mixture, and will also keep heat in the thickness of the walls.
It is advised to apply a solution of clay for wall plastering when the insulation layer has already been installed in the room. The main positive property of clay is that it is excellent for adhesion with other materials, such as wood, stone, cement or concrete. To prepare a clay solution, you will need the following devices:
- bowl for mixing the mixture;
- bayonet shovel;
- screwdriver;
- a set of spatulas for applying and distributing clay over the surface;
- a large sieve for sifting different components that are added to the mixture;
- drill with an additional nozzle for the mixer;
- to attach a metal mesh, you need a puncher.
Also, to prepare the solution you will need different materials, which are:
- metal mesh that will be used to reinforce the wall surface;
- clay;
- additional fibers or sawdust, depending on the type of work;
- dowels that will attach the mesh to the wall surface.

After preparation necessary tools, fixtures, as well as materials, you can start preparing the mixture. Many are interested in the question: how to dilute the clay for plaster? As a rule, the technology of work depends on the type of clay, which may differ in different parameters. At the same time, there is no specific procedure for mixing clay and preparing a solution. However, when performing work, you must adhere to the sequence, which determines the quality of the mixture produced:
1. First you need to prepare all the components used in the work.
2. After that, the clay is soaked in water and left for a day.
3. After the time has elapsed, the wet mixture must be mixed again and excess water removed from the container.
4. It is important to sift different fibers, sawdust, and also sand through a sieve.
5. After cleaning the additional components, they are added to the clay along with water, while all components are thoroughly mixed.

6. The prepared mixture should have a thick and sticky consistency, and the ratio of the proportion of clay and sand for plaster should be 1:2 or 1:5.
After the implementation of these works, the mixture becomes ready for use. If the composition of the solution is too sticky, then to remove this property, you need to add a little sand. The resulting mixture can be checked for plasticity by several methods:
- Visually, the clay mixture should resemble the appearance of thick sour cream.
- Also, you can make a small ball. It must be pressed against a solid base, creating a plane 1 cm thick. If all the components are mixed correctly, then the pressed edges of the ball should not crack.
Another option for checking the plasticity of the solution will be the following procedures. To do this, you need to create a ball, after which it is dropped to the floor from a height of one and a half meters. The resultant effect should be that the ball should not crack.
On a note! If the ball cracked in one of the ductility testing methods, this may indicate an excess of sand. If the ball spreads, then this is indicated by the presence of a large amount of water in the solution. All shortcomings can be easily corrected by adding necessary components into the mixture and stirring.
Clay plastering step by step instructions
The technology of working with clay, resembles the method of application cement mortar. To prepare the mortar, the main components of the plaster are: sand, clay, cement, which can be added to hold the mixture together. When carrying out work, the following instructions should be followed:
1. First attach the mesh and metal to working area using dowels. This is important for reliable application of the solution.
2. Using a spatula, the solution is applied to the wall surface. The thickness of the clay layer should be no more than 5 cm. This layer is rough and does not need to be leveled.
3. After applying the first layer, you need to wait until it dries completely, after which you can proceed to further finishing.
4. When the rough surface is dry, it must be cleaned and sanded using sandpaper.
5. The last and final step in applying the plaster is top coat wall surface.
Plastering walls with clay is great solution for insulation and finishing country house. This option of applying plaster is excellent for rustic style or the design of houses made of log or wood, which will ensure the environmental friendliness of the building. As a decoration, you can use volumetric embossing or clay modeling technology. To protect the surface of the wall from external influences, you can paint the clay with paints and varnishes of different shades.

Recommendations of specialists for applying a plaster layer of clay
Experts in the field of plastering houses are advised to follow some recommendations for the work. For example, start finishing work immediately after the construction of the house is not recommended. Otherwise, the house will still succumb, causing the plaster on the walls to crack. The approximate period of house settlement is 1.5-2 years for wooden or brick structures. A building erected from foam concrete or aerated concrete has a lower load, which determines the settlement period of 4-6 months.
After the erected house stands, you can start plastering with clay video of the work, which can be seen at the end of the article. First, it's important to do interior decoration premises, and lastly you need to start external work. This moment is explained by thermal and physical parameters and the peculiarity of the implementation of the finish. This will avoid cracking the plaster layer from exposure to steam.

Before plastering, you need to prepare the walls. First of all, they must be equal. Indeed, with an unequal surface, the layer of clay in diverse places will be different, which is not very good. In this case, the plaster layer will be thicker, which is not very favorable, because the standard layer thickness should be up to 2 cm. With a large thickness of clay plaster, it will begin to crack and fall off over time. Also, a layer of plaster of 4 or 5 mm is also not recommended, otherwise the mixture will not stick to the wall.
When applying the plaster layer, you need to remember about the adhesion of the solution to the wall. To do this, the surface is pre-moistened with water, after which plaster can be applied. This will create a reliable fastening of the finish and the wall. At the same time, clay can be applied to the surface not immediately, but in thin layers. This will help you stick better. building material, which will extend the life of the plaster layer of clay.
The technology of plastering walls with clay is not laborious, however, it requires some care in the manufacture of the mortar and its application to the wall surface. All work can be done with your own hands, the main thing is to follow the recommendations of specialists and step by step instructions for the expected outcome.
Once in a past life, I had, among other things, to deal with fire protection. Among several permitted types of fire protection (impregnation, etc.) - I found such a type as clay-based coating. This, as it turned out, is one of the most reliable and forgotten types of fire protection. In my opinion, this type was forgotten due to the great laboriousness, since everything had to be done with an ordinary brush.
Imagine what a job it is to crawl across attic beams and smear them with a clay brush? Therefore, when impregnation appeared, which was carried out by spraying, they forgot about coating. And this despite the fact that this technology was the most reliable and preferable, and would save a lot and many. Impregnating attics ancient buildings, including schools, hospitals and boarding schools (this liquid itself is not very cheap and not at all durable) - I was very sorry that it was impossible to use a cheap and durable coating due to the high labor intensity of the process. However, in the mid-nineties, sprayers from compressed air thick mixtures with small inclusions. Of course, I immediately purchased this atomizer and immediately tested it on clay.

Given the fact that by this time I was no longer involved in fire protection, as an experiment, I processed the attic of my summer house, a neighbor and friends. I picked up the clay in the garden. For processing an attic of 100 sq. meters took no more than 30 minutes. More time was spent preparing and mixing the clay. Shocked by the result, I tried to process the second floor of my building in the same style, with the only difference that instead of clay I used chalk adhesive putty.
Finely sifted sawdust was used as a filler. I tried sand, fine crumbs, nothing happened. The filler settled at the bottom of the container and did not go through the nozzle. Spraying produced on the ceiling and walls, upholstered somehow with plasterboard. Putty reliably covered all the bumps. Including all fasteners, wires, nails and screws. It turned out a reliable fire-resistant durable coating and not at all expensive. Considering its adhesive base, it held tightly to wood, drywall, and wires. I was convinced of this when I began to wash the splashed windows.

Encouraged by the results, I decided to process my structure from the outside as well. I wanted not only to treat the building in a decorative and fireproof way, but also to increase the heat-shielding characteristics of the house, since the second floor was made of hardboard. As a heater was the notorious foam. It keeps heat very well, but people do not like it for big love to him mice and for good combustibility. To do this, I treated the walls from it on both sides with clay from the sprayer. Adhesion was excellent due to the porous surface of the foam.

From the first time, the clay treatment did not quite work out. Sawdust, as a filler, had to be abandoned due to their getting wet when raindrops hit. The greasy clay cracked as it dried. With a large filling of sand, it was wet and easily washed off. But in all cases, fire protection turned out to be remarkable. If on the wall to be processed, first, using a construction stapler, fix a synthetic plaster mesh, then the coating will hold securely. Due to the fact that outer side the structure was made of large sheets of fiberboard, then with temperature weather changes, the fiberboard warped. I had to somehow fix it with rails. I couldn't figure out how to do it decently. When I started cutting, there were no problems. The mesh easily lay along the logs. I had to break my head with the ends, but nevertheless everything turned out pretty quickly. With spraying, everything turned out quite easily.

With a clay mixture, I managed to process not only the log house, but the entire facade. With the onset of the first frosts, I was happy to notice that the house had become much warmer than last year. I am not an expert in clay-filled stucco mixtures, but even what I have managed to achieve inspires me. The spraying technology is simple and not laborious. For some hour, two, you can process dozens square meters without much financial investment. Where there is no direct rain streams, the spraying steadfastly holds for many years. You can of course cover everything. facade paint, but the desire to increase the protective layer stops me. I want to know: how thick can it be increased?

On a flat wooden wall from an old cladding board, things were even simpler. To do this, he fixed the plaster mesh and immediately covered everything with clay. From wooden slats tried to draw the rest brickwork, but then I was overtaken by frosts.
Next year I will try to process a wooden fence with clay.