Sketches of plywood cutting boards with dimensions. DIY cutting board
 A cutting board is an indispensable attribute of any kitchen. Boards can be both professional (for example, for catering establishments) and household. They differ in shape, size, and material from which they are made. But the most popular were and remain wooden cutting boards. To make a cutting board from (and it is not at all difficult), it is enough to know some simple rules.
Firstly, not all wood is suitable for making a cutting board. One material absorbs moisture faster, the other is practically “moisture resistant”. Wood may have a tendency to split. And different types of wood differ from each other in hardness.
In order to make a board for the kitchen, such species as oak, pine, and birch are suitable. Boards are made from beech and acacia. There are also more expensive species (for example, Hevea), but this is not for everybody. The simplest cutting board can be made even from a sheet of plywood.
Rules for making a cutting board
The method of making a board, regardless of the material chosen, is the same. First, the board is marked depending on the shape and required dimensions - here everyone uses their imagination. For ease of use, do not forget about the handle. The handle should be located strictly on the longitudinal axis of the board, so you need to carefully measure and determine this axis.

The board itself and the handle are cut out with a hacksaw or jigsaw. Don't forget about the corners and curves around the handle. They need to be carefully ground down, rounded with a file, sanded - whoever has what. And it's not just that you can get hurt. Small pieces of wood left after sawing can then break off and get into food, and then into the esophagus. And this can already be dangerous.
Next, using the same sandpaper, you need to process the entire surface, paying special attention to the ends. It is better to round right corners of the surface. If you made a handle, don't forget to drill a hole in it. Then the board can be stored hanging in a place convenient for you.
It is necessary to take into account that the wood becomes covered with microcracks, and food waste residues accumulate in them. Therefore, the cutting board must be washed and dried very carefully after each use. It is good to lubricate the board with paraffin, after slightly heating both the board and the paraffin. Wax is also used for such “sealing” of cracks.
Important!
- When making a board, consider not only its surface area, but also its weight.
- And another useful tip - it’s better to have your own cutting board for each type of product.
The process of making a cutting board in the video:
All photos from the article
One of the most important kitchen utensils is cutting boards. It is on them that cutting vegetables, cutting meat and many other tasks are performed that allow you to prepare delicious dishes. Next, we will get acquainted with the characteristic features of plywood models, and also learn how to make them ourselves.

Advantages and disadvantages
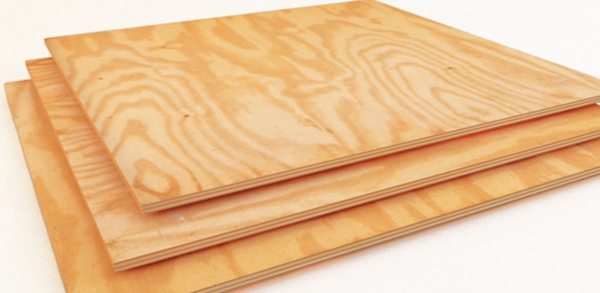
Fiberboard consists of several layers of veneer, which are extensively glued together. Why is it so good for creating a cutting board? This is easy to understand after familiarizing yourself with the characteristic features of such interesting material:
Advantages
- High strength indicators. This is due to the presence of hardened glue in the structure of the product, which is stronger than wood fibers;

- Moisture resistance. What is more important in the kitchen than mechanical resistance? Resistance to excessive humidity. Juice from cut vegetables and fruits, water draining from them after washing, and steam simply standing over pots quickly render ordinary wood unusable. But the sizing mentioned above quite effectively prevents this;
- Beautiful appearance. Plywood, just like a classic wooden product, can boast of having an original textured pattern;

- Ease of processing. The shapes of plywood cutting boards can be very diverse;
- Acceptable price . Taking into account all the high performance indicators, fiberboard is cheaper than solid wood;
- Durability. The service life is not limited to ten years, subject to proper care.
Flaw
The only significant disadvantage is that toxic glue may have been used in the manufacture of the plywood you purchased.
Tip: You only need a small amount of particle board to make a cutting board, so don't try to save money by buying a cheap product of unknown origin.
It is better to purchase material from a trusted manufacturer, which probably used environmentally friendly adhesive.
This will eliminate the only possible drawback of your future piece of kitchen equipment.
Manufacturing process
Now let’s directly figure out how to make a cutting board from plywood with your own hands:
Stage No. 1: drawing and template

Drawings of plywood cutting boards are needed to create templates. That is, draw a drawing by hand, and then transfer it to cardboard in exact dimensions, creating a kind of stencil.

Tip: when creating a drawing, remember that the more intricate the contours of the future product, the more difficult it will be to wash.
So, if high loads are expected in the kitchen, then it will be more practical to use simple geometric shapes.
Stage No. 2: choosing plywood
There are several basic requirements

Stage No. 3: tool preparation

To work you will need:

Stage No. 3: cutting out the outline
This is the most important stage, which, in general, can be described as creating a cutting board. You should cut slowly, exactly following the lines drawn on the template and holding the plywood with your free hand, unless, of course, it is fixed in a vice. The quality of this task depends solely on your accuracy.
Good day to all!
In this article, the author invites you and me to make a very useful thing that you can’t do without in the kitchen, this item is called a cutting board. The cutting board is mainly used for cutting food during the cooking process, or we simply use it as a stand for hot pans, in general, everyone uses it in their own way. Next, the author will describe the entire manufacturing process, which will be accompanied by a detailed photo report.
To make a cutting board we will need:
Tool:
Drill;
- electric jigsaw;
- file;
- sandpaper;
- roulette;
- corner ruler;
- pencil.
Material:
Oak board;
- protective oil.
Since the cutting board must be strong and serve us for a very long time, we use an oak board as a blank. You can purchase this wood material in one of the specialty stores. The width of the board that the author used is 20 cm.
A preview of what we will need in the future.
We start by sanding the surface of the board, since the wood is hard, and be patient.
Next, using a ruler, mark the future outline of the board.
The author decided to use this form.
We take an electric jigsaw and cut out a shaped part along the drawn contour.
It should turn out something like this.
In order for the board to be hung on a hook or nail, we drill a through hole on the handle of the board.
Then you need to take a file and use it to process the edge of the board.
After filing, take fine-grit sandpaper and run it over the entire surface, smoothing and rounding the sharp edges.
When you have finished sanding the part, take a rag and wipe the board from wood dust.
Next, we take a special oil called “Belinka”, which is non-toxic and can come into contact with food, and pour it into a container.
Take a brush and evenly cover the board with a thick layer of oil, then leave the board for a while so that the oil is absorbed.
After 15 - 20 minutes, you can wipe the board from the remaining oil; for this we use a napkin.
The surface of the board should acquire a more pronounced color - the texture of the wood will appear.
Next, you need to leave the board lying for a day.
After 24 hours have passed, you need to apply a second layer of oil, let the wood dry completely.
As a result of all these steps, we get this ready-to-use cutting board.
That's probably all. If you use this product carefully, the board will last a very, very long time.
Thank you all for your attention.
Cutting boards are an important piece of kitchen equipment in any home. Plywood cutting boards, drawings of which can be seen below, in addition to helping in culinary activities, are an element of the kitchen interior, adding a unique flavor to it.
The division of cutting boards into household and professional mainly concerns their appearance. For professional cutting boards, the material from which they are made is important. Therefore, for each type of work, boards made of special materials are used. Household cutting boards have no special requirements, other than environmental friendliness, for the material. Their main advantage is their original appearance, with the help of which cutting boards in the kitchen, being in a visible place, create a special interior.
Making a cutting board with your own hands is an opportunity to realize your creative potential and create a touch of originality and uniqueness in your kitchen interior.

When starting to develop your own drawing of a cutting board, you need to think through the options for how the cutting board will be held in its designated place in the kitchen, whether its design will have elements for easy gripping or whether it will have special gripping slots.

It makes more sense to make cutting boards in the form of sets united by a single design idea. Such sets look more complete and will represent a separate decorative element in the kitchen interior. In addition, it will be possible to allocate a separate board for each group of products, and their smells will not mix when cooking.

Plywood is an ideal material for implementing different ideas on the shape of a cutting board. There are different grades of plywood, but for making cutting boards, the one that has no knots on the surface is suitable. It is not recommended to use moisture-resistant plywood due to the high content of various synthetic resins in it.
Cutting boards are in constant contact with water. The problem of plywood swelling when absorbing moisture is easily solved. One non-working side of the cutting board is varnished. This side of the board can be decorated with decorative painting or a burnt picture. The working surface of the board and its ends are soaked in hot olive oil or rubbed with wax.
To make cutting boards from plywood with your own hands, you first need to draw them in the form of a sketch on paper. This way it will be possible to compare different options for implementing an idea and visually control the comparability of several sketches that will be included in one set of cutting boards. All these sketches need to be transferred to full-size cardboard and templates made. Such a template is also made for a structure that will hold a cutting board or a set of them in a suspended state. This could be a decorative panel into which dowels will be inserted for hanging cutting boards, or it could be a more complex design with a shelf on which cutting boards will be placed.
Guide to Making a Plywood Cutting Board
In the process of making a cutting board you will need:
- Drill with a set of wood drills;
- Manual or electric jigsaw;
- Sanding machine and a set of sandpaper of different grits;
- Rasp;
- Manual milling machine.
Unlike wood cutting boards, decorative carvings are not made on plywood. When making cutting boards, original design is achieved through contour lines and decorative designs on the board. Therefore, the shape of the cutting boards is of decisive importance when drawing up its sketch. It follows from this that the main tool that will have to do the most work when making a cutting board from plywood will be a jigsaw.
You should cut slowly, trying to make one continuous cut. In this case, processing the ends of the board will not be tedious. If the cutting board sketch has internal isolated cavities, then to cut them out you need to drill a hole along the edge of the marking and, inserting a jigsaw into it, cut out the desired segment.

After cutting, you should thoroughly sand the cutting board. The main amount of work will be finishing the ends. After using a jigsaw, there are many chips left along the edge of the cut. The cut itself is not always smooth, especially in those places where one saw meets another. Smooth end surfaces, to which the working surface of the grinder can be accessed, are processed using power tools. Hard-to-reach places are smoothed using a rasp or file, using sandpaper folded in half in the corners of the bend of the lines. Deep chips may disappear after processing the ends of the board with shaped cutters. Using a milling machine, you can not only refine the ends of the cutting board, but also make an in-depth counter stroke along the surface of the board or highlight elements of the design that are a continuation of the contour line on the surface of the board, giving the design three-dimensional elements.

After routing the ends, a final sanding should be done, first using medium-grit sandpaper and finishing with fine-grit sandpaper.
By using such a universal material as plywood and using maximum imagination, you can make an original and useful thing in the kitchen yourself - a cutting board.

The fact that no housewife can do without a cutting board is not subject to debate. Only with a large assortment of relevant products, one is not tripled by its size or geometry, another by its external design, and a third by something else.
The list of all similar “claims” can be continued indefinitely.But there is a fairly common solution for woodcarving craftsmen to find a rational version of a household cutting board - make it with your own hands, from wood. Knowledge of certain features of the technology will significantly simplify this work.
The first question asked by home craftsmen who do not have sufficient experience in working with wood species is what species is best to use for a cutting board?
Firstly. it is necessary to clarify for what specific purposes it is being done. Many housewives always have not one, but at least two boards on hand for various products. Moreover, they differ both in the width of the tree and in size (and, as follows, in weight and ease of placement on the countertop). Therefore, it is first necessary to understand the specifics of the upcoming use of the board - it is planned as a universal attribute or for a wood carving electric tool for a specific purpose. For example, when working with fish, it hardly makes sense to make it bulky, because cutting it using the chopping method using a hatchet, unlike meat with bones, is not done.

In addition, some boards are generally not used for their intended purpose. They are made with their own hands specifically for home decoration. In other words, they serve only as part of the decoration for a certain interior of the house (country and a number of others).  Due to the absence of carcinogens in the adhesive composition, these particular sheets are recommended for interior work.

Secondly. It also matters how actively the cutting board is used. If it is done “for all occasions,” then such an indicator as strength should not fade into the background. It is also designed to withstand significant loads, taking into account wood carvings and sketches of animal fish, which will also be used to cut the same bones.
Third. a kitchen, regardless of the type of structure, is not only a room with excess humidity. It experiences periodic and quite significant temperature changes. This alone is enough to understand that any wood is not suitable for a cutting board.
When choosing a type of wood for a cutting board, you need to pay attention to its compliance with the following criteria:
- minimal moisture absorption, otherwise it will swell quite quickly in the kitchen. The result is deformation of the working surface of the cutting board. Even as a stand for something, it is unlikely to be in demand if the geometry changes significantly;
- sufficient strength. Otherwise, with targeted impacts (this mainly relates to the chopping process), the cutting board will gradually become covered with deep dents. Consequently, its further use for its intended purpose is a big question. This also applies to the possibility of material delamination. Plywood, even the highest quality and most expensive (for example, FB), is definitely not suitable for cutting boards.

It is pointless to list exotic breeds — ; They are used for cutting boards only by professionals (Hevea and the like), who produce original copies to order, and the craftsmen do not require advice. Those who decide to make such a board for their home needs, it is advisable to pay attention to birch, acacia, pine, oak, beech, pear, cherry wood carving elements of the ornament. Such wood is malleable in processing, has good strength and is also inexpensive.
This is the second question that interests many home craftsmen - what linear parameters should they focus on? There is no standard for cutting boards, nor are there generally accepted norms. When cutting them out of wood with your own hands, all sizes are determined arbitrarily.

Firstly, every housewife can say what area of the board is optimal for cutting certain products. Therefore, when determining sizes, one must be guided by the principle of sufficiency. If the cutting board is mainly used for skillful wood carving of meat, then its dimensions are chosen to be somewhat large, but for chopping vegetables, for example, a relatively small one is enough. Secondly, how much food is usually cut at a time. After all, a family of 3 people or 5 - 6 is not the same thing. Thirdly, it is important where and how the main workplace of the housewife is arranged. Will it be possible to fit a board that is too large there?

Again, this is determined by the hostess. The man’s task is to do it with his own hands, and what kind of wood carving unit the cutting board should end up being (dimensions, shape, etc.) is the woman’s decision. Some prefer to store such an accessory in a tube (cabinet) of the kitchen unit, others hang it in the kitchen - there are plenty of options. The main thing is that in everyday life the cutting board is not conspicuous, does not interfere and is always at hand.
As follows, the most important aspect here is the artistic design of the cutting board, and not its strength, durability, etc. In this case, it is entirely possible to get by with wood carving on a lathe and a multi-layer board, and not focus on the type of wood. Its most affordable variety that meets all the characteristics is FC.
Because there is nothing complicated in this work, it is enough to just list the main technological operations:
- Marking a wooden blank according to the drawn up drawing. For ease of use of the cutting board, it is necessary to provide a handle. A nuance - it should be located along the longitudinal axis of the product. Otherwise, the center of mass will shift, and handling this kitchen attribute will become inconvenient in a number of different cases.
- Cut the tree. Considering the relatively small thickness of the material, it is enough to use a jigsaw or a wood carving Penza region hacksaw (for metal, with fine teeth). This will ensure the most accurate cut. It is especially important if you are making not just a cutting board with your own hands, but a complex one (curly).
- Edge processing. Any owner always has some kind of abrasive (sandpaper, sharpening wheel) or an appropriate tool (file, grinder) on hand. All corners and edges of the resulting cutting board must be sharpened to remove various roughnesses, microscopic chips remaining after sawing, etc. This solves a dual problem. Firstly, after using the board you won’t have to remove the splinters from your hands. Secondly, the smallest fractions of wood remaining after cutting can unnoticeably get into the products that will be cut.
- Drilling a hole. It should be in the pen, although this is not necessary. But if you do it in advance, then later, if you want to hang the cutting board somewhere in a convenient place, there will be no problems.


- If a cutting board for wood carving or exclusive furniture is stored in a visible place, it makes sense to leave one side of it for work, and the other side to somehow decorate it artistically. Your own imagination will suggest options - paint and varnish, paste over, laminate with decorative film, etc.
- Modern homes in most cases are finished in a certain style; fortunately, there is a sufficient choice of materials. Therefore, it is advisable to choose the appropriate shape of the cutting board, and not limit yourself to just a traditional rectangle or square.

- Some wood is suitable for a number of parameters for the manufacture of such a kitchen attribute. But there are also some disadvantages that need to be taken into account. For example, birch is good for cutting wood carving boards, but its structure is so porous that this lumber is highly hygroscopic. The conclusion is not difficult to draw - before choosing a specific type of wood, you need to decide on the intended use and storage location of this kitchen attribute. The same is true for oak, although it is durable and moisture-resistant, it is so dense that even a small cutting board made from it has significant weight. And this comes to the issue of ease of use.
That's basically it. And what kind of cutting board to make with your own hands from wood - in size, shape, external design - is up to you, dear reader, to decide.
How to make a wooden bed with your own hands — ; step-by-step instructions and drawings How to make a bird feeder from wood with your own hands — ; step-by-step instructions and drawings How to make a good ax handle for an ax &