This quest will become available after the construction of an outpost on Eos. Walkthrough Mass Effect: Andromeda
Players will now find themselves far beyond the Milky Way, in the very depths of the Andromeda galaxy. The main character (or heroine) will take on the role of the Pathfinder and thereby lead the search for a new home not only for humanity, but also for many other races in a new, hostile corner of space. Discover new and completely unfamiliar secrets of the endless galaxy, eliminate alien threats, create your own powerful and combat-ready team, plunging headlong into a deep system of development and settings of skills (abilities).
The Andromeda Galaxy is a completely new chapter in the history of mankind, so it will depend on your choice whether the new founders will be able to survive in it and find a new home for themselves. As you delve into the mysteries and secrets of Andromeda, with the future of many species resting on your shoulders, ask yourself the question... What are you willing to do to survive?
Walkthrough of the mission: "Get comfortable on the Nexus" ✔
“The Nexus is full of different organizations and departments. To fully understand what is happening, talk to the leaders and key personnel of the base.
This first optional quest can be obtained during the storyline at the very beginning of the game. After the shocking news, the main character (or heroine) is offered to look around and get to know everyone, so the main four tasks appear: the first - «» , second - «» , third - «» , fourth - «» .
First of all, talk to Addison, because she will be the closest - on the captain's bridge a little higher. It will be possible to discuss many things with her, so the dialogue will turn out to be amusing. At the very end, I recommend talking with Director Tann, because after talking with him, the Mass Effect: Andromeda storyline will continue. Kandros can be found by going down a little further (he will stand with right side in a small compartment). Professor Gerick on the task «» can be found at the very end of the same room in which they spoke with the Tyrant Kandros. As for Kesh, he can be found on the opposite side of Director Tann's room - on the other side. After that, you can already go, in fact, to Director Tann, talk to him, complete the first additional task and continue the storyline.
Walkthrough of the mission: "Sabotage at the station" ✔
“Teznik Raj Patil believes that someone is deliberately damaging the systems of the Nexus. You are asked to inspect the places where problems have arisen.
After a conversation with Director Tann on the Nexus, right next to the exit you can see a person delving into some details of the panel. Soon he will have a small explosion, so you can approach and talk to him. As a result, after a short dialogue, he will ask the main character (or heroine) to help solve technical problems on the Nexus, so if you agree, then get this task. In any case, several main tasks will appear, each of which is related to the investigation and inspection of the station: the first - «» , second - «» , third - «» . Return to the headquarters of the pioneer (it is closest). The damaged panel in this place can be found behind a small tree in a pot. Use the scanner to inspect it.
♦ : “The explosion at the node occurred as a result of the system's attempt to compensate for a major energy surge. If we can trace the origin of the spike, we can determine who had control over the system.
Now be careful and do not turn off the scanner, because thanks to it it will be possible to track down some analogue of the wiring (lines yellow color) next crime scene. At some point, you will notice that the line breaks at the top, so go up the stairs and scan the next location.
♦ : “This relay is designed to collect a small amount of excess charge each time power is distributed to other systems. If it had not been found, it would eventually lead to overload and severe discharge. Only someone with physical access to the console could install it."
In this place, the finds end, so go to the next place, or rather to the militia barracks and look for the next place with a breakdown up there - this is, as usual, a square, inside of which there are a bunch of all sorts of technical gizmos, and around there are black spots indicating explosions and short circuits.
♦ : “Damage in the area was caused by direct blocking safety devices. There are many names on the work list. I (SAM) will collate all other data.”
The next cell is hidden because it is locked and located behind the crates, right on the corner. By eye, perhaps right place you won’t be able to immediately determine, but if you turn on your scanner, then immediately look for a broken panel.
♦ : “Someone tampered with the system in such a way that a discharge pulse was randomly created that would erase the system’s memory. The sabotage was carried out remotely. If we can trace the source, we may be able to determine who had access to this site."
After this find, the next yellow strip will appear, which you need to follow to the next panel, so climb the stairs nearby and turn to the right side, where the next panel is right next to the crates. The scanner will most likely not scan the cell immediately, so wait a bit. After scanning, Raj Patil will contact the hero by radio, who will tell you that Zara Kellus worked with these panels. This is how the task appears: «» .
♦ : “There was a complete sabotage here. Only a few technicians had permission to enter here.”
So, in order to find the right character, you need to get to the living deck, and for this you need to go down, go through the doors between the stairs, get further to the monorails and press the button to go to another location.
Upon arrival, go forward, go down the stairs, turn right and stomp to the Atrium, where you will find a saboteur. After the dialogue, it turns out that Zara Kellus is the same ordinary technician who noticed strange problems in the panels, so a version appeared that a third party was involved in this whole thing. This is how the task appears: «» . Get to the Command Center (to do this, go back to the monorails).
Check all security records upon arrival. There will be three entries in total, and only in the third one will it be possible to find a clue. Immediately after that, two main tasks will appear: the first - «» , second - «» . For show, scan all employees nearby (although you can immediately go to the Hyperion), then go to the monorails to go to another location. During the sanitization, sooner or later you will stumble upon Dale Atkins, who will match in all respects, so you will need to talk to him. At the end of the dialogue, you will have to decide what to do with it, but in any case, the task will be completed.
Walkthrough of the mission: "First strike" ✔
“Militia strike teams are conducting risky operations throughout the cluster. Talk to Kandros and see if he needs your help."
During the conversation with the Tyrant Kandros, you can find out about the strike groups, and next to him there will be a control panel with the image of the planet, so click on this panel and get the current task, the first task of which will be: «» .
It will be easier, of course, to immediately, being on the Nexus, come up and talk to him. After the conversation, a task will appear: «» . You won’t have to go far, because the right panel is nearby. There will be nothing difficult in the APEX strike force control panel itself, so when you select the appropriate task to complete, the current task will be completed.
♦ : “To support the Initiative's endeavors, you can hear shock troops on missions. If successful, they receive experience points, and Ryder - rewards. If you fail, there will be little experience, and no reward at all.
♦: “A strike force on the most important missions in the sector. Select and press the "Space" key to send the APEX there. The game will save before the launch of the multiplayer game, and you will take on the role of one of the APEX operatives as part of a small group. APEX Missions can be completed online with friends or through matchmaking to earn rewards and bonuses for your Pathfinder."
Passage of the mission: "The first killer" ✔
“Nilken, an employee of the Initiative, was accused of murder, but not the fact that he is really guilty. Everything must be checked to establish the truth."
The passage of this task begins on the Nexus, after a conversation with a turian. The first task in this case: «» . The guard will allow you to talk to the prisoner without any problems. Moreover, Renzus (aka a prisoner) will tell you that the murder on the mission happened unintentionally, and since the “Pioneer” is an unbiased person, he asks for an investigation, so the task appears like this: «» . So head back to the Turian Commander at Militia Headquarters for a chat.
After the conversation, two tasks will appear: the first - «» , the second additional - «» . Since the audio recording is nearby, you can listen to it on the control panel. But in any case, you have to go to the witness. Go to the Department of Colonization and climb to the very top. After talking with the girl, go to Director Tann (he is in the Pioneer Headquarters) to talk to him now.

Director Tann will be open to suggestions, so he will kindly provide Pathfinder with coordinates from the crime scene where the body can be examined, but he only asks that no one be told anything, since it is not yet clear whether he is really innocent. Either way, I'll have to go to the planet where, according to Renzus, the kett were spotted.
As you already understood, the path now lies on the planet Eos, where you need to urgently inspect the crime scene. Upon arrival, simply follow the marker on the map. When you are in place, scan what is left of the dead. After you finish, SAM will report that in fact Nilken did not commit a crime, but he wanted to, he was simply ahead of him. So now with the information received, you can return to Director Tann to make a key decision.

Option One - Let Nilken Go
If you decide to release Nilken anyway, then he will receive community service as a punishment, as a participant in this mess, but will remain on the Nexus. When you talk to Marietta, she will express her deep gratitude to you. In addition, when you warn Nilken to watch his behavior in the future, Marietta will ask him what the "Pioneer" had in mind, but he will evade the answer and your paths will part ways.
Option Two - Banish Nilken
In this case, Nilken will be expelled, that is, he will be kicked out of the Nexus. And after talking with Kandras, he will say what you did right choice. However, this is not the end, because the next meeting with Nilken will take place on the planet Kadar, in the Govorkam star system, where he will already try to establish a life in exile. But that's all.
Walkthrough of the mission: "Monkeys in space"
Walkthrough of the mission: "Fire Brigade" ✔
"Dr. Aridana asked me to add some complex formulas to the SAM module."
"Fire Brigade" - a side task in which this time you have to deal with the cult of people who despise the very existence of artificial intelligence. In this walkthrough, you will learn how to complete the "Fire Brigade" mission in the game.
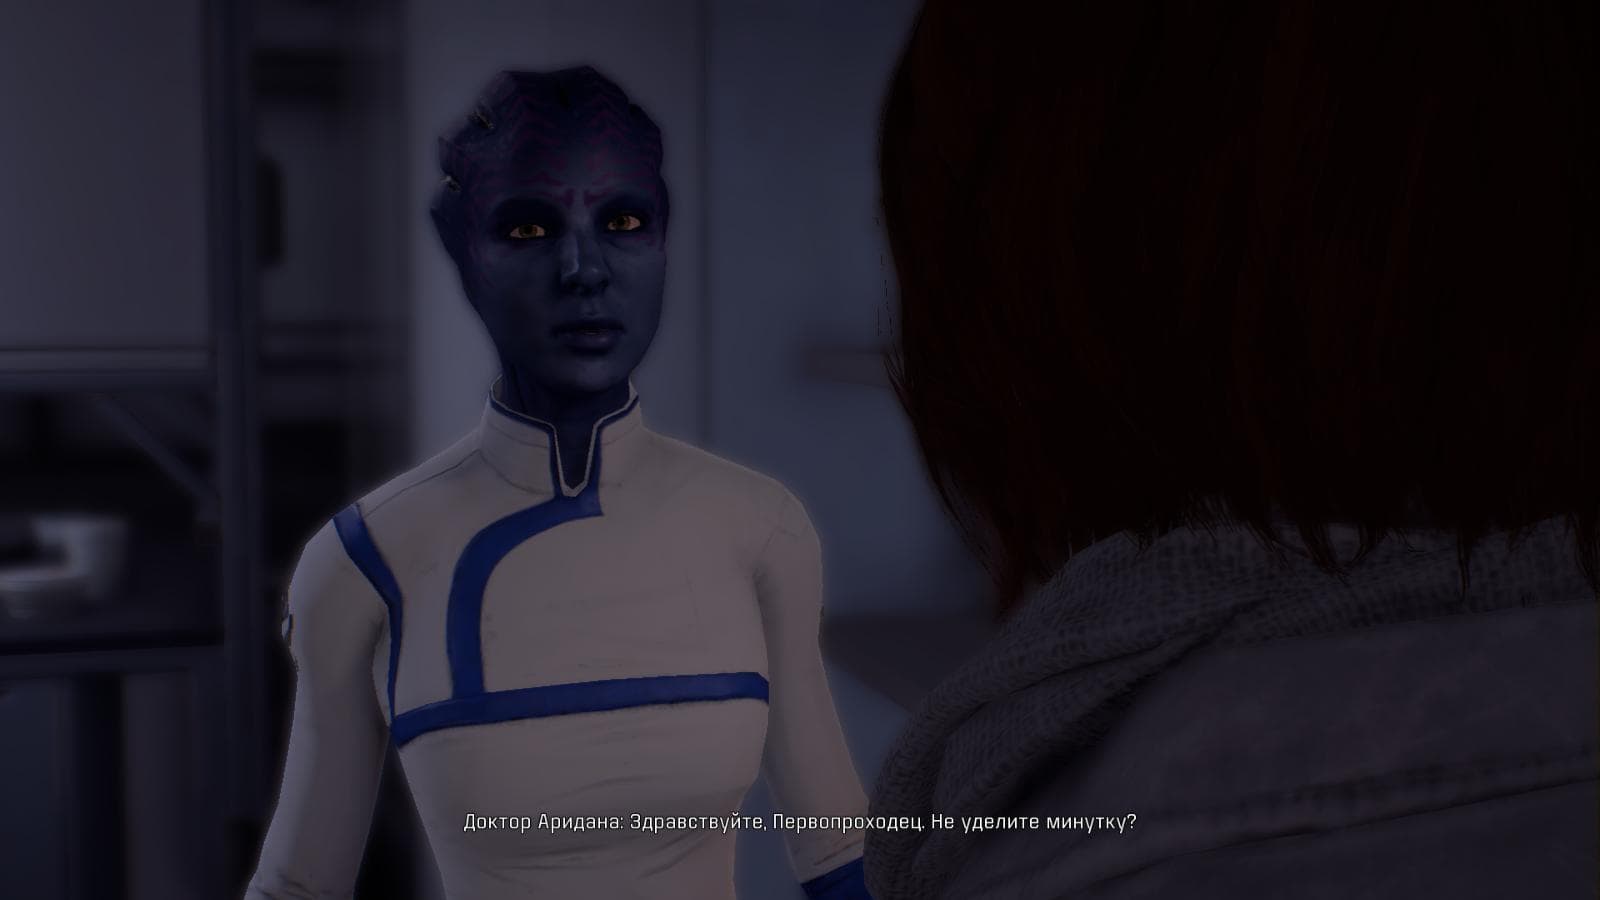
"Doctor Ariadana, upon arrival, will ask her to do her a favor."
How to complete the task "Fire Brigade"?
In order to take on this quest, the first step is to check Ryder's mail in his private quarters. The message you receive will tell you that Doctor Aridana is asking for the help of the Pathfinder on the Nexus. The girl needs the SAM to solve certain equations. After you go to the core and after SAM solves the equations, it turns out that in these puzzles there was a special virus that could disconnect SAM from Ryder, but this did not happen. The doctor will be out of business, but on the Habitat Deck, Ryder will meet Avina (AI assistant), who turns out to have been hacked by hackers. Moreover, the hackers will think that their venture ended in success and therefore SAM will offer to play along with them, which, in fact, will need to be done. As a result, the hackers will promise to bring the hero to the leader of their group, whose name is Knight. But the meeting will take place only if you must select the option “Can I meet her?” in the dialogue. In general, after this conversation, you will have to wait for the moment when a letter arrives in the mail.

"AI-Avina will be hacked by hackers."
As a result, the message will only come when you visit Kadar, because the lair of new "friends" will be located on this planet. During the conversation, you will find out why she hates artificial intelligence so much. And thanks to this, it will become clear that the girl has started something dangerous, so you have to find out exactly where Knight is going to strike his next blow. In total there will be two options for solving the problem: option one - you can safely kill absolutely everyone in the lair, because any of your scans will still lead to this; the second option - it will be possible to make implants for the son of Knight (Alena), which will help to recover from a serious illness, after which he will issue a search word in the system.

"Implants for Knight's son can be made on Tempest."
And once you have the information, you can safely return back to the Nexus to disable the three devices. Once you've done that, you can talk to Knight again. However, now you have to decide: kill Knight or arrest (although there is a possibility that the possibility of arrest appears only if you cured Alain).
However, there is another option. If you cure Knight's son with an implant, but still run a scan and then kill the entire hacker team, then there will be another gloomy ending. Knight's arrest will fail, so she will be shot. Immediately after that, a letter will come to the post office from Alain (son), where he swears that he will avenge the death of his mother.

"Location of the first device."

"Location of the second device."

"Location of the third device."
Walkthrough of the mission: "Stones for Science"
"Use the scanner on unexplored worlds to test Lucan's new VI for geophysical exploration."
The task can be taken near Professor Gerik from a character named Chef Lukan. The first task will be: «» .
Walkthrough of the mission: "Missing Scientists" ✔
“Doctor Aridana sent a group to investigate the Fel, but the group has not been in contact for a long time. There is reason to fear the worst. You are being asked to find out what happened to the scientists."
The task is taken on the Nexus from Dr. Aridana. The first task will be: «» . In fact, finding the ship will not be so difficult: when it becomes possible to fly into outer space, go to a system called Ericsson, in which you will carefully study the Filth. When the radar against the background of the Fel turns green, an anomaly will be found, which will be the wreckage of the ship, and the very one that needed to be found.
♦ : “The ship was heavily damaged by the Corruption, which destroyed all internal systems. Dr. Aridana's team died instantly. The ship is drifting, it is impossible to use it due to radiation contamination. The name of the shuttle is "Yudoxus". Number of crew - 7".
Walkthrough of the mission: "The Lost Arks"
"Tann asked you to look for clues that could lead to the missing arks."
The task is taken on the Nexus from Director Tann. Thus, there are three main tasks: the first - «» , second - «» , third - «» .
Passage of the mission: "Secrets of the Ryder family"
“Your father has blocked part of SAM's memory and he cannot access some data. To gain access, look for memory activators while exploring planets."
During the passage of the story mission «» , after a private conversation with SAM, this task appears, the first task of which will be: «» .
Where to find the first memory activator?
First of all, I recommend going to the cabin of the late father of the Ryders, which is located on the left side of the SAM Module. In the cabin you can find the first memory activator (such a round luminous circle in the center). Click on it and talk to SAM about the unlocked memories. SAM will say that his program has certain conditions that must be met in order to unlock the memory, so go back to the SAM Module to listen to important information.
Walkthrough of the mission: "The path of the hero"
"Asari journalist Keri T'Vessa wants to interview you for a documentary on current events."
The task is taken on the Tempest, and the first task will be: «» .
Walkthrough of the mission: "The Ghost of Hope"
Walkthrough of the mission: "Traces of data"
Walkthrough of the mission: "Models of spheres"
Walkthrough of the mission: "Shock therapy"
Passage of the mission: "Wonderful life"
Walkthrough of the mission: "Early awakening"
Walkthrough of the mission: "Movie Night: The Beginning"
Walkthrough of the mission: "Search for the past"
Walkthrough of the mission: "Trade benefits" ✔
Trade Perks is another side mission in Mass Effect: Andromeda. So, when you find yourself on a planet called "Aya", a merchant named Sohkaa Esof, who can be found in the port (near the "Storm"), will ask the hero (or heroine) to deliver an important cargo to him. In return, the merchant promises not only to enter into trade relations with the character, but also to put in a good word with the leader of the Resistance. In this walkthrough, you will learn how to complete the Trade Perks quest in Mass Effect: Andromeda.

Take the task from Sokhki Esof, fly to the planet Voeld and follow the mark on the map.
Go to the planet indicated above, find the merchant and take the task from him. Sohkaa will ask you to deliver him boxes of goods that are located on a snowy planet called Voeld. Gather a team and go to the marked place.

Scan the boxes and return to the merchant back to Aya.
Arriving at the indicated place, go to the active mark, which is located in the southeast. Move until you come across a broken patrol, near which supplies will lie. In the same place, use the scanner to examine all the objects, during which you fall into an ambush, the initiators of which will be the ketts. Nothing will be difficult, so just fight back and go back to the supply boxes. Scan them, collect them and return back to Aya to return the cargo to Sohke Esof. As soon as you transfer the cargo to him, it will be possible to trade.
Passage of the mission: "Restoration of the world" ✔

“Remnant technology is the key to rebuilding Voeld and turning it into the golden world it should be. But first, you need to find the vault by activating all the Remnant monoliths.”
Restoring Peace is an optional mission on the planet Voeld. As on the planet Eos, you will need to activate three Relics (or, more simply, monoliths) in order to improve the atmosphere for building a colony. The main problems during the passage arise with puzzles, which are Sudoku. In this guide, you will learn how to complete the "Restore the World" quest in Mass Effect: Andromeda and how to decipher the codes of the Relics (monoliths).
The character will receive the task automatically when he arrives on the planet Voeld, having swept through the surroundings. Below are screenshots that show the location of all the Relics on the planet Voeld and their solution.
The first Relic on the planet Voeld
Go to the places that are marked in this order. Upon arrival at the specified location, look for the missing glyphs that are needed to decipher the relic code. The screenshot below shows the correct solution to the Relic code.

Deciphering the first code of the Relics on the planet Voeld.
Second Relic on the planet Voeld
The second Relic is located inside the cave, where you can also find the necessary glyphs, so turn on your scanner and look for important items for the task. After the search is successful, hack the Relic console.

Deciphering the second code of the Relics on the planet Voeld.
Third Relic on the planet Voeld
The third monolith will be a little more difficult than the rest. First, this time you will have to fight with enemies. Secondly, after the destruction of the enemies, you will need to find glyphs, two of which are on the surface, and not inside the specified cave. If you do everything right, then the character will open the location of the storage, from which the lock will now have to be removed.

Deciphering the third code of the Relics on the planet Voeld.
Vault on the planet Voeld
Once in the vault, there are two very important things to do: the first is to activate the emergency generator, the second is to remove the lock from the vault. All these actions can be done using the relic console. After activating the emergency generator, the hero (or heroine) will enter the next location, which will contain platform elements from the previous planet. In case you don't want to mess around with access to all sorts of random extra rooms with pretty good stuff, activate the console to the right and head off to unblock the vault.

In the storage on the planet Voeld, you can find an additional room with good things. On the left side of the Vault unlock console.
In the middle of the path you have to go upstairs - here is extra room. Inside, you will need to destroy a couple of powerful opponents. Next, approach the console and hack it, after deciphering the Relic code. In addition, after the decryption is completed, your character will be able to receive two additional skill points.

Deciphering the code of the Relics in the Vault on the planet Voeld.
Everything worked out? Then you need to continue the path forward to unlock the vault. Activate the console, then quickly move away from the black smoke in order to stay alive and, in the end, seal the vault.
Walkthrough of the mission: "Removal of the heart"
Walkthrough of the mission: "Frequency" ✔

"A scientist from Voeld complains about some kind of interference interfering with the operation of the equipment"
Frequency is one of the planetary missions in Mass Effect: Andromeda. You can get the task in one of the camps of the Angara rebel base. Inside the building is a researcher who will ask for help. The bottom line is that you need to investigate an unknown signal, so the character receives the main task and the first task: «» . In this guide, you will learn how to complete the "Frequency" mission on the planet Voeld in Mass Effect: Andromeda.

Talk to the scientist and get important coordinates.
In this mission, you will need to deal with a strange and unknown signal source that causes certain problems for local rebel scientists. After a conversation with a research assistant, he will mark a key place on the map, so a task will appear: «» . As soon as he does this, you can safely go to the marked point in the east. In addition, along the way you can stumble upon several Kett outposts, so if you want, then you can clear them.

Scan the fallen meteorite and follow further instructions.
When you arrive at the specified location, the hero (or heroine) will notice a huge piece of a stuck meteorite, so analyze and scan it at the same time. However, be on the lookout, because soon your team will be attacked by a pack of Savage Ahdi, from which you can get a couple of Visible Plates. But still, after you kill all the enemies, it remains to neutralize the signal and the task will be completed.
Walkthrough of the mission: "Cashes with medicines" ✔

"A Resistance doctor on Voeld needs medical supplies to save the lives of wounded soldiers and civilians affected by the planet's harsh conditions."
Medical caches are one of the optional quests in Mass Effect: Andromeda. You can receive the task at the Angara resistance base, on a snow-covered planet called Voel. The main character (or heroine) will be asked to find three boxes of medicines in the form of supplies. The most problematic of these boxes is the third, because, as it turned out, it is not so easy to get to it. In this guide, you will learn how and where to get medical caches on the planet Voeld in Mass Effect: Andromeda.

Talk to Dr. Kharin to get the coordinates for the location of the medical supplies.
So, the doctor who will issue the task can be found inside the Resistance base. After the conversation, the doctor will mark the location of the boxes with medicines on the map, so you can safely go in search.

In this screenshot, all medicines are marked and I recommend looking for them in the specified order.
The first two crates of medicines are fairly easy to find. In addition, one of them will be unguarded, but there will be an ambush by the kett, which you can safely ignore and go immediately after the second box. The second one will be a little more difficult, as you will come across a small kett base with several enemies inside, so you can only get another crate of medical supplies after killing the kett.

As soon as you get to the landing zone of the capsule, drive up the slope and look for a cave.
As for the third cache, it can cause certain difficulties, because it is located on the top of the mountain. So that you do not get confused, navigate and follow thanks to the map. First of all, get to the capsule, and then climb higher up the slope. Eventually, you will reach the cave, but to enter you will first need to deal with the kett (they will ambush your team). So fight off the enemies, take the last box of medicines and go back to Dr. Kharin to complete the task.

The second cache can be found inside the cave after you kill a couple of aggressive ketts.
Walkthrough of the mission: "Sleeping Dragons" ✔

“A group of protesters demand that their families be taken out of cryostasis. We need to talk to Nexus management about how best to resolve this situation.”
Sleeping Dragons is a side quest on the Nexus in ME: Andromeda. So, the protesters on the Nexus find themselves unhappy with the fact that their family members have not yet been awakened from stasis after the colonization of the planet Eos. In this guide, you will learn how to complete the additional task "Sleeping Dragons" in Mass Effect Andromeda and you will learn what to do with the protesting residents.
Protesting residents can be found in the common area of the Nexus, after the construction of an outpost on the planet Eos. They stand in the hydroponics zone. Upon arrival, talk to them, after which they will convey all their complaints to the main character (or heroine). It turns out that all the protesters will be unhappy with your choice on Eos, no matter what it was (military or scientific). The family members of these rebels were next on the list to unfreeze, but character selection on Eos dropped them down the list. So they will send you to talk to Kandros.
And if you do not talk to them, then it will look like you ignored the protesters' complaints, so they will end up in jail. In general, I recommend talking to him. After the conversation, he will arrange a meeting with Director Tan, Cash and Addison. In the course of a conversation with them, such arguments will appear that are directed in favor of nipping the rebellion in the bud. They will argue that the Initiative is unable to support any additional colonists at this stage, so they believe this matter should be dealt with with a firm hand.
Therefore, by the end of the conversation, the "Pioneer" will have to choose how to deal with the protesting residents. There are two options for solving the problem, which pass without any serious consequences, and they also do not affect the main storyline in any way. Two options for solving the problem: 1 - "Stop the protest" (Kandros will arrest all the protesters), 2 - "The protesters are right" ("Pioneer" will personally unfreeze all relatives).
Walkthrough of the mission: "Nexus: Infestation" ✔
“The initiative was brought out of cryostasis by a citizen suffering from an incurable infection. Track down the patient and bring her back to the capsule before she spreads the infection."
"Infection" is a side mission in . The plot and events of this quest will revolve around the search for one local resident of the Nexus, who turns out to have disappeared. The task, in turn, is quite long and has a difficult choice at the very end. So this walkthrough guide will help you complete the quest, so you will find out exactly what will happen if you kill or spare the Roekaar leader.
Useful information: The task "Infestation" can only be accepted after you open Kadara, however, you will not be able to complete the passage of the task until you have access to the slums of Kadara (which means that you will need to complete the main mission of the storyline under titled "The Hunt for the Archon").
How to complete the mission "Infection" inMass effects: Andromeda?
So, after Kadar is opened, then upon returning to the Nexus, Ryder will receive a message from Captain Dunn. You can talk to her on Hyperion. The girl will talk about the fact that a sick woman has disappeared, so she will ask for more details about the incident and problems to talk with Dr. Carlisle in the infirmary on the same ship.
After the doctor, you will need to talk with the officer who is in charge of immigration in the common area. The next step in this task is to scan the common area. The purpose of the scan is to look for traces of Ruth Becker's activities. The trail should lead you to a bar called Whirlwind. Follow the trail inside, where you will need to scan the hologram next to the table.

"Use the scanner to follow Ruth Becker's footsteps."
A salarian named Lator will stand by the bar - talk to him. During the conversation, he will send the hero to the command center, where, in turn, you will need to talk with Theron. The next stop after the conversation with Theron is once again the docks. In this place, find and talk to the wounded pilot. It turns out that Ruth Becker stole his ship, so he will have to go on the "Tempest" in pursuit.

“It is necessary to scan anomalies to find out exactly where the girl sent next.”
As soon as you find yourself in space, the game itself will tell you which system you need to scan. Beacons will need to be launched to the indicated place, as usual, and as soon as the first trace (anomaly) of Ruth Becker is found, it will be possible to move on to the next specified system. Soon, in this way, you will find yourself on Kadara, where the girl is now arriving.
In the northwestern part of the map to Kadara, you will first need to find Ruth's shuttle. Then you will need to follow the path straight to the shelter called "Roekaar". Along the way, you will definitely run into bandits, so after you kill them, enter the lower floor of the base. Use the terminal to open the doors upstairs. As soon as the hero enters the room on the top floor, he will find that Ruth Becker is standing at gunpoint from the local leader of the Roekaar hideout

“The choice is yours: save Ruth Becker and thereby release the bandit from the virus, or kill the bandit and Ruth, thereby eliminating the possibility of the virus spreading.”
Option One - "Kill Leader Roekaar"
The only problem is that Ruth Becker is a carrier of the infection. Leader Roekaar, in turn, plans to take a sample of the virus and use it as a new biological weapon. If you decide to kill him, then he will kill Ruth and there is no way to prevent this. However, in this case, the infection will be stopped, so not everything is so bad. At the end, Ruth Becker's body will have to be transferred to the Nexus in a cryo-chamber.
Option two - "Let the Roekaar leader escape"
If you give the bandit leader the opportunity to escape, he will escape with a degraded and even possibly unsuitable virus for the sample. In addition to being a risk, Ruth Becker's life could also be saved in this way. After this incident, Ruth will have to freeze and go with her back to the Nexus.
Walkthrough of the mission: "Betrayal of the Krogan" ✔
“William Spender is an undeniably complex man. But there is reason to believe that the assistant director of colonial affairs is actively digging under the krogan. Drac wants you to check it out."
The Krogan Betrayal is the first quest that is intended to increase Drak's loyalty in the game. Assistant Addison (named William Spender) turned out to be dishonest and does everything in order to interfere with the krogan, thereby compromising their work on the Nexus. You, in turn, will have to lead this person to clean water. In this part of the guide, you will learn how to complete the "Krogan Betrayal" quest in Mass Effect: Andromeda.
Passage of the task "Betrayal of the krogan"

"Comrade Kandros after the dialogue will provide access to the security records."
Head to the Nexus to talk to Kandros, Kesh, and, in fact, Spender himself. So, it turns out that Kesh thinks that Spender is hiding something, so he asks Kandros to find out if there is evidence of Spender's crimes on the records from the security cameras. Having gained access to the security cameras, you will find out that there is a recording, but it is the only one and has poor quality, so the SAM will come into play, which will determine the coordinates of Kadara, so it will go there. Upon arrival on Kadar, go down to the local slums and then on the "Nomad" drive straight on the trail of Spender. Right in front of the lair there will be a mined field, so you have to get off the all-terrain vehicle and walk further on your own two with a scanner in your hands.

“You can get to that distant building, but you won’t be able to get there, because the field around is mined, so go there on foot, using the scanner along the way.”
After all resistance is crushed, it turns out that Spender is selling stolen goods on the Nexus to some exiles, and he also works with a certain person named Aoran. So it's time to head back to the Nexus and visit Spender's apartment to get the scrambler (hidden behind a monitor on the wall). And after the device is found, hand it over to the technician and finally speak with Drak, who will issue the next task, and the current one will be completed.

"The scrambler can be found just behind the monitor."
Walkthrough of the mission: "The future of the people" ✔
"The krogan tracked the stolen transport to the mines outside of Elaaden. The krogan colony could face starvation if Pathfinder and Drac don't return the stolen seeds."
"The Future of the People" is the second quest that deals with Drak's loyalty in the game. According to the plot, the transport of the krogan colony, which in turn was transporting a unique seed fund, was stolen, so Drak asks Ryder to help find him. This mission is essentially a direct continuation of the Krogan Betrayal mission, so this walkthrough will guide you through the Future of the People mission in Mass Effect: Andromeda.
How to pass the task "The Future of the People"?

“Here, in fact, is New Tuchanka.”
After accepting the task, go to Elaaden, and on the planet, get behind the wheel of the Nomad and get to a place called New Tuchanka. Upon arrival, talk to a krogan named Hark, under whose guard, in fact, the ship was hijacked. So, he will give you the coordinates of the local pirate lair, so you can go immediately to this place.

"Guard Hark will send the protagonist in search of a pirate lair."
Upon arrival, a long fight with the local guards will start, but when the fight is over, you will meet the same Aroan who was lit up in the last task. So, after another shootout, Ryder will be contacted by Vorn (a laboratory assistant, without which the fund is absolutely useless). They will not put your hero before the choice, because this time Drac will decide everything himself, but after saving Vorn, another shootout will follow. Then, after the battle, you will have to go for the cargo, where the battle will start again.
Overcoming enemies, the chase will end with Ryder and Drak meeting with Aroan again. And now you have to decide what to do with this interesting person: kill or leave alive. If it is decided to kill Aroan, then Drak will throw him into the abyss without delay, but if you leave him alive, it will be possible to find out something from him about Spender. However, in any case, the task, one way or another, will be completed.

"It's up to you to decide exactly how to deal with Aroan: kill and enjoy revenge, or let him live and get valuable information."
Walkthrough of the mission: "Voeld: The Lost Song" ✔
“Outlaws prey on the Yeevara, local creatures revered by the Angara. Hunt down the poachers and earn the respect of the people of Voeld."
The Lost Song is an optional quest that can be picked up on the planet Voeld. According to biologists, creatures called "Yevara" are quite rare view, which, in addition to everything, was attacked by local poachers. The main character will have to not only find the poachers, but also punish them. In this walkthrough, you will learn how to complete the Lost Song quest on the planet Voeld.

“The first thing you have to do is talk to the biologists. After the dialogue, you will not only receive the task itself, but also find out where the poachers are now.”
How to pass the task "The Lost Song"?
So, near the camp, which is located in the very center of Voeld, you can find biologists. After talking with them, it turns out that the sacred animal species of Yevar is at the stage of extinction and therefore needs effective protection from attacks by poachers. And since they are sacred to them, they ask for help. Therefore, as soon as you receive the task, go along the presented route to find the poachers. Upon arrival at a key location, scan and read the data block carefully. Based on the information received, you will find out exactly where the poachers' camp is located.

"Find a block of data that will help you now find the location of the poacher's lair."
When you get to the camp, the first thing you need to do is clear the area of kett and local mercenaries. Thus, free the entrance to the cave. Making your way through the cave inside, you will again encounter several enemies along the way, but nothing difficult, so follow the marker ahead. At the very end of the cave, Ryder will stumble upon the leader of a gang of poachers, Voeld, who will tell his version of what is happening around. After listening to everything to the very end, you have to make a rather difficult choice.

"At the very end of the cave you will meet with the leader of the gang, but after a little conversation you will learn new details of the whole story, so you will have to make a difficult choice."
Dear visitors! The Mass Effect: Andromeda side quest walkthrough is under development, so bookmark this page for updates!
The quest starts after reading the given block on Object 1 or after approaching Object 2.
Stage 1: Investigate Object 2: Fortitude
At the research station, elements of the project are scattered (on purpose), and the researchers themselves are killed. First you need to go into the main building - from the right side of the complex, with a loader at the entrance. There, SAM will point to a mysteriously locked door. Turn on the power to activate it, and then everyone else, thereby releasing the Demon to freedom.
Stage 2: Defeat the kett
If you're doing a quest early in the game, the first skirmishes can be threatening, and then there's the Demon in addition. Try to be in cover (it is best to climb onto the roof of the complex). After the battle, you can start looking for elements.
Stage 3: Find secret project details
The initial data will be on the second floor of the building where the Demon sat in a cage. They are called Special Project Sigma, but the components are missing.
Stage 4: Find three elements
The first one will be in the same complex, but in the building located on the right upper corner from the entrance to the building with the Demon.
The second one is near the southern shores of the lake, which is not far from Object 2.
The third one is in the kett research facility where you first met Drak (the room where the monolith's lock is disabled).

Stage 5: Scan project
Return to the building where you found the schematics and scan the project with all the necessary elements in your hands.
Quest completed.
Defeating the kett
To the west, beyond the mountains, is a mysterious kett facility surrounded by a protective barrier.
Stage 1: Deactivate the protective barrier
There is only one entrance to the base, and it is teeming with kett. The passage is guarded by a small detachment and turrets, it is worth using shelters. After the fight, go to the console by the door and break it open. An area is formed around the console that cannot be left until the hack is completed. At the same time, a new kett squad will attack you. After the fight and unlocking, go inside.

Optional: Gain access to kett defense systems
To prevent the intervention of new units of kett, you need to activate the code on the console, not far from the entrance. Clear the nearby area and interact with the console to turn off the warning signal. If you do, kett who are not currently in the base will not come to the aid of the kett.
Optional: Overload Shield Generators
The road ahead from the consoles will split in two, and on both sides you need to disable the shield generators. Once done on each side, return to the defense systems console, go up to the second level and deactivate the shields.

Stage 2: Gain access to the Fortress Reactor
Walk forward, go down to the lower level and enter the main building. There, go up to the top floor, turn off the console next to the window. This is the first of three security terminals that must be deactivated in order to proceed further. The second is not far, go to the left side of the building on the same floor. Jump down and go down the corridor to the third console. Go to the main hall and there, after cleaning, open the hole in the floor with the console, and this way you will get to the main headquarters.

Stage 3: Get to the control center
This level has the most enemies. Walk along the marker, trying to keep cover and keep the shields from going out. In the control center, the commander of the kett, the Inquictor, is waiting for you. If you complete the mission at the beginning of the game, then this is the first serious boss that you will face. Eliminate the orb that floats around him first, and then the wearer himself. Beware of boss attacks. Then eliminate kett ranks if there are any left.

Stage 4: Get into the observation compartment "Zenith"
Use the console in the center of the bottom floor to open the door forward. There, through the corridor, go to the elevator that will take you to the Zenith. Use the console in the center of the hall to disable the station.
Quest completed.
Make an impression
This quest will become available after the construction of an outpost on Eos.
You need to find and activate three hammers that will help improve water production on the planet.
The first located north of the lake located in the center of the map.

Second located at the relic molonite, west of the lake. A representative will come to talk to you sovereign state of Advent, and ask for a deal: place of birth natural gas Prodromos in exchange for water for Advent. You can only select one hammer.

After activation third hammer, which east of the second, the Architect, the eldest of the relics on earth, will immediately emerge from the ground. To defeat him, you need to hit his "head", but for this you need to immobilize him - hit the limbs. The architect is fast, constantly attacking, so defeating him from one position is a difficult task. He is also capable of summoning lesser relics.
After defeating the Architect, his shell will fly into orbit, and the remains can be scanned from the Tempest.
Quest completed.
Curse of the kett
While driving through western Eos, you will be contacted by a man named Bane. He will give a tip on the main kett structures, the destruction of which will help weaken the alien defenses on the planet. But first you need to find him.

He'll be in a kett camp with a broken shuttle smoking. This blackest smoke will be the navigator. Talk to him and get two goals.
Destroy the generator
Approach the console and start deactivating the generators. This will take some time, so make sure you don't get shot at.

Destroy the barracks
Players will now find themselves far beyond the Milky Way, in the very depths of the Andromeda galaxy. The main character (or heroine) will take on the role of the Pathfinder and thereby lead the search for a new home not only for humanity, but also for many other races in a new, hostile corner of space. Discover new and completely unfamiliar secrets of the endless galaxy, eliminate alien threats, create your own powerful and combat-ready team, plunging headlong into a deep system of development and settings of skills (abilities).
The Andromeda Galaxy is a completely new chapter in the history of mankind, so it will depend on your choice whether the new founders will be able to survive in it and find a new home for themselves. As you delve into the mysteries and secrets of Andromeda, with the future of many species resting on your shoulders, ask yourself the question... What are you willing to do to survive?
Character Creation
As usual, the passage begins with the creation of a character. You have to choose: gender (male or female), appearance (default or custom), training (character class, which are described below), name and history.
. Soldier class- While serving in the military forces of the Alliance, you tried to learn everything about weapons and tactics. The class has three unique starting skills. The first skill is "Stunning Shot" (Starting skill) - the hero releases a heat-guided ammunition that knocks the enemy down. The second skill "Turbo Charge" (Open Skill) - briefly, but greatly increases the rate of fire of weapons and the effectiveness of thermal charges. The third skill (Open Skill) - "Stamina in battle" - improves stamina and allows you to take more weapons into battle.
. Biotic class- While serving in the military forces of the Alliance, you were a biotic and helped your comrades with the help of the ability to control the fields of the mass effect. The class has three unique starting skills. The first skill is "Throw" (Initial skill) - biotic skills allow you to throw opponents into the air. The second skill is "Singularity" (Open Skill) - a whirlwind keeps enemies caught in the way. The third skill is "Barrier" (Open Skill) - your defense will be enhanced by a powerful biotic barrier.
. Engineer class- While serving as a technician in the Alliance military, you learned how to fly drones and hack into enemy systems. The class has three unique starting skills. The first skill "Reboot" (Initial skill) - causes an electrostatic discharge that causes great damage to shields and synthetic enemies (can hit several targets in a row). The second skill is "Invasion" (Open Skill) - you hack the armor and weapons of the enemy, infecting him with a computer virus, weakening the protection (the virus spreads to nearby enemies). The third skill is "Group Support" (Open Skill) - a special technology increases the chance of a squad to survive.
. Leader class- While serving in the military forces of the Alliance, you were a team player and worked with your comrades for your own safety. The class has three unique starting skills. The first skill is "Energy Absorption" (Starting skill) - absorbing the energy of the target's shields allows you to restore yours (this skill is especially effective against synthetic enemies). The second skill is Havoc (Open Skill) - an aura of mass effect fields enveloping you slowly deals damage to nearby enemies. The third skill is "Group Support" (Open Skill) - a special technology increases the chances of survival.
. Bully class- when a fight starts, you always find yourself in its epicenter - often in accordance with the recommendations of the Alliance, but not as a couple. The class has two unique starting skills. The first skill is "Dash" (Initial skill) - you fly at enemies like a comet, restoring part of your shields on impact. The second skill "Stamina in battle" (Open skill) - improves stamina and allows you to take more weapons into battle. The third skill is "Dash" (Open Skill) - see above.
. Operative class- While serving in the military forces of the Alliance, you studied covert operations and equipment used by special forces. Prior to joining the Andromeda Initiative, such knowledge was rarely applied. The class has two unique starting skills. The first skill is "Tactical Disguise" (Initial skill) - the technology of bending light rays allows you to become invisible for a short time (attacks from invisibility cause more damage, but destroy the disguise). The second skill "Stamina in battle" (Open skill) - improves stamina and allows you to take more weapons into battle. The third skill is "Tactical Disguise" (Open Skill) - see above.
Prologue: "Hyperion"
After character creation, an intro video will begin. Control will not pass into your hands immediately - before that, you will have to talk with some members of the crew of the Hyperion vessel. At the beginning of the game, you will be introduced to response styles. The style of the answer will determine the character of the protagonist, so always think before you answer. There will be four response styles in total: 1 - Emotional, 2 - Reasonable, 3 - Casual, 4 - Professional.
So, after a short dialogue, a strange incident occurs with the ship, so the Pathfinder asks the main character (or heroine) to appear on the captain's bridge. So there are two tasks: the main - «» , additional - «» (or brother if you're playing as a girl). Since the sister's capsule was damaged during the shutdown of gravity, it is necessary to carefully examine it. The capsule will stand 9 meters from the character. Everything will be fine with the sister, since the SAM will not detect anything alarming, so you can safely go to the captain's bridge of the ship (the icon with an asterisk is the main goal).
Upon arrival, there will be a small explosion due to a system reset, so a new main task will appear - «» . When Kora tells you what the problem is, you will need to scan the power circuit and find out through this what the cause of the problem is. Now you can get confused, because at first it is not entirely clear what needs to be done. Cora ordered to scan the power circuit, which is located directly above the key mark (in the middle of the huge generator). After that, scan the part on the right and get the following task - «» . To do this, go to the next mark and interact with the control panel. Done? Then it's time to head to the monorails. Open the doors ahead and go further to the mark. Upon arrival, start the monorail, after which the cutscene will begin.
Well, after a rather interesting scene, the Pathfinder decided that it was necessary to study the planet, because it is not known what awaits Hyperion in this place. He orders to assemble a squad for reconnaissance, so when control over the character again passes into your hands, collect things: a helmet and weapons. Then go to the hangar.
Mission: "On the Surface"
“The expedition to Dwelling 7 ended in disaster. The planet does not even come close to the treasure that the scanners showed: its atmosphere is toxic, and deadly electrical storms brought down both shuttles.
Landing on the first planet in the Andromeda galaxy was not very successful: there was another incomprehensible anomaly that disabled the ship. As a result, the main character and Liam fell to the planet and lost contact not only with the rest of the team, but also with Hyperion. So the first task looks like this - «» .
: By scanning samples of unknown technologies and lifeforms, the character will receive scientific data points - "ND". In turn, ND can be spent in the research center, thereby obtaining new types of armor and weapons.
The path will be completely linear for now, so along the way I will note the most remarkable and important details along the way. So, first of all, young heroes will stumble upon a path along which lightning will strike - here you need to make a dash and quickly run to the cave on the opposite side. The main thing is not to slow down, otherwise the hero will be hurt. And after leaving a small cave on the other side, it will be possible to test the weapon at will by shooting a couple of times at the fuel cell. Further, the path will remain the same linear, but now you have to learn how to use a jetpack, which is nothing complicated. Therefore, upon arrival at a key point, a cutscene will begin.
During the cutscene, the heroes stumble upon unknown creatures who are armed and, judging by appearance dangerous. But the most important thing is that among the wreckage of the ship lies the wounded Fisher, who needs urgent help. The only problem is that very soon unknown creatures will find him. Your new challenge is «» . I recommend not to wait until they finish off Fisher and attack them first. After the battle, the next cutscene will begin.
So, there's no way to take Fisher with you, because he broke his leg, so he asks to go further and find the rest of the Pathfinder reconnaissance group. So there is an additional task: «» . The task is easy to complete, because the supply container is nearby, so take everything that is inside and the task will be completed. In any case, move on, the path is again linear.
When you get to a huge alien building, you will find not only, again, representatives of an alien life form, but also your friend, who will soon be killed. Therefore, boldly start a shootout and kill all enemies. After the fight, look for Kirkland. Unfortunately, the guy died, so there is a new additional task: «» . By the way, do not forget to search the corpses of aliens and other debris.
Going a little further, the heroes in the sky will notice the signal lights, so the task will appear: «» . I recommend you go there right away. However, do not rush too much, because an unknown and invisible creature will suddenly run out into the gorge on the way to meet the heroes. Immediately at this moment, step back and shoot the monster from afar. In the future, such monsters will come across to you more than once, so be prepared. In addition, when you get to the second half of your ship (the fallen part after the crash), the alien creatures will again attack the heroes, which will need to be defeated. At the same time, constantly move forward and inspect all the debris, boxes, enemies, and more. Don't skip items.
In addition, when you get to the strange ruins, a corresponding additional task will appear: «» . Do not be afraid. Feel free to enter the building, on which there is an orange mark. Move deep into the building, where the heroes will soon stumble upon a strange sealed door.
: At this point, pay attention to the icon in the form of a radar. The bottom line is that this icon will point to the most interesting places. And the more it flickers, the closer the character will be to the goal. So take note.
So, in order to open a sealed room, you need to restore the power supply. There is a machine responsible for this case in another part of the complex. One might even say on the opposite side. Since nothing will work without power, I recommend not even wasting time on any devices, so go to the corresponding icon and click on the control panel. As a result, the power supply will be restored, so go back to the sealed doors and be sure to collect all the items along the way. In general, go inside the room where you will meet a strange robot. You should not admire him for a long time, so quickly deal with him, scan and collect all the items, and then leave this alien complex.
But before you go outside, get ready for a fight, because the enemy has set up an ambush with the participation of invisible monsters. Pick up some kind of rapid-fire weapon to react faster and kill enemies. After you kill everyone, go in search of Greer.
To find your partner, you need to go forward from the alien building directly under the large bridge above. Then go through the rocks and look to the left - there is a passage to the cave. Right next to the entrance, you can hear the voice of Greer, who does not understand what is happening and what these creatures need. When you get a little closer, open fire as soon as possible, otherwise Greer will be killed. After the fight, it turns out that Greer was unable to contact the others due to a broken receiver. But this is not so important already, because it's time to move on.
Since the beacons were fired from the same spot as the main target, head straight for it. As you get closer, you can hear "SOS" signals from Cora, so this is how the task appears: «» . Don't waste time and move on. And remember that almost all hard-to-reach places can be overcome with a jetpack.
When you get to the second shuttle, a task will appear: «» . Therefore, rather, take a comfortable position closer to your comrades-in-arms and begin to accurately and confidently shoot enemies. In addition, I want to add that the enemies this time will try to throw grenades at the heroes, so either quickly dodge with the help of rolls or with the help of a jetpack. When there is a moment of calm, regroup, level up the heroes and prepare for the next enemy attack, because now the enemy equivalent of landing from spaceships will begin to land. Do not forget also that you also have grenades in your arsenal (they are best thrown into the thick of enemies), and against melee creatures (invisible monsters), a shotgun is perfect (unless, of course, you missed it). And yet, if the shield is gone, then it is better to sit behind some kind of shelter, for example, behind a stone, until it is restored.
At the very end of the battle, your squad will attack "Something Heavy". So, it’s better to be careful with this alien creature, because in his hands is a powerful weapon that will quickly remove the shield, and then all health. Try to attack from a pullup and "shine" your body less so that he does not critically hit you. After the fight, a cutscene will start.
Thanks to a successful repulsed attack and established communication, it was possible to contact SAM, who, in turn, connected the main character with the Pathfinder, but it turned out that he was trapped, so it was necessary to find and save him as soon as possible. Your new main task: «» . Head east from your current location to a key point on the map. Along the way, you have to kill a couple more stone-headed enemies, and upon arrival, another cutscene will begin.
The pioneer said that he would have to destroy a huge alien tower. Otherwise, not only the heroes will not be able to choose from this planet, but the Hyperion will not be able to get out of its trap, so it commits a diversion, undermining several important structures, after which lightning begins to strike over the entire area. This brings us to the next important issue: «» . In general, everything will be simple now, because you just need to push forward, expose yourself less and kill enemies more - in general, an assault.
If you have chosen a character that has some effective skills against enemies, then now is the time to use them. Also, do not forget about the jetpack, because if it becomes too difficult to break forward further, then you can use it to quickly change position or counterattack. And do not forget to collect all sorts of useful items from containers and other things along the way. Move to the next key point, which is indicated on the radar.
When you get to the tower gate, an additional task will appear: "Order Cora or Liam to protect both flanks." To do this, press the key reserved for orders and move the squad to any convenient area. The orders related to the attack also work absolutely - you just need to show the target. There will be two points in total and only you can choose which point and whom to send to, and this does not play a particularly important role.
When you order a squad to defend the points, the task "Protect the Pathfinder" will appear again and another line with the progress of decryption. All you have to do now is wait for this download to finish. The task is complicated only by the fact that now enemies will begin to attack, from which you need to fight back, so find a convenient place and fight back. When the download is over, go to the door, click on it. The next screensaver will start.
Mission: "Reunion with the Nexus"
“Hyperion has docked with the Nexus, which is supposed to coordinate the work of the Andromeda Initiative participants.
Due to unforeseen circumstances, the father of the Ryders died, so the command of the Hyperion is taken over by the main character (or heroine), to whom the Pioneer transferred, plus artificial intelligence - SAM. Now you need to go to the Nexus on the monorail, so go to the indicated mark, inspecting the ship along the way. Upon arrival, you will need to find the Nexus employees, so open the doors and first talk to the artificial intelligence that helps with immigration issues called "Avina". Although it will not give anything useful, it will become clear that it has outdated data.

Go down the stairs a little lower and go forward, where you will stumble among all the boxes and lamps of a worker with whom you can talk. Soon, Kandros will join the conversation, who will tell you that they arrived here fourteen months ago. Follow him to the Nexus command center on the monorail. Upon arrival, another cutscene will begin.
After a small shocking scene, you will receive an additional task «» , whose passage is - . However, this is not important now, since the first thing to do is to talk and discuss everything in detail with Director Tann at the headquarters of the Pathfinders. Get down and turn to the right side to the doors, where the next cutscene with a bunch of dialogues will begin. However, this is where the current mission will end and the next one will begin.
Mission: "From a clean slate"
The Nexus needs an outpost to supply resources, but the only planet within reach is Eos. You, the Pathfinder, are being asked to do the impossible: find a way to make Eos habitable and help the Initiative gain a foothold in the system. Director Tann provided funds for this desperate operation. You'll get both a ship and a support team."
After a conversation with Director Tann, the new "Pioneer" learns about many of the events that have happened in all this time. Thus, a new task appears: «» . It's time to go back to your ship, so get on the monorail and move to another location on it.
Run to the Atrium, and from there to the SAM think tank for a very serious and important conversation. After the dialogue, the character will have the opportunity to choose a unique "Profile", which will improve the general human skills. Moreover, a total of seven profiles will be given to choose from, each of which is unique in its own way. All profiles are described below.
All profiles and bonuses
. Profile ""- Soldiers specialize exclusively in combat. No one knows how to deal with enemies like they do. The profile allows SAM to reconfigure the Pathfinder's implant for better performance on the battlefield. All profiles and bonuses of the first rank:
♦ Sniper Focus: Increases damage dealt for each target destroyed in a short amount of time.
>+10% Weapon Damage
>+10% Weapon: Accuracy
>+2 damage resistance
>+10% Weapon: Magazine Capacity
. Profile ""- Engineers understand both offensive and defensive technologies. This profile adjusts the implant that Ryder wears, allowing him to fly a small combat drone. First rank bonuses:
♦ Combat Drone: A small drone that speeds up tech reload and self-destructs by emitting an EM pulse if enemies get close to it. After the drone is destroyed, the reload speed returns to normal.
> +20% Damage for all combos
> +20% Technique: Construction Health
> +20% Technique: Structure Health Recovery
> +20% Technique: Structural Damage
> +20% Technique: Recovery and Protection
. Profile ""- adepts specialize in biotics and can destroy and stun enemies through the use of mass effect fields. In this profile, the biotic implant Rider wears has been modified to take out enemies without firing a shot. First rank bonuses:
♦ Biotic Echo: Biotic combos can additionally explode all affected enemies.
> +15% Biotics: Strength
> +15% Biotic: Damage Area
> +15% Biotic: Area of Effect Radius
> +20% Biotics: Effect Duration
> +20% Biotic Combo: Radius
. Profile ""- Guardians are unique warriors who simultaneously use equipment and biotic abilities on the battlefield. This profile creates a direct link between the Pathfinder's implant and his armor's built-in computer systems, giving the Pathfinder additional protection from Blitz Shields. Bonuses of the first rank:.
♦ Tech Armor: Absorbs a significant amount of damage that passes through shields.
> +15% Damage for all combos
> +10% Technique: Reload Speed
>
> +20% Skill: Recovery and Defense
. Profile ""- Stormtroopers act aggressively in combat, preferring to approach the enemy at a short distance and inflict great damage. This profile subtly reconfigures the Pathfinder's physiology, allowing it to absorb enemy blows and use external energy to boost shields. First rank bonuses:
♦ Siphoning Strike: Melee attacks restore shields.
♦ Biotic jumps and dodges: Use biotics instead of a jump pack.
> +20% Melee Damage
> +50% Melee: Strength
> +10% Biotic: Recharge Speed
> +20% Skill: Shield Cost Reduction
> +10% Max Shields
. Profile ""- scouts understand both weapons and technology. They prefer to eliminate enemies from a safe distance. With this profile, Ryder will become more agile and will be able to track his enemies even in the most furious fight. First rank bonuses:
♦ Observation in combat: Enemies are visible through the scope through the walls.
♦ Tactical Retreat: Dodging temporarily activates a cloaking device.
> +20% Weapons: Accuracy
> +20% Weapon: Stability
> +20% Technique: Reload Speed
> +10% Weapons: Increased damage on headshots/weak spots
. Profile "" is a master of all trades, possessing both combat, technical and biotic skills. This profile changes the Pathfinder's mind and body towards versatility, allowing him to quickly switch between shooting, technology, and biotics. First rank bonuses:
♦ Biotic Blink: Dodges allow you to quickly cover short distances, even if there is solid matter in the way.
> +5% Weapon Damage
> +5 Damage Resistance
>+ 15% Technique: Reload Speed
> +15% Biotic: Skill Damage
> +15% Skill: Recovery and Defense

So, after you have decided on the profile of your hero, the following important task will appear: «» . In addition, you will receive an additional task «» - passing all additional tasks. In any case, go to the ship. Upon arrival, a screensaver will begin. When control returns to your hands, then you can look around, but do not forget that you need to come to the bridge. A screensaver with a couple of dialogues will start on the bridge, and after that the heroes will hit the road.
: Be sure to visit the science terminal just below, because in the "Research" section you can open new drawings and power-ups using previously mined scientific data - "ND". And in the section called "Development" it will be possible to create new items and various improvements.
: In the Research section, each category has different types scientific data. This includes " Milky Way”, “Eley” and “Relics”.
Soon a map of the galaxy will appear before your eyes, and the task will say: «» . There is nothing particularly complicated: you choose a system, after which you choose a planet. On the planet, in turn, choose the landing site and equipment. Next comes the splash screen.
: In addition, on the first landing, on Eos, I recommend taking Vetra along with you, because it will help a lot to establish relations with a new companion - Drak.
Well, after landing on the planet Eos, there are two main tasks. So the first task is: «» . Second task: «» . So, move to the buildings and collect items along the way + try to sometimes look at various objects using a scanner, because this way you can collect a lot of useful data.
When you get to a place called "Outpost Central Control Room", then you will need to find the access code to the locked buildings. The code (in the form of a data block) is located in the building next door - in the northeast side of the entrance to the locked buildings. In addition to the code, there will also be an interesting audio recording and "Diary: An Analysis of Botany" inside. In general, now go back to the locked doors and open them.
Inside, scan the doors ahead and turn left. There will be a terminal in the hallway with a "Message for Nick Taniopulis" and an entry called "Ay?". A little at the end, there will be another terminal, but with an audio recording. In addition, here you can collect a lot of useful items and scan many objects. In any case, it will be necessary to listen to the plot recording, from which it will become clear that a remote lock is working in this place, therefore there is no power supply. This is how the task appears: «» .
So, now you need to go to the building on a small slope, which is located behind the "Storm". Climb the stairs up, interact with the door and a dialogue will begin with a living character inside. The survivor will be someone named Clancy, so he needs to be convinced in any convenient way that the power must be turned on. You can promise to deal with the kett. In any case, the next task will be: «» . It soon turns out that the generators are not working, so you need to scan the power towers to find a place to connect. By the way, the easiest way would be to use the generator, which will stand right next to Clancy's house, because the power tower will also stand right next to it. After scanning, you will need to turn on two power towers. Finding them isn't a problem, so it's only a matter of time before you activate them, but when you do, the outpost will be attacked by kett, so you'll need to defeat them. There will not be many waves, so after destroying a couple of landing groups, it will be possible to finally launch the power control station. Head back to Clancy Arquist for a cutscene.
So now it's time to find the transport that Clancy was talking about. To do this, you will need to carefully inspect the containers using a scanner.
Mission: Ray of Hope
All endings and key decisions
In Mass Effect: Andromeda, like in all other games from the BioWare studio, there are different endings, each of which depends on what decisions the players made during the passage of the game (and not just the story part). And there are usually an incredible number of such solutions. However, in addition to this, there are many other decisions and choices for the development of the storyline / world in the game, which will be reflected in one way or another at the end of the game. Some options greatly affect the end, for example, who exactly will come to the rescue in the final part. There are even such plot developments that affect the future (future games in the series). Below is a detailed description of all the endings and decisions in Mass Effect: Andromeda that exist in the game and what they affect.
Some choices and decisions of the protagonist (heroine) can be found in the Code. For example, it will be possible to find the consequences of completing story missions, attitudes towards allies and satellites (in the corresponding section). But in fact, there are many endings in Mass Effect: Andromeda, since they all depend solely on what decisions you made along the way. And everything is taken into account: from the plot to additional missions. Therefore, below are all the options for decisions and choices.
Important storyline decisions
♦ - Prologue. Has the hero/heroine explored the planet Habitat 7 in detail? A very important point. If this is the case, then Alec Ryder will rank highly in conversation and messages for the future Pathfinder as a hard-working and high-spirited leader.
♦ - Mission - 1: "From a clean slate". On the planet Eos, at the end you will have to make a choice which outpost to build: scientific or military. If you choose scientific, then all subsequent dialogues and cutscenes will be sent to that moment. There will be no significant impact on the plot from this decision, but the decision of internal issues will be up to you. If you choose the military, then in subsequent dialogues they will mention exactly this. In the future, during the development of the plot, if you need military support from Prodromos, it will be possible to get it.
♦ - Mission - 3. Being on Voeld (Nol), the hero/heroine will have to fight the Kett Cardinal at the very end of the task. After the battle and a short cut-scene, a difficult choice will appear: 1 - "Destroy the entire facility along with the Kett Cardinal", 2 - "Keep the facility but take a shot at the Kett Cardinal", 3 - "Save the object and the life of the Kett Cardinal". If you save the object, but kill the Kett Cardinal, then in the very last mission on Meridian, representatives of the angars will come to the aid of the main character/heroine.
♦ - Mission - 4. Has the deal with Sloane Kelly been accepted? Whether you let her kill Veren or not. If you save Veren's life, then he will then appear in the Angarsk Resistance. If you agree with Sloane and kill Veren, you will still be able to talk to him, after which he will be executed. Thus, regardless of the choice, the hero / heroine will still be able to see them.
♦ - Mission - 5. Whom did the character save from the Archon's flagship at the end of the mission after the battle with the Krogan-modified Boss? It all depends on who was found: the Krogan Pathfinder or the Salarian Pathfinder. The bottom line is that the choice affects who will join the "Pioneer" of people in the last story mission. As for the escape phrase, it doesn't affect anything. As a result, either a krogan or a salarian will simply join the hero / heroine. So you still have to fight off the waves of advancing kett, whatever one may say. In addition, if Drac is with you on the team, then he will definitely speak out about any decision made.
♦ - Mission - 6: "Point of no return". now this Captain Dunn's fate(she is also the captain of the Hyperion ark). She can both die and survive. How to save Captain Danna? In order for Captain Danna to survive, it is necessary to complete a mission for the loyalty of Kora and convince Avitus to become a Turian "Pioneer" in the building of the Turian Ark before the start of the task. Thus, in the last mission, the Pathfinder should have three other Pathfinders: the first is one of the two salarians, the second is a turian, the third is an asari. Only in this case, Captain Danna will be able to survive the emergency landing. If the conditions are not met, then she will die after the heroic rescue of the crew.
♦ . So now the story will end with Ryder having to decide who to make ambassador to the Nexus. Everything is simple here, because you can even choose the one you like more. This decision does not affect anything.
Important side mission decisions
Important Allied and Relationship Decisions
Dear visitors! The full walkthrough of Mass Effect: Andromeda is under development, so bookmark this page for more updates!
eUMY NPTsOP UHDYFSH P LBYUEUFCHE UATSEFB YZTSCH RPUME YUBUB YZTPCHPZP READING, FP CHSHIPDYF FCHETDBS YMY DBTSE YEFSCHTE U RMAUPN RP RSFYVBMMSHOPK YLBME. rPOSFOP, UFP PLPOYUBFEMSHOP PFOPIEOYE L YZTE VKhDEF UZHPTNYTPCHBOP VMYCE L UETEDYOE YZTPCHPZP UATSEFB, OP TBDHEF HCE FP, UFP U RETCHSHCHI UELHOD YZTB OE VEUIF, LBL LFP VSCHMP U Mass Effect 3rd, Dragon Age Inquisition 2.Mass Effect Andromeda Mass Effect
oEUREYOPE OBYUBMP (NOPC VSCHM CHSHCHVTBO RPCHEUFCHPCHBFEMSHOSHCHK UFYMSH YZTSCH) CHCHPDYF YZTPLB CH LHTU DEMB Y RP IPDH UATSEFB YDEF YOFETEUOPE TBCHYFYE YZTPCHSCHI NPNEOPHR. NSC OBLPNYNUS U YZTPCHPK NEIBOYLPK Y OPCHSCHNY RETUPOBTSBNY, F.L. andromeda lPNBODPTB yERBTDB NSC VPMSHIE OE KHCHYDYN, LBLOE KHCHYDYN PUFBMSHOSHCHI RPMAVYCHYIUS RETUPOBTSEK Y OELPFPTSCHE TBUSCH.ЬФП, Л УПЦБМЕОЙА, УПЧУЕН ДТХЗБС ЙЗТБ Й У Mass Effect ЕЕ УЧСЪЩЧБЕФ ФПМШЛП ОБЪЧБОЙЕ (ПЮЕТЕДОПК НБТЛЕФЙОЗПЧЩК ИПД ТБЪТБВПФЮЙЛПЧ) Й ОЕЛПФПТЩЕ РТЕДНЕФЩ ЙЗТПЧПЗП НЙТБ, ПЮЕОШ РПИПЦЙЕ ОБ ЙУРПМШЪХЕНЩЕ Ч ПТЙЗЙОБМШОПК ЙЗТЕ. FP PTHTSIE, UTEDUFCHB RETEDCHYTSEOIS Y OELPFPTBS PDETSDB. about LFPN UIPDUFCHP BLBOYUYCHBEFUS Y NSCH, RTYVSCCH CH fHNBOOPUFSH BODTPNEDSHCH, OBYUYOBEN SBOYNBFSHUS UCHPYNY DEMBNY CH OPCHPN YZTPCHPN NYTE.
UACEF nBUU YZhZHELF BODTPNEDB TBCHYCHBEFUUS UFBODBTFOP
NSC ABOUT LPCHUESE ZYRETYPO PLBSHCHCHBENUS CH ZBMBBLFILE BODTPNEDB YOUETE 600 MEF RPUME RPUMEDOYI UPVSCHFIK Mass Effect 3, Y RETED GENERAL UFPYF UBDBYUB URBUFI ZBMBLFYLH. ъBFP OHTSOP TEYYFSH LPOLTEFOSHCHE RTPVMENSCH RP KHUREYOPK LPMPOYBGYY OPCHPK TPDYOSCH.OBN RTEDMBZBEFUUS YЪHYUBFSH Y LPMPOYЪYTPCHBFSH OPCHCHE NYTSCH, CHEUFY TBVPFKh U NEUFOSHCHN OBUEMEOEN Y DPVIFSHUS FPZP, YUFPVSHCH OPCHSHCHK DPN UFBM DMS YuEMPCHEYUEUFCHB YDEBMSHOSHCHN NEUFPN DMS TsYЪ. yZTPCHBS NEIBOYLB YZTSCH DPCHPMSHOP UFBODBTFOB Y RTEDULBKHENB, NOPZYE OBTBVPFLY CHSKFSCH TBTBVPFYuYLBNY YЪ RTEDSHCHDHEYI UCHPYI YZT.
UATSEF OE HDYCHMSEF OPCHSHCHNY IPDBNY Y LTEBFYCHPN. CHUE LFP NSC HCE CHYDEMY H DTHZYI YZTBI. rPUME RTPVHCDEOYS ZETPS ABOUT ZYRETYPOE OBJOYOBEFUS PVCYUBAEBS YUBUFSH YZTSCH. ChSCHUBDLB ABOUT RMBOEFH 7 BLBOYUYCHBEFUUS BCHBTYEK YBFFMPCH Y ZETPA OHTSOP OBKFY URPUV UPVTTBFSH TBVTPUBOOKHA RP RMBOEFE TBCHEDSCHCHBFEMSHOHA LPNBODHSH Y RP CHPNPTSOPUFY CHUPITETSBOYFSH. Retchshchk LPOFBLF U BZTEUUYCHOSCHN NEUFOSHCHN OBUEMEOYEN BLBOYUYCHBEFUUS HOYUFPTSEOEN NEUFOPZP OBUEMEOYS Y LPMPOYUFBN OE PUFBEFUS OYYUEZP DTHZPZP LBL RTETCHTBFIFSH TBCHEDLH H OBUFHRBFEMBHA.
ABOUT LFPN PVCYUBAEBS YUBUFSH YZTSCH BLBOYUYCHBEFUS, Y OBJOYOBAFUS RPMOPGEOOSCHE UATSEFOSHCHE NYUUYY.
LBLIE CHBY TEYOYS H Mass Effect Andromeda RPNPZHF CHBN H DBMSHOEKYEN UPVTBFSH UYMSHOEKYHA LPNBODH DMS ZHYOBMSHOPK VYFCHSHCH
CHUE CHBY TEYOYS CHMYSAF ABOUT YZTPCHPK RTPGEUU. y EUMY RPUMEDUFCHYS PDOYI TEOYOYK OE YNEAF DMS CHBU OBBYEOOYE, FP L CHSCHVPTH TEEYOYK CH OELPFPTSCHI UIFKHBGYSI MKHYUY RPDPKFY U KhNPN. y OHTSOP RPNOYFSH, UFP CH FFK YUBUFY YZTSCH CHBY TEYOYS RP LCHEUFBN OILBLOE CHMYSAF ABOUT PFOPEOYE L CHBN CHBYEK LPNBOSHCH. about MPSMSHOPUFSH LBTsDPZP YUMEOB LPNBODSCH LPNBODSCH CHMYSEF FPMSHLP ZhBLF CHSHCHRPMOEOIS YI LCHEUFCH.uPU
lBLPK CHSHVTBFSH RETCHSHCHK BCHBORPUF?
CHPEOOSHK - VPOKHU - CHURPNPZBFEMSHOSHCHK PFTSD rTPZTPNPU CH ZHYOBMSHOPK NYUUYY.
obhyuoshchk - VEURPMEP TEYOYE.
hPEMD
lCHEUF: tbhn chPEMDB
eUMMY OE KHOYUFPTSBFSH AI Y RETEDBFSH EZP bozbte, POY RPNPZHF CHBN CH ZHYOBME.
lChEUF: MHYU OBDETSDSCH
eUMMY OE HOYUFPTSBFSH PVYAELF, RPMHYUFE RPNPESH RPCHUFBOGECH CH ZHYOBME.
lBDBT
lCHEUF: TEGERF pVMYCHYPOB
eUMY UBVTBFSH TEGERF X zhBTTEO, OBTLPFYLY DEMBFSH RTELTBFSF.
lCHEUF: CHYDBMSH RTPFYCH YETTY
eUMY CHSCVTBFSH UFPTPOH LETTY UMPHO, POB CHBN RPNPCEF CH DBMSHOEKYEN, EUMY CHSCVTBFSH UFPTPOH chYDBMS - RPNPCEF PO.
MBBDEO
lCHEUF: UELTEFOPE CHPDPITBOYMYEE
eUMY RPЪCHPMYFSH PUFBCHYFSH CHPDH BOY, POB RPFPN CHBN RPNPTSEF CH ZHYOBMSHOPK NYUUYY.
lCHEUF: SDTP TEMYLFCH
eUMY PFDBFSH SDTP LTPZBOBN, ChSCH UNPTSEFE PUOPCHBFSH BCHBORPUF Y RPMKHYUYFSH DPRPMOIFEMSHOSHE NYUUYY.
dTHZYE LCHEUFSHCH
lCHEUF: uHDSHVB bCHYFHUB TYLUB
eUMY RPNPTSFE ENH RTYOSFSH OPCHA TBVPFKH RETCHPRTPPIPDGB, RPMHYUYFE UPAYOILB CH ZHYOBME Y dBOOB PUFBOEFUS TSYCHB.
YUFIOB YMY RPDMPUFSH
rPVPYUOBS NYUUYS. eUMMY OE DPCHETSFSH UMEOH CH RPUMEDOEK VEUEDE, FP UBNPCHBOGB OBIPDYN CH REEETE ABOUT LBDBT. eUMMY PUCHPPVPDYFSH DPLFPTB bDEOB - RPMHYUBEN GEOOSCHE UCHEDEOYS, OP LFP VKHDEF PUCHPPVPTSDBFSH FBLPZP RTPICHPUFB.
tBULPM H TSDBI
rTPCHPLBGIPOOBS NYUUIS ABOUT UPA U CHTBZBNY. eUMMY UZMBUIFSHUS ABOUT RETENNYTYE Y UPFTKHDOYUEUFCHP, LEFFSHCH RPNPZHF CH ZHYOBMSHOPK VYFCHE, OP MHYUYOE UPZMBYBFSHUS. chTBZY, POY CH MAVPN UMHYUBE CHTBZY Y CHBYE TEYOYE UPFTKHDOYUBFSH RPFPN (CH UMEDHAYI YUBUFSI YZTSCH) NPTSEF PLBBFSHUS UYMSHOP OERTBCCHYMSHOSHCHN.
lCHEUF: uHDSHVB UBTYUUSCH
eUMY OE TBUULBCEFE EE UELTEF, RPMHYUFE UPAYOILB.
lCHEUF: uHDSHVB lBMYODSH
OHTSOP URBUFY TJOYOSH LBMYODSH Y RPMHYUFE UPAYOILB.
lCHEUF PIPFB bTIPOFPN
URBUEFE TBCHEDUYLCH LTPZBOB dTBLB Y POY RPNPZHF CHBN CH ZHYOBME.
NETIDYBO: RHFSH DPNPK
uFPVSC OPTNBMSHOP ЪBCHETYFSH LCHEUF OHTSOP UOBYUBMB RTPKFY NYUUYA ABOUT MPSMSHOPUFSH LPTSH Y NYUUYA fKhTYBOULYK LPCHUEZ.
oEULPMSHLP UPCHEFCH RP YZTE Mass Effect Andromeda
ABOUT RMBOEFE uPU (RECHBS RMBOEFB CH YZTE) oh hmefben UTBYH RPUME CHSHCHRPMOEOIS ZMBCHOPK UACEFOPC NYUUYY. NOPZYE UPCHEFHAF UTBIH PFFHDB HMEFBFSH, YUFPVSHCH OE RPTFYFSH CHEYUBFMEOYE PF YZTSCH. fBL CHPF, CHUE LFP ETHODB Y EUMMY CHSH IPFYFE U RETCHSHCHI NYOHF YZTSCH RPOSFSH HER BFNPUZHETH - CHSHCHRPMOSKFE RPVPYUOSCHE NYUUYY ABOUT PUUE. чБЦОП ФПМШЛП ЪОБФШ, ЮФП УОБЮБМБ ПВМБУФШ ЧБЫЕЗП ФБН РТЕВЩЧБОЙС ПЗТБОЙЮЕОБ ЛПОФХТПН ТБДЙБГЙЙ ХТПЧОС 3, Б ОБ ПУФБМШОПК ЮБУФЙ ТБДЙБГЙС ХТПЧОС 1, ЗДЕ НПЦОП УРПЛПКОП ЧЩРПМОСФШ ЪБДБОЙС, УМЕДЙН ФПМШЛП ЪБ ЫЛБМПК ЪДПТПЧШС Й ОЕ УХЕНУС Ч ЪПОХ У ТБДЙБГЙЕК 3. оБ БЧБОРПУФБИ Й ЧПЧУЕ ОЕФ ТБДЙБГЙЙ Y FBN NPTsOP RPRPMOYFSH BRBU RTPYUOPUFY ULBZHBODTTB.
OECHETPSFOP, OP ZhBLF - RPUME FTEI RTCHBMSHOSCHI RTPELFPC LPNRBOYS BioWare UNPZMB TEBVYMYFYTPCHBFSHUS CHSHCHRHUFYCH YZTH U OPTNBMSHOSHCHN TPMECHSHCHN UATSEFPN. th EUMY CHS RPLMPOIL RPG Y CHBN OTBCHYMBUSH RETCHBS YUBUFSH Mass Effect, ChSCHVTBCH RPCHEUFCHPCHBFEMSHOSHCHK TETSYN YZTSCH H Mass Effect Andromeda CHS RP DPUFPYOUFCHH PGEOIFE CHEUSH HER RPG-RPFEOGYBM.
NEOSEN GCHEF PDETSDSCH
eUMY X CHBU OE RPMHYUBEFUS UNEOIFSH gchef PDETSDSCH CH UCHPEK LBAFE ABOUT LPTBVME, YURPMSHEKHEN DMS RPDFCHETSDEOYS RTPVEM.
chShVPT RETCHPZP BCHBORPUFB
URBGYBMYBGYA RETCHPZP BCHBORPUFB, HUFBOBCHMYCHBENPZP ABOUT RMBOEFE uPU ChBN TBTEYBF CHSCVTBFSH ubnpnkh. eUMY IPFIFE KHUYMYFSH UCHPA BTNYA - CHSHVYTBKFE CHPEOOSHK BCHBORPUF. ffyn chshchvptpn chshch bdbefe chpeoope obrtbchmeoye tbchhyfys yztchpzp uacefb. lPZDB Tse ABOUT oELUKHUE CHBN VKHDEF RTEMPSEOP CHSCVTBFSH LPZP YЪ LPMPOYUFCH CHCHCHPDYFSH YЪ LTYPUOB - CHSHCHVYTBEN CHPEOOSHCHI. рПУМЕ ФБЛПЗП ЧЩВПТБ ОБЮОХФУС ОЕДПЧПМШУФЧБ ХЮЕОЩИ ФЕН, ЮФП ОЕ ТБЪВХДЙМЙ ЙИ УПФТХДОЙЛПЧ, ОП ЬФП УБНЩК РТБЧЙМШОЩК ЧЩВПТ ОБ НПНЕОФ, ЛПЗДБ РПУЕМЕОГЕЧ ПЛТХЦБЕФ ТБЪЧЙФБС Й ЧТБЦДЕВОБС ГЙЧЙМЙЪБГЙС ЛЕФПЧ ЙНЕС ЮЙУМЕООПЕ РТЕЙНХЭЕУФЧП ЧП ЧУЕН.
CHEDEIPD YNEEF DCHB TETSINB EJDSCH
eUMY CHBN OKHTSOP ЪBVTBFSHUS ABOUT LTHFPK ULMPO - CHLMAYUBEN RPMOPRTYCHPDOSHK TETSIN rtbchpk LOPRLPK NSHCHY.
RBUYCHOSCHE GENERAL
h RTPGEUUE RTPLBYULY RETUPOBTSB RTPLBYUYCHBEN UOBYUBMB RBUUYCHOSCHE OCHSHCHLY, LPFPTSHCHE TBVPFBAF CHUEZDB.
tBVPF PTHTSYS Y VTPOY
eUMMY CHBN HCE OE OHTSOSCH OELPFPTSCHE CHIDSH VTPOY Y PTHTSYS, MKHYUY TBTVTBFSH YI ABOUT TEUKHTUSH BOE RTPDBCHBFSH.
pVEEOYE U LPNBODPK
рПУМЕ ЧЩРПМОЕОЙС ЛБЦДПК УЕТШЕЪОПК НЙУУЙЙ ПВСЪБФЕМШОП ЗПЧПТЙФЕ УП ЧУЕК УЧПЕК ЛПНБОДПК ОБ вХТЕ, ЬФП РПНПЦЕФ РПМХЮЙФШ ОПЧЩЕ ЛЧЕУФЩ, ТБЪВМПЛЙТПЧБФШ ОЕЛПФПТЩЕ ОБЧЩЛЙ УРХФОЙЛПЧ Й ЪБЧСЪБФШ ТПНБОФЙЮЕУЛЙЕ ПФОПЫЕОЙС У ФЕНЙ, ЛФП РПОТБЧЙФУС.
LBL ULBOITCHBFSH NEUFOPUFSH Y RMBOEFSHCH
ULBOITCHBOYE - PYUEOSH CHBTSOSCHK NPNEOF CH YZTE, DBAEYK NOPZP PRSHCHFB Y RTEDNEFCH. ULBOITCHBOYE RPNPZBEF CH CHSHCHRPMOOYY LCHEUFCH. OE MEOYFEUSH ULBOITCHBFSH NEUFOPUFSH RETEDCHYZBSUSH LBL REYLPN FBL Y ABOUT FTBOURPTFE (LMBCHYYB G).
LBL VSHCHUFTP RETENEEBFSHUS RP RMBOEFBN
OHTSOP HUFBOCHYFSH CHUE RETEDPCHSHCHE UFBOGYY, SING SCHMSAFUS UCHPEPVTBOBOSCHNY FEMERPTFBNY. b EEE DBAF CHPNPTSOPUFSH CHSHCHVTBFSH PTHTSIE Y RPRPMOIFSH BRBU RBFTPOCH.
LBL LZHZHELFYCHOE DPVSCCHBFSH NYOETBMSCH
NPTSOP ULBOITCHBFSH RPCHETIOPUFSH RMBOEFSHCH ABOUT IPDH, OP FFP DPMZP Y ULHYUOP. mHYuYE YURPMSHЪPCHBFSH ZPTOPDPVSHCHCHBAEKHA UYUFENKh lPYUECHOYLB - LFP UBNSCHKZHELFICHOSCHK URPUPV DPVSCHYU NYOETBMPCH CH YZTE. th OE ЪBVSCCHBEN RTPCHETSFSH CHUE OEBLPNSHCHE RMBOEFSC Y BOPNBMYY CH OPHSCHI CHEDOSHCHI UYUFENBI.
LBL BCHYUBFSH H RTSCHTSLE H VPA
RETELMAYUBENUS CH TEZYN VPS, RTSCHZBEN Y OBTSYNBEN RTBCHKHA LMBCHNYKH NSHCHY - RTYGEMYCHBOYE. h FFPN RPMPTSEOY NPTsOP RBTYFSH OBD RTPFYCHOYLPN Y TBUUFTEMYCHBFSH EZP ACCOUNT. dMYFEMSHOPUFSH RBTEOYS IBCHYUYF PF RTPLBYUBOOPZP OBCHSHLB.
UBC
vPECHBS RPDZPFPCHLB (RBUUYCHOPE HNEOYE)
vBTTYLBDB (BLFYCHOSCHK OCHSHCHL)
TEMYLFSHCHK 6 (BLFYCHOSCHK OCHSHCHL)
LBL UDEMBFSH ULTYOYPF YZTSCH
RETCHCHCHK URPW:
pFLTSCHCHBEN LPOUPMSh LMBCHYYPK FYMSHDB Y OBVIETBEN LPNBODH screenshot.render
hFPTPK URLMAP:
UCHPTBYUYCHBN YZTH CH TETSYN PLOB Y DEMBEN ULTYOYPF LTBOB, RPFPN LPRYTHEN CH ZHPFPYPR Y PVTVBFSHCHCHBEN.
ftefyk urpww:
EUMY UFPYF Windows 10, FP EUFSH JHOLHYS DMS LPRYY LTBOB YZT - LMBCHYY Win+Alt+PrtSc, ULTYOYPF VHDEF H C:\Users\UserName\Videos\Captures\.
LBL RPUFBCHYFSH KHUYMEOYE ABOUT PTHTSYE, LBL UDEMBFSH MHYUECHPE PTHTSIE Y PVSCHUOPZP
KHUYMEOYE NPTsOP RPUFBCHYFSH ABOUT PTHTSYE FPMSHLP CH NPNEOF EZP UPDBOYS Y EUMY NPDYZHYLBGYY NPTsOP UFBCHYFSH CH MAVPE CHTENS, FP KHUYMEOYE OEF. eUMMY CHSH ЪBVSCHMY KHUYMYFSH PTKHTSIE CH NPNEOF EZP UPDBOYS, PUFBOEFEUSH VE HUYMEOYS. th RPOSFOP, UFP CH NPNEOF, LPZDB CHSHCH UPDBBEFE PTHTSYE OHTSOPE HUYMEOYE VSCHMP X CHBU ZPFCHP. lBCDSCHK CHYD HUYMEOYS NPTsOP UDEMBFSH FPMSHLP PYO TB Y UOSFSH EZP NPTsOP FPMSHLP TB'PVTBCH PTHTSIE.
chschwytben vtpoa h Mass Effect Andromeda
VTPOA h Yzte, fbrebce gables npzop rpneosfsh, Chechtbfsh h ptchtsekopn pfule vkhty, b -eumi bvschmy dudeshchushchysh about the rmboyfhi vfbogy (ivpmsshnaya uglbias) h RTPYMSHI CHETUYSI YZTSCH UYUFENB CHSHCHVPTB OBRBTOILPCH VSCHMB RTPDKhNBOB OBNOPZP MKHYUYE, B DEUSH HER RTBLFYUEULY OEF.
HOYCHETUBMSHOPK VTPOY CH YZTE OEF, OP EUFSH OEULPMSHLP PUPVP CHSHCHDBAEYIUS NPDYZHYLBGYK, LPFPTSCHE RPPDKDHF UPMDBFH, VYPFILH Y FEIOILH. y EUFSH PFOPUYFEMSHOP HOYCHETUBMSHOSHCHE UEFSHCH, DBAEYE IPTPYK YBOU RTPUFP CHCHTSYFSH.
MHYYBS WTPOS CH YZTE Mass Effect Andromeda:
- DMS CHPYOB RPDPCDEF EDYOEOYE LEFFPCH (DPVSCCHBEFUUS H VPA, OBIPDIFUS CH UETFETSBI) YMY VTPOS RETCHPRTPPIPDGB N7 (DBEFUS RPUME CHSHCHRPMOEOIS PDOPYNEOOPZP LCHEUFB YMI DEMBEFUS ABOUT VHTE)
- dMS VYPFYLB RPDPKDEF PVSCHUOBS VTPOS N7
- dMS YOTSEOETPCH RPPDKDEF LPNRMELF bozbtb rbtfyjbo (DPVshchchbefus h vpa, obipdyfus h yuetfetsbi)
- dms (DPVSHCHCHBEFUSS CH VPA, OBIPDIFUS CH YuETFETSBI)
- EUFSH EEE LPNRMELF VTPOY, LPFPTSHK NPTsOP OBKFY ABOUT RMBOEFBI. UEF uFH VTPOA RPLKhRBFSH OE OHTSOP. dPUFBEFUS DBTPN, HCHEMYYUYCHBEF VPELPNRMELF Y HTPO
chschwytben pthtsye h Mass Effect Andromeda
EUMY CHSC YZTBEFE CHPYOPN Y YURPMSHHEFE VTPOA TEMYLFPCH, FP Y PTHTSIE TEMYLFPCH CHBN RPPDKDEF LBL OEMSHЪS LUFBFY. ffp PTKhTSYE OE FTEVHEF VPERTYRBUCH Y UFTEMSEF MHYUBNY, RTBCHDB POP NPTSEF RETEZTEFSHUS, RPFPPNKh UMEDYN b DBFUYLBNY.
MHYUEE PTHTSIE CH YZTE Mass Effect Andromeda:
- uOBKRETOOLBS CHYOPCHLB uETOBS hDPCHB
- pTHTSYE VMYTSOEZP VPS NEYU bbty
- dTPVPCHYLY BRPUFPM YMY YYY
- yFHTNPCHSHCHE CHYOPCHLY GILMPO YMY rHMENEF zBFMYOZB
- rYUFPMEF N7 hTBZBO
rPMEOSCHE CHPYOKH NPDYZHYLBGYY PTHTSYS
FEIOPMPZYS TEMYLFPHmHUECHPK ZOEETBFPT (PTHTSYE) - RETELMAYUBEF PTHTSYE CH TETSYN MBETB
LTYPLPODEOUBFPT (PTKhTSYE, VTPOS: RPOPTSY) - BNPTBTSYCHBEF CHTBZB
ZEOETBFPT EIFPH (WTPOS: ZTHDSh) - HUYMYCHBEF EIFSHCH
FEIOPMPZYS MMES
nPDHMSh RMBNEOOOPK ЪBTSDLY (PTKhTSYE: DTVPCHYL) - RMBNEOOSHCHE ЪBTSDSH
FEIOPMPZYS nMEUOPZP RHFY
LMELFTPLPOFHT (PTHTSYE) - LMELFTYUEULYE OBTSDSCH
ZTBOBFPNEF (PTHTSYE) - LBTSDSHK ЪBTSD RTCHTBEBEFUS CH ZTBOBFH
RPMEOSCHE TBUIPDOSCHE NBFETYBMSCH
TEJETCH utsp - CHSHTSYCHBOYE CH PRBUOSCHI UTEDBIHUYMYCHBAEYK OBVPT - VSHCHUFTBS RETEEBTSDLB, KhTPO Y FPYUOPUFSH 25%
lPODEOUBFPT EIFB - HUIMEOIE EIFB 20%
LBLIE LTYPLBRUKHMSCH PFLTSCHCHBFSH H RETCHHA PYUETEDSh
bBTVBFSHCHCHBEN PYULY RETEURELFICHOPUFY BODTPNEDSC YMY prb. rPUME LPMPOYBGYY uPUB X YZTPLB RPSCHMSEFUS CHPNPTSOPUFSH TBVMPLYTPCHBFSH prb. DMS LFPZP ZPCHPTYN ABOUT oELUKHUE U dYUUPOPN Y VELLPN, RPUMEDOYK PVYASUOYF LBL PFLTSCHFSH DPUFHR L LFPNH FETNYOBMH. rPFPN RPMShЪPCHBFSHUS FETNYOBMPN Y PFLTSCHCHBFSH LTYPLBRUKHMSCH NPTsOP VKhDEF UP UCHPEZP LPTBVMS Y DMS LFZP OE PVSBFEMSHOP MEFBFSH ABOUT boobies.pYULY RETEURELFICHOPUFY BODTPNEDSHCH (prb) NPTsOP RPMHYUYFSH UMEDHAENY URPUPVBNY:
- pFLTSCHFYE NPOPMYFPCH Y ITBOYMYE TEMYLFPCH ABOUT RMBOEFBI (40% RETURELFYCHOPUFY)
- Updboye BCHBORPUFCH Y Chshchchch Retedpchshchi UFBOGIK ABOUT RMBOEFBI (20% RETURELFYCHOPUFY, 2% RETURELFYCHOPUFY)
- CHSCRPMOOEOYE RTYPTYFEFOSHCHI BDBOYK RMBOEF (10% -20% RETURELFYCHOPUFY)
- bBICHBF VPMSHYI VB LEFPPCH, HOYUFPTSEOIE bTIYFELFPTPCH (10% RETURELFYCHOPUFY)
- CHSHCHRPMOOEOYE RTYPTYFEFOSHCH LCHEUFPCH Y RPVPYUOSCHI BDBOIK (2% -5% RETURELFYCHOPUFY)
chBTSOSCHE CHPEOOSHCH Y LPNNETYUEULIE LTYPLBRUKHMSCH, LPFPTSHCHE OHTSOP PFLTSCHFSH LBL NPTsOP ULTTEEE:
- TBCHEDLB - OBIPDYF ULTSCHFSHCHE FBKOILY (OHTSOP CHSHCHBFSH RETEDPCHSHCHE UFBOGIY ABOUT RMBOEFH)
- YOFEOWYCHOBS RPDZPPFCHLB - DBEF DPRPMOYFEMSHOSHCHE PYULY PRSCHFB bB CHSCHRPMOOEOYE BDBOIK (+10% PRSCHFB)
- CHUEZDB OBZPFPCHE - PFLTSCHCHBEF DPRPMOYFEMSHOSHCHK UMPF DMS LLYRYTPCHLY. (OHTSOP 70% RETURELFYCHOPUFY PUB)
- fPTZPCHSHCHK RPFEOGYBM - HCHEMYYUYCHBEF TBNET YOCEOFBTS
URCHFOILJ C Mass Effect Andromeda
LPNBODB H BODTPNEDE RP UPUFBCHH UYMSHOP RIPTSB ABOUT LPNBODH LBRYFBOB yERRBTDB. FPMSHLP KNEUFP BBTI MIBTSH EUFSH BBTY RVEVI, ChNEUFP LTPZBOBE TELUB EUFSH LTPZBO DTBLA, FHEBOGB ZBTHUB - FKHTIBOLB CHMIFP. CHUE YDEOFYUOP, FB CE LPOUFTHLGYS, FPMSHLP CHOEYOPUFSH URHFOYLPCH DTHZBS/ tBMYYUBEF FY DCHE LPNBODSCH FPMSHLP FP, UFP IBTYЪNBFYUOPUFY X CHUEI CH BODTPNEDE, CHLMAYUZPSH ZETBCH oP ffp xtse OE FBL CHBTsOP.YUIFBA CH UEFY NOPZP PFTYGBFEMSHOSHCHI PFSCHCHCHCH RTP Mass Effect Andromeda YOE NPZH RPOSFSH, RPYUENH LFB YZTB LPNKh-FP OE RPOTBCHYMBUSH. yMY PVUYTBFSH IPTPYYE YZTSCH UEKYUBU NPDOP? RP RTBCHDE S UBN OE PTSYDBM, UFP RPUME FTEI RPUMEDOYI RTPCHBMSHOSHCHI YZT Y UENY MEF OEZBFYCHB BioWare UNPTSEF UDEMBFSH UFP-FP OPTNBMSHOPE. UBN LTYFYLPCHBM YI OEHDBYUOSCHE RTPELFSHCH, OP DEUSH OBPVPTPF POY RPUFBTMBMYUSH Y UDEMBMY YZTH CH LPFPTHA YOFETEUOP YZTBFSH. RHUFSH RETUPOBTSY OE UFPMSh IBTYЪNBFYUOSCH LBL CH RETCHPK YUBUFY PTYZYOBMSHOPC Mass Effect, OP LFP OILBL OE RPTFYF YZTH.
YZTB IPTPYBS. CHETOKHMBUSH CHPNPTSOPUFSH YUUMEDPCHBFSH RMBOEFSHCH, BOE FHRP VEZBFSH U RHYLPK. CHETOHMBUSH TPMECHBS YZTPCHBS NEIBOYLB, BOE FPMSHLP FHRPE NPYUMPCHP. uACEF RTPDKhNBMY OE IHCE UATSEFB RETCHPK YUBUFY YZTSCH Y UDEMBMY EZP YOFETEUOSCHN Y YZTBVYMSHOSHCHN.
NEOS UMPTSOP YUEN-FP HDYCHYFSH CH LPNRSHAFETOSHCHI YZTBI, S YZTBA EEE U UETEDYOSCH DECHSOPUFSHCHI ZPDCH RTPYMPZP CHELB, OP DEUSH CHSHCHTBTSBA NPE CHETOKHCHHYEUS HCHBTSEOYE TBTBVPFUYLBN. y FFP FPMSHLP OBUBMP, DCHE RETCHSHCHE NYUUYY. xCHETEO, UFP DBMSHYE CHUE VHDEF FPMSHLP YOFETEUOEEE YOE TSBMEA RPFTBYEOOSCHI ABOUT YZTH DEOEZ.
Ps. rPYZTBCH CH BODTPNEDH 100 YUBUPCH NPTsOP U HCHETEOOPUFSHHA ULBBFSH, UFP LFP OE RTPUFP IPTPYBS YZTB, LFP pyueosh iptpybs yztb.
OP UPCHETYEOUFCHP, LBL ZPCHPTYFSHUS, OCHPЪNPTSOP Y EUFSH, ABOUT NPK CHZMSD, H FFK YZTSCH PYO UETSHEOSCHK OEDPUFBFPL - FP UTEENETOSCHK RBTLHT Y BTLBDOPUFSH. rPUFPSOOBS OEPVVIPDYNPUFSH RTSCHZBFSH U RMBFZHPTNSCH ABOUT RMBFZHPTNKh CHHUNETFSH ЪBDBMVSHCHCHBEF, B FBL CHUE OPTN :).
Mass Effect: Andromeda. Passage.
You will have to spend a lot of time on the new part of Mass Effect (about 60 hours), and you need to be ready for this. There are much more adventures, the world is freer, decisions still influence the further development of events. If so, then it’s not shameful to ask what is in the game and what it affects in order to prevent stupid mistakes or miss something important. So, here's the walkthrough of the main story.
Mass Effect classes
It all starts in the best traditions of Mass Effect - the creation of a hero. We decide on the gender of the character, how it will look, its preparation. We give him a name and a biography. The choice of gender is classic (male/female), the view can be selected from templates or customized by yourself, and preparation is the same class. By the way, I would like to write about it in more detail.
We are given a choice:
Biotic is a standard wizard with defense and attack spells. There are six of them (three of each type). Want more game skill testing? It seems that any fool can shoot? Then this preparation is for you. With the ability of the biotic shield, it becomes possible to stay in the open for a long time without fear of being killed.
A soldier is an ordinary fighter, a lover of war. Of the skills - three basic and all for weapons. This preparation is perfect for players who do not want to bother too much. Those who want to go further in the story without unnecessary troubles will definitely appreciate this option. He can carry a lot of weapons with him.
Leader - shares a role with the engineer, but more of an aggressor. Such leadership abilities as "absorption of energy" and "extermination" allow you to show yourself from a militant side.
Engineer - more suitable for those who like to help. For it, you can break equipment and create drones. The task of an engineer is technical support. It may not seem so tempting, compared to the others, but if you try, then he can "play" too.
Bully - furious preparation. Will appeal to those who like to scatter enemies to the right and left. With this class of players, a quick death awaits, but a beautiful one. The class is strictly for lovers of bloody follies.
An operative is a silent death. We sneak up on the enemy, sabotage and win. If this is for you, then feel free to choose. It’s worth mentioning right away that at difficulty levels below “hard”, all these sneaks are not needed, since the enemies are too weak.
Attention: preparation in no way limits the development of your character. It only outlines the approximate framework for development, since in Mass Effect: Andromeda your skills are not tied to a class.
Hyperion
Our ark has finally reached its destination. You have just recovered from cryosleep, and life is already seething around. Specially trained personnel are engaged in awakening. Preparations for the arrival are in full swing. First, let's define personality. We talk with Dr. Lexi T'Perro. You can choose both casual and professional. Further, again, the dialogue is only with artificial intelligence, whose name is SAM.
So, all the necessary checks are passed, but it's still not right. The ark collides with an unidentified object. Panic on the ship. It would seem that Cora Harper manages to restore gravity, but the ship is so damaged that too many systems have been disabled.
Finally, Ryder is under your control. It's time to choose: are you and Dr. T'Perro dealing with the twins, or are you leaving the room? See the information panel - there is information about the mission to Andromeda. If you climb near the beds, you can find a couple of datapads. We are in the bay. We can chat with someone there, or we can go straight to Kora. She is near the door.
Block explosion! We take out the scanner and scan the first part of the device. That's how we find the problem. On the side of the device, turn off the power and go on. By the way, congratulations, you just saved everyone who was in the bay. We head for the bark to the transport. The ship is in a terrible state, it is being restored by the sweat of its brow. As soon as we are ready, we get on the tram and forward to a new location.
A couple of minutes later, you find an argument scene between Captain Dan and Alec Ryder. So who are you for? Once you choose, each
a team member will say something about your decision. Whom you choose is not so important, since Alex will still swear.
And now Hyperion is finally at the heavenly place. It's called "Dwelling 7". Of course, there is something wrong with her. Otherwise it wouldn't be interesting. After some deliberation, the team comes to the decision that a "pioneer" is needed, who, taking his room, would go to the planet to determine the level of landing safety.
We run into the room with the equipment. Cora is waiting for us there. We talk to her about the family. We pick up the helmet, look for everything useful and important. There are several datapads and objects to interact with in the room. Once everything is done, we go out the door. Further conversation with Alec. He will try to support you. We sit down with other team members in the apparatus and fly into a brave new world. Let's say up front that talking to different characters and tugging on different objects can affect how the story progresses, so think about what you're doing.
New world
We fall out of the shuttle. Liam finds himself with Ryder in an unknown location. Here we are waiting for a lot of mysteries. Do not forget to inspect everything, scan. This way you will get a lot of research points. After you turn away from the cliff, a QEC comms relay will show up. Let's start our research with him. Do not forget about plants, they can also tell you a lot.
Walk along the wreckage to the goal, to the very static field. It will be possible to bypass it with the help of a jetpack. Next, we use a gun, since Liam is interested in him and hints that it would be nice to shoot through the fuel tank. Before blowing it up, you can use the scanner. After the explosion, a passage will appear. We go along it and collect ammunition.
The plot brings Ryder closer to Liam. Learn to climb ledges and jump walls. We climb higher, admire the landscapes and find something radiating energy in the distance. Then another choice, as Fisher appears with an unknown race. What will you do? Will you follow protocol or expect the worst? Regardless of the choice, we chat with aliens. We observe an attack on Fisher, if the soldiers were not lured to themselves. Dealing with enemies. Checking out Fischer.
Fisher turns out to be alive, but not very healthy. Those who were with him went for help. Let's start looking for them. A couple more side tasks are attached: body scanning, searching for supplies. It is highly recommended not to miss the containers, because they can become your main source of ammunition and weapons. In addition, there is often material for creating useful items and just the right things.
Again we make a choice, only this time between paths. The right path will take you to the "pioneer" member. His name is Kirkland. He is in captivity. We attack enemies. Our new friend is dying. We approach the body and enjoy a small video. The path by the building will lead you to scan a door and a strange pillar with unstable blocks.
We run to the main path. We go along the scorched foliage mixed with the details of the ship. Be sure to keep scanning everything that comes to hand, as this is an excellent source of research points. At the end of the road, you will see an atmosphere sensor. Such a gift of fate will give you information about the planet. Without a doubt we interact with him. We run further. Enemies again, but that's okay. There are only three of them, so they still do not suspect that you are nearby. We easily deal with them, find a large hole and look for a box. There will be items to scan nearby.
So, all opponents are killed. We again have several paths to choose from. It's good that they all definitely lead to the wreckage. We examine the wreckage and find the container. It has a bunch of useful gizmos, ammunition and a recorder. A little to the north you will run into an ambush, so be prepared! In it, four aliens will be waiting for you, and a couple of creatures that can skillfully hide.
Let's go for Greer. We run under a large bridge, right next to the alien building. We see rocks. We move forward, but carefully monitor the left side, as there should be a small passage. He will lead you to the cave. Here is our unfortunate Greer, talking to the aliens and still can not understand what they need from him. We break into the cave. We quickly process the aliens, while they did not have time to explain anything to the poor fellow. Once everything is over, Greer will talk about the broken transmitter. Because of him, he was never able to contact the others.
We see that a signal was launched somewhere. Of course we run there. As we approach, we hear a call for help. Cora sends him. We accept a new task - we begin the search for the second shuttle. On the way to it there will be many obstacles, so do not forget about the jetpack. It can save you time.
At the shuttle, we will again have to defend our own from the aliens. It is best to do this among comrades. Shooting enemies one at a time is recommended. Grenades will fly at you, so do not lose face and use rolls and a satchel. The battle is expected to be quite intense, but between the waves of enemies you will be able to take a break and prepare.
At the end, a heavily armed machine will come. The enemy can very quickly remove the shield from you and also quickly all your health. We are not in a hurry to attack, we think everything will work out for you. Be sure to use cover. As soon as victory comes, watch the video.
Finally, the adversaries depart, communication is being established. We go out to SAM, the latter leads us to Alec. It turns out that the "Pioneer" is trapped. The task is clear - we find it and save it to the best of our ability. Direction is east. There is the desired location, indicated on the map. We spread more aliens and watch the scene.
We listen to Alec, and he broadcasts about the need to destroy the tower, which definitely does not allow newcomers to fly away. Therefore, the structure explodes, which leads to a colorful, but dangerous release of lightning discharges. We hold on to our father, while simultaneously fighting off enemies.
Again, we watch the scenes that tell about your becoming a "pioneer". Alec is no longer at the helm.
Back with the Nexus
Launching the monorail. We speak with the builder, which leads to the launch of the scene. We head to Tann, we speak with him and with several other characters. Upon completion of the dialogue with one of them, tasks for researching the station will appear.
We start everything from the beginning
Attention: in our opinion, Vetra will show herself better among partners, as she will assist in relations with Drak.
On the road again. A new mission will direct you to the monorail. We're going to Hyperion. We communicate with artificial intelligence and again to transport.
We open the map of the monorail and look for the point of the docking compartment. Click on it. Meet! You will be shown the "Storm" - this is your spaceship.
We need to go to the icon on the map. Doors do not work - need a code. He lies in a building that is not far from here. It has a data block. Lies on the table.
Attention: in no case do not forget to turn on the scanner! This helps a lot in saving scanning time. Containers shouldn't be skipped either. Nothing gets in the way.
We open the locked door, and again we run into an obstacle. Again the door, only it no longer works due to lack of power. We run into the far room a little to the right and use the console. Determine the location of the power antenna.
The marker will lead you to the tower. It is located near your ship. Clancy activates the power supply at your request. We run to the generator and try to start electricity. The generator is next to front door. Nothing will come of it, so we scan the tower nearby. Then jump up and dig into the generator panel.
Another energy tower requires activation. We do the same steps as with the first one. You will be attacked. Once you figure it out, run to the station to Clancy. He is a merchant, so take advantage of the moment and sell everything you don't need. You can also buy what you need, by the way. If the Hoe rifle attracts attention, then do not take it, as you will find it in the container a little later. Again we work with the control panel. We provide food again.
After we go to Object-1. It is located at the door that you opened with the access code. Next to the door, scan the huge container and get data on the Ark. We use the terminal on the side. We run on the map to the destination. You need to get to the mobile station, which will soon appear in the objectives. You can change clothes a little, load your weapons. When finished, go to the terminal, open the container and go.
Again to the goal. We reach the right place, we are engaged in the study of the area with a scanner. We examine the devices of aliens until we find the glyph. A little higher you can find a control point on the tower. She has scaffolding. We climb on them to the glyph and start the device.
Next comes a conversation with Peebee. We are preparing for battle, as Monoliths and Collectors will attack. We sit down again in the "Nomad", we go to the marked places. There we turn off alien devices. Next to the first one you will find a laboratory. It belongs to the Kets. We go upstairs and kill everyone.
On the way we turn off the barriers - on the way we use the generator. You won't be able to enter the station because the entrance is closed. The roof will help with this. We climb onto it and find another entrance. We find what we need. We turn off and get into the building. Here we are waiting for a video about the appearance of Drak.
Now our goal is alien equipment. Looking for glyphs. Activate the scanner. Thanks to this, we see the location of the towers with glyphs. We climb the towers, scan the necessary. We use the device.
Next on the plan is another technology from other worlds. We use the opening in the rock in order to get to the relics. We destroy them. We are looking for glyphs with a scanner. Once everything is found, we go to the Remnant control panel. With the help of it, we create steps along which we go to the glyphs. We scan, turn on the device. To turn it on, you need to solve a puzzle. It is not difficult.
Now we are interested in the place where the rays are directed. We use the control panel of aliens and go to the structure. We move to the building down. We go into it. Before us will be the console, which we will activate. We follow the contour and talk with artificial intelligence. Enjoy the cutscene.
We do not change the orientation and follow all the same. Don't focus too much on the little things. We do not lag behind and shoot enemies along the way. Chatting with Peebee. Then we go into the spacious hall through the corridor nearby. A couple of devices will be allocated for us. Then again the opponents. It is best to launch the relic control panel, which is located on the right side, before attacking the robots. So you can launch a weapon that can help you in a difficult fight. We launch console number two. We use a gravity well.
Once you're downstairs, find the closed door. If you find the panel opposite, then a leak will be found along with it. We are doing research and waiting for Peebee. close up the hole, activate the console. Here we have moved on.
The place is interesting. We see some separate platforms with relic control panels. If you click on each of them, you will advance further. Activate the furthest panel. First, go to the left platform, to the relics. There you will find a panel. Then go to the trees to the trees. We run to the mark, parallel jumping on the platforms. This will open the correct door.
We run to the goal, watch the video. Now we urgently run away from the storage to the target that has appeared. Again we go to the goal, turn on the module.
Solution: Think about which outpost you like better - scientific or military. Both have their pluses. The first speeds up research, and the second pumps your weapons.
We go on board the ship and fly away from the system. We land in the docking bay in the Nexus. Your choice of outpost will affect the opinions of the characters about you. Someone will thank you, and someone will scold you. We get to the command compartment on the monorail. There was a conversation with Thane, and the mission was completed.
Choose who to wake up. OPA.
Teaching task. We speak with Addison Brack and at the same time with Vladimir. Next, we start the OPA. This is how we get knowledge about cryonic sleepers. We learn how to select the right specialists. Once you learn and decide, start awakening those you need.
Start of strike missions
Once on the ship, find the "strike groups" digital system. She lies on a round table. We speak with Kandras in the Nexus. After the conversation, we learn how to manage shock troops. You can do this using the console. Shock troops are capable of performing certain missions.
Ray of hope
Let's move on to the next task. I'm going to the starship. It will fly to Onaon. We watch regular videos, we talk with all the heroes that are available. Here you will also meet the Angara race - your new brothers in arms.
On the captain's bridge, we make a choice of tasks. Two options will be given. We choose and that's it - the mission "Ray of Hope" is completed.
Havarl. Helping scientists
So, we go to the Pharaong system, namely to Havarl. Everything is extremely simple - select the desired place with the mouse, click and go!
We communicate with Kiiran Dals. It can be found at the science station nearby. We run to the goal, dealing with all the enemies along the way. We find ourselves in a monolith, scatter enemies. Now our goal is to find scientists. They were taken prisoner. We are trying to interact with the panel, but nothing happens - there is not enough information. We need glyphs again. A properly pumped character will be able to hack this panel. Others will still have to solve the puzzle.
On the right side of the building is the first glyph. On the left side is the second glyph, right on the large pillar. We recognize them, as expected, using a scanner. We solve vile tasks of aliens. Not difficult. Get it right.
We return to Kiiran. We speak with the character marked on the map and complete the mission.